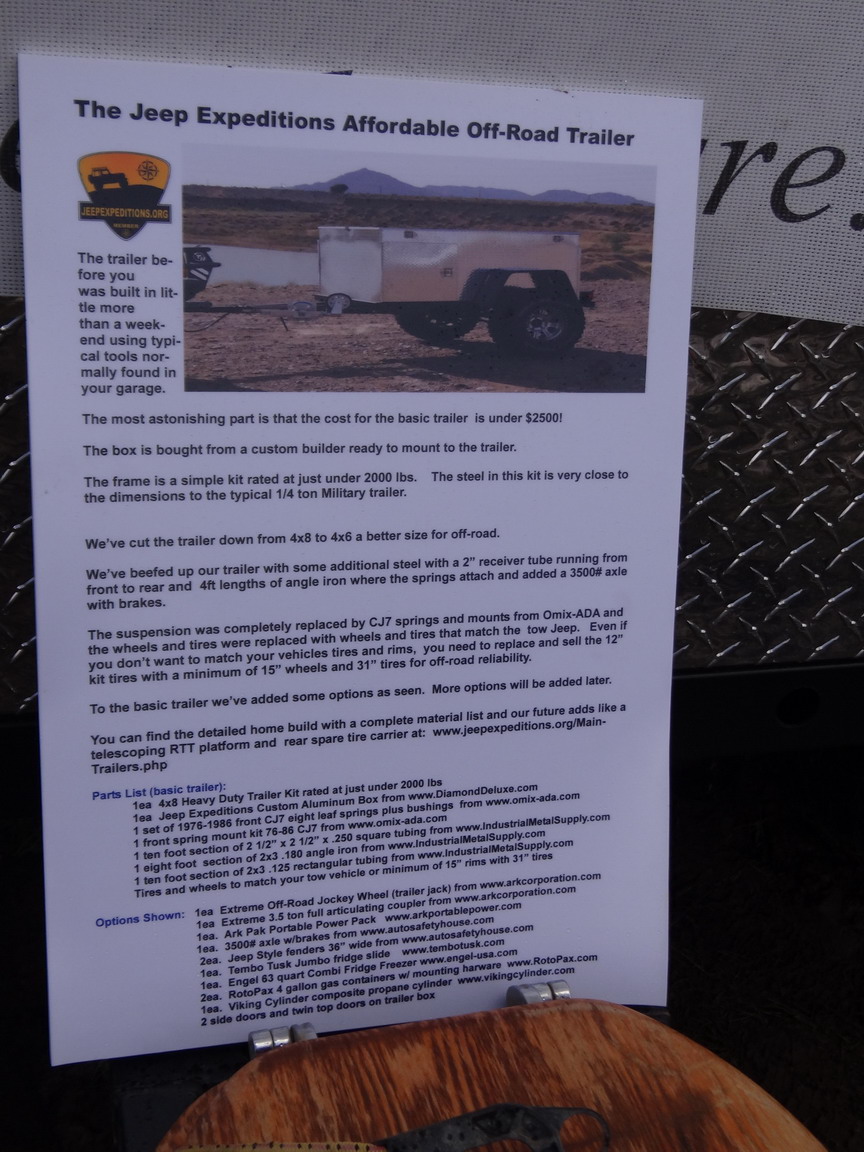
The affordable alternative to expensive off-road trailers
You've seen them in magazines, you've seen them on the trails. Custom Off-Road Trailers. You check them out and then the sticker shock set in, the entry level bare bones
no frills trailer starts right around $5000. The one you saw on the trail probably set the owner back $8000 to $16,000 with the average price landing somewhere in the
$10,000 to $12,000 range for nicely optioned trailer.
So much for that dream, right? Wrong, we think that we have figured out how anyone can own a basic, but very nice off-road trailer for around $2500. Add some
popular options later as you get the time and money and you'll end up with a full featured rig for less than half the cost of a comparable commercially built trailer.
It starts with an idea, you put that idea on paper and you take it from there. The "box" part of the trailer will be bought as you see it. Already built in a shop that specializes in quality custom aluminum trailer boxes. You've spent half your budget and the project is half done before you've broken a sweat.
Ok, so here are our final drawings along with the blueprint from the manufacturer of the box. Once I have final costs for a basic box and costs of options to make it like this one, I will post those costs along with the contact information for the manufacturer.
These are the four crude drawings of my ideas for a trailer box that I emailed to Jackson Creek Manufacturing and the CAD drawing he sent back to me for approval.
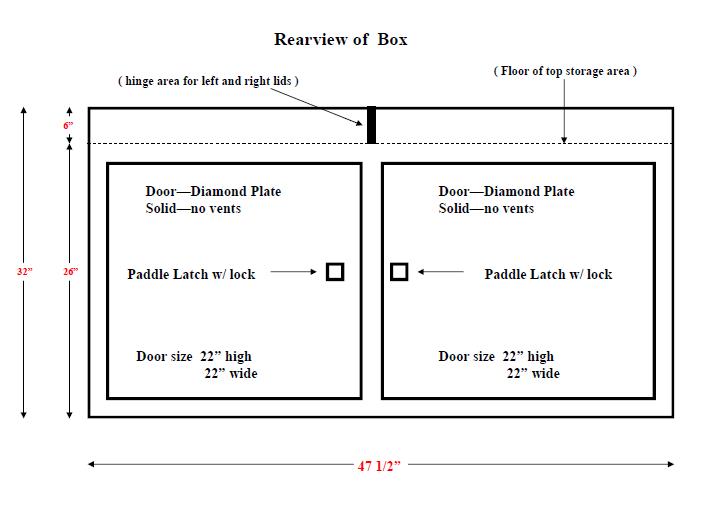
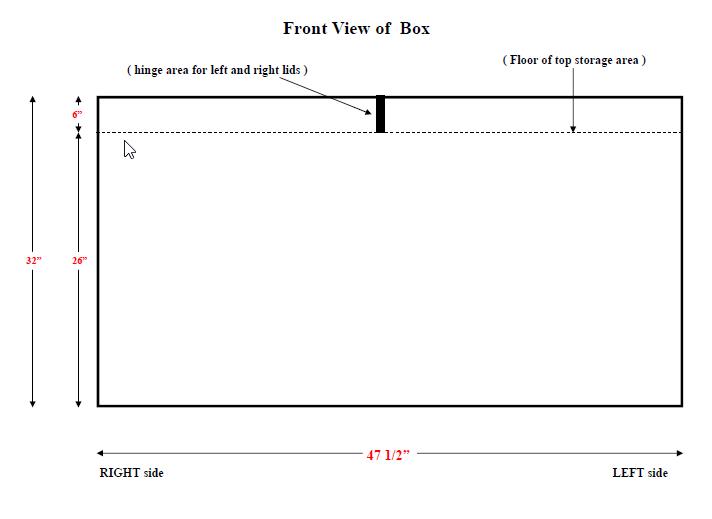
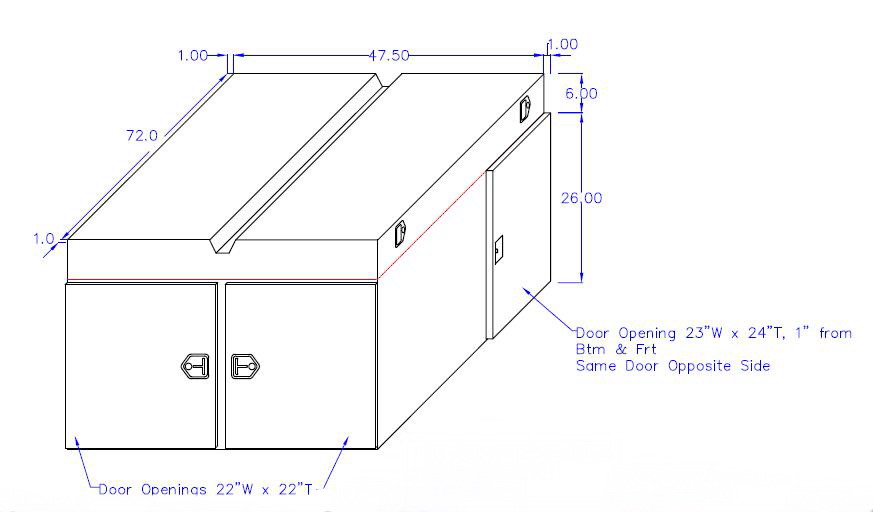
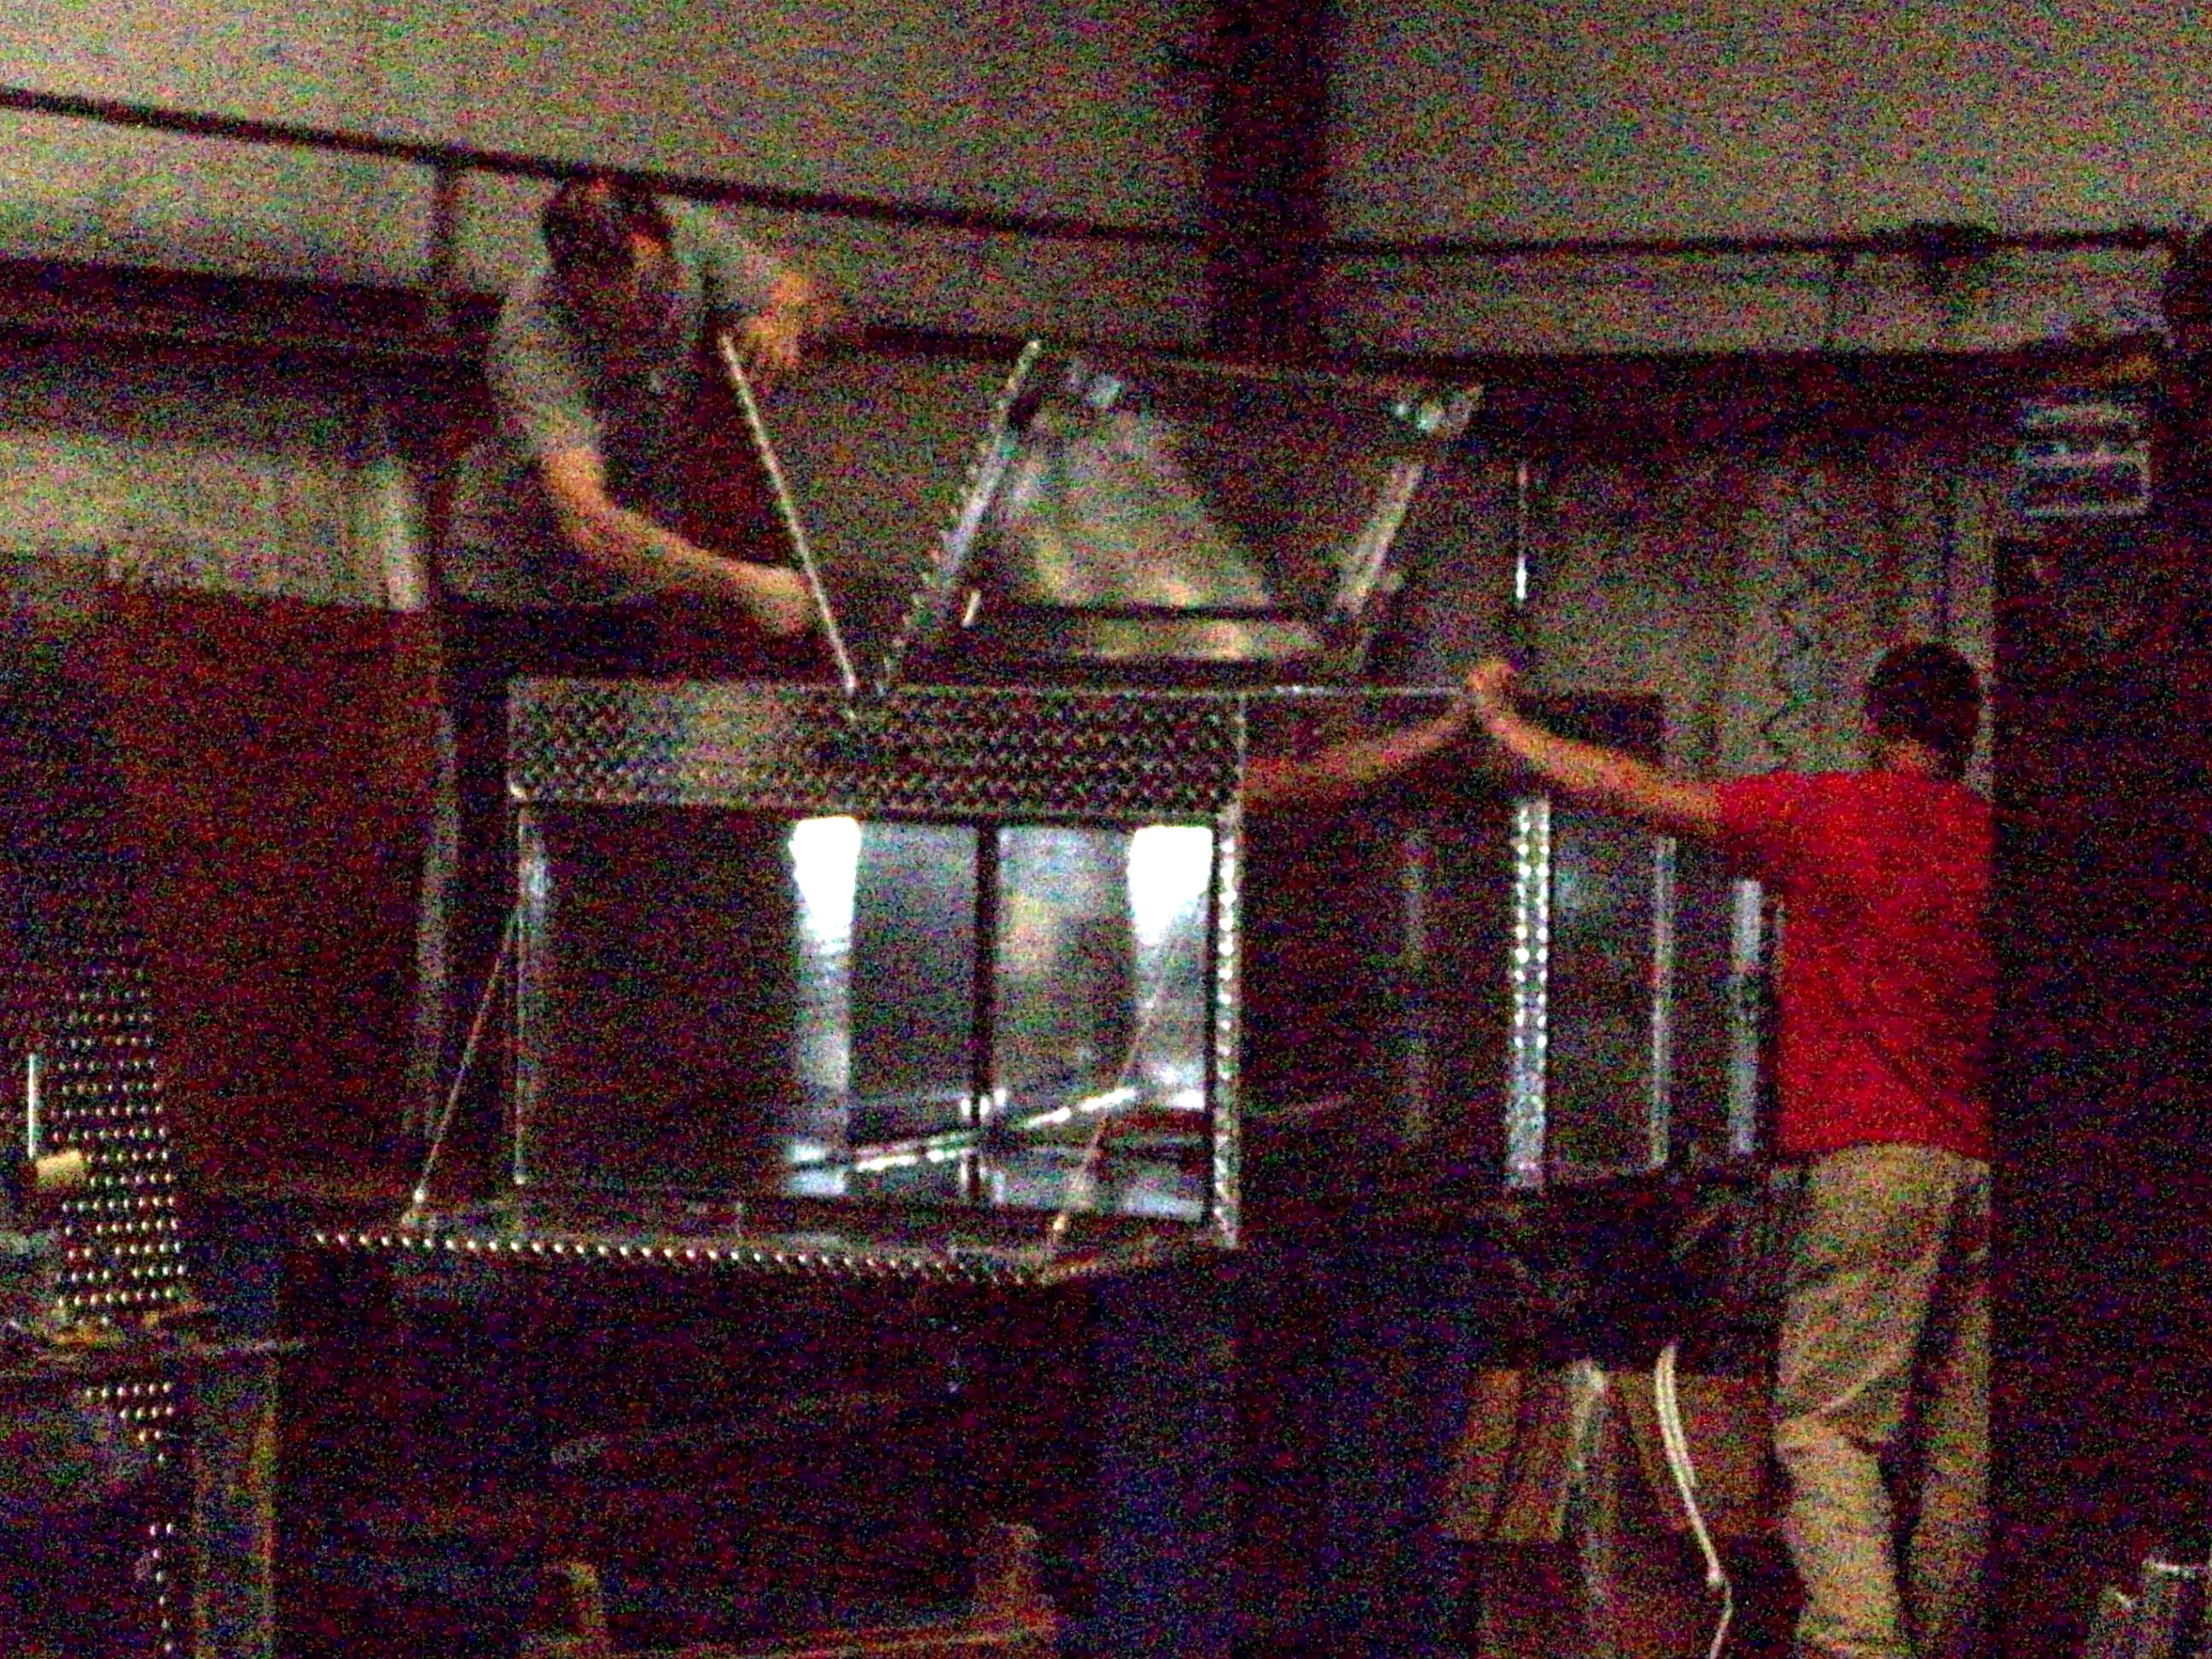
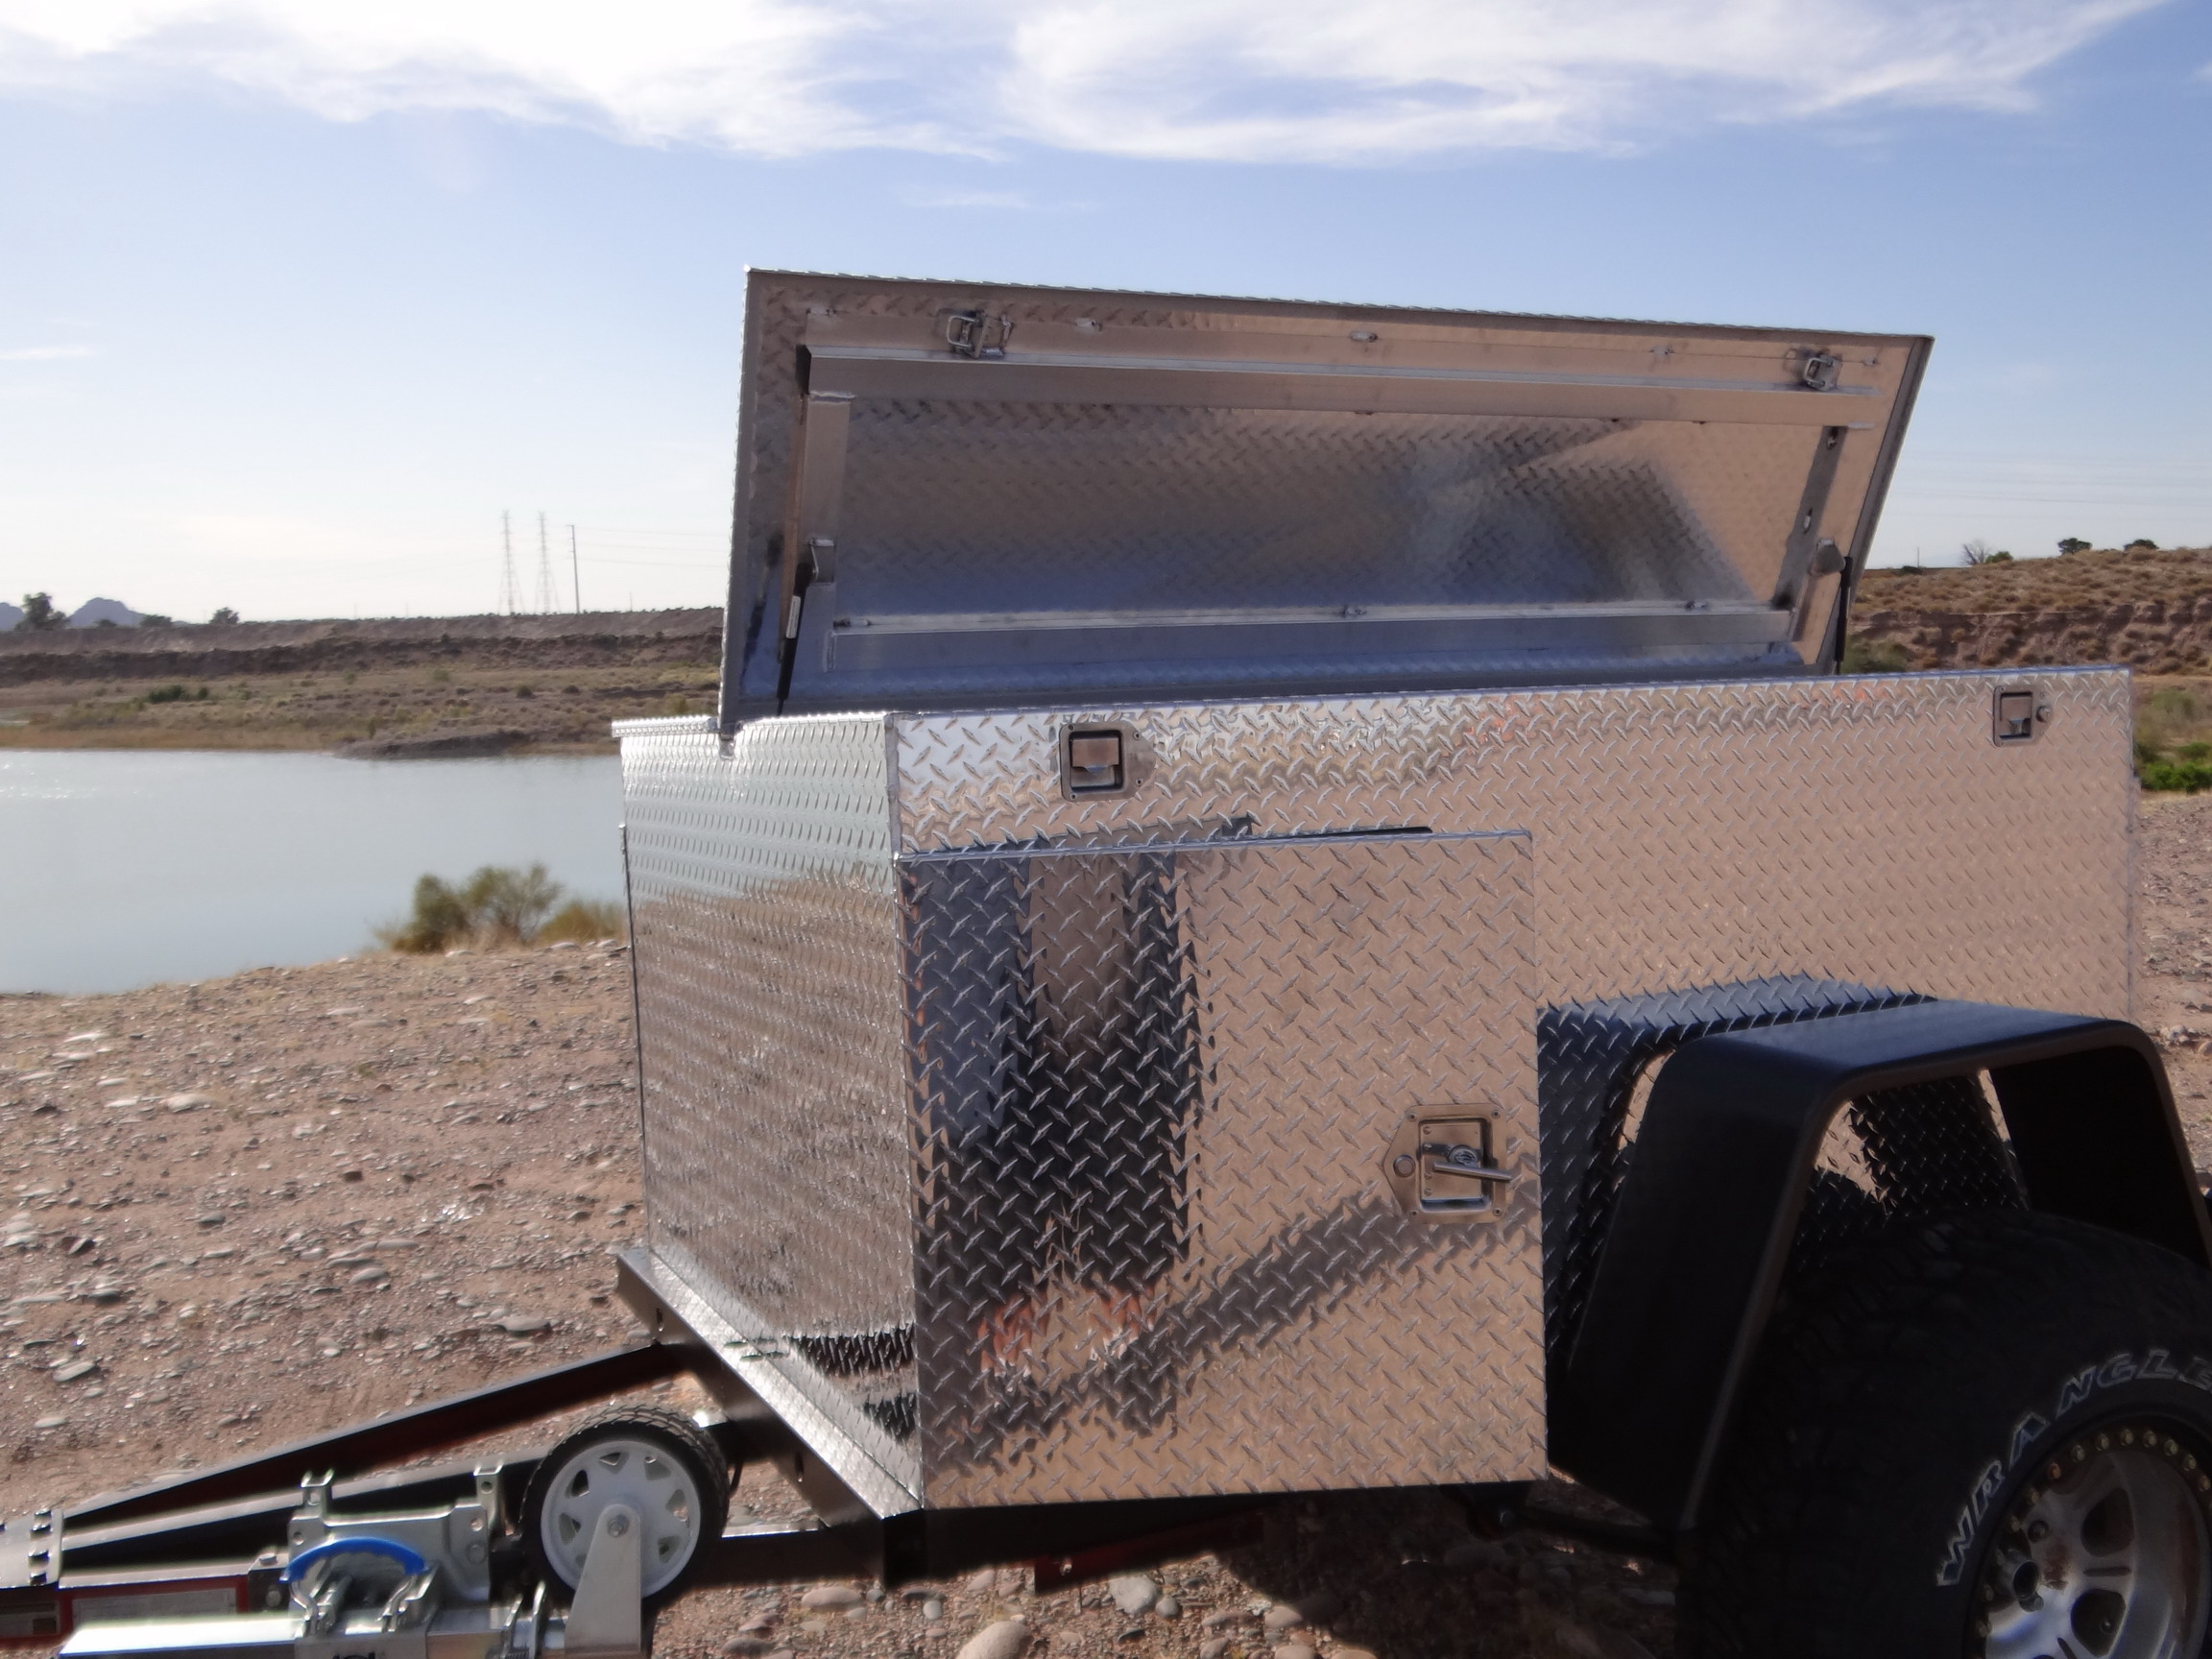
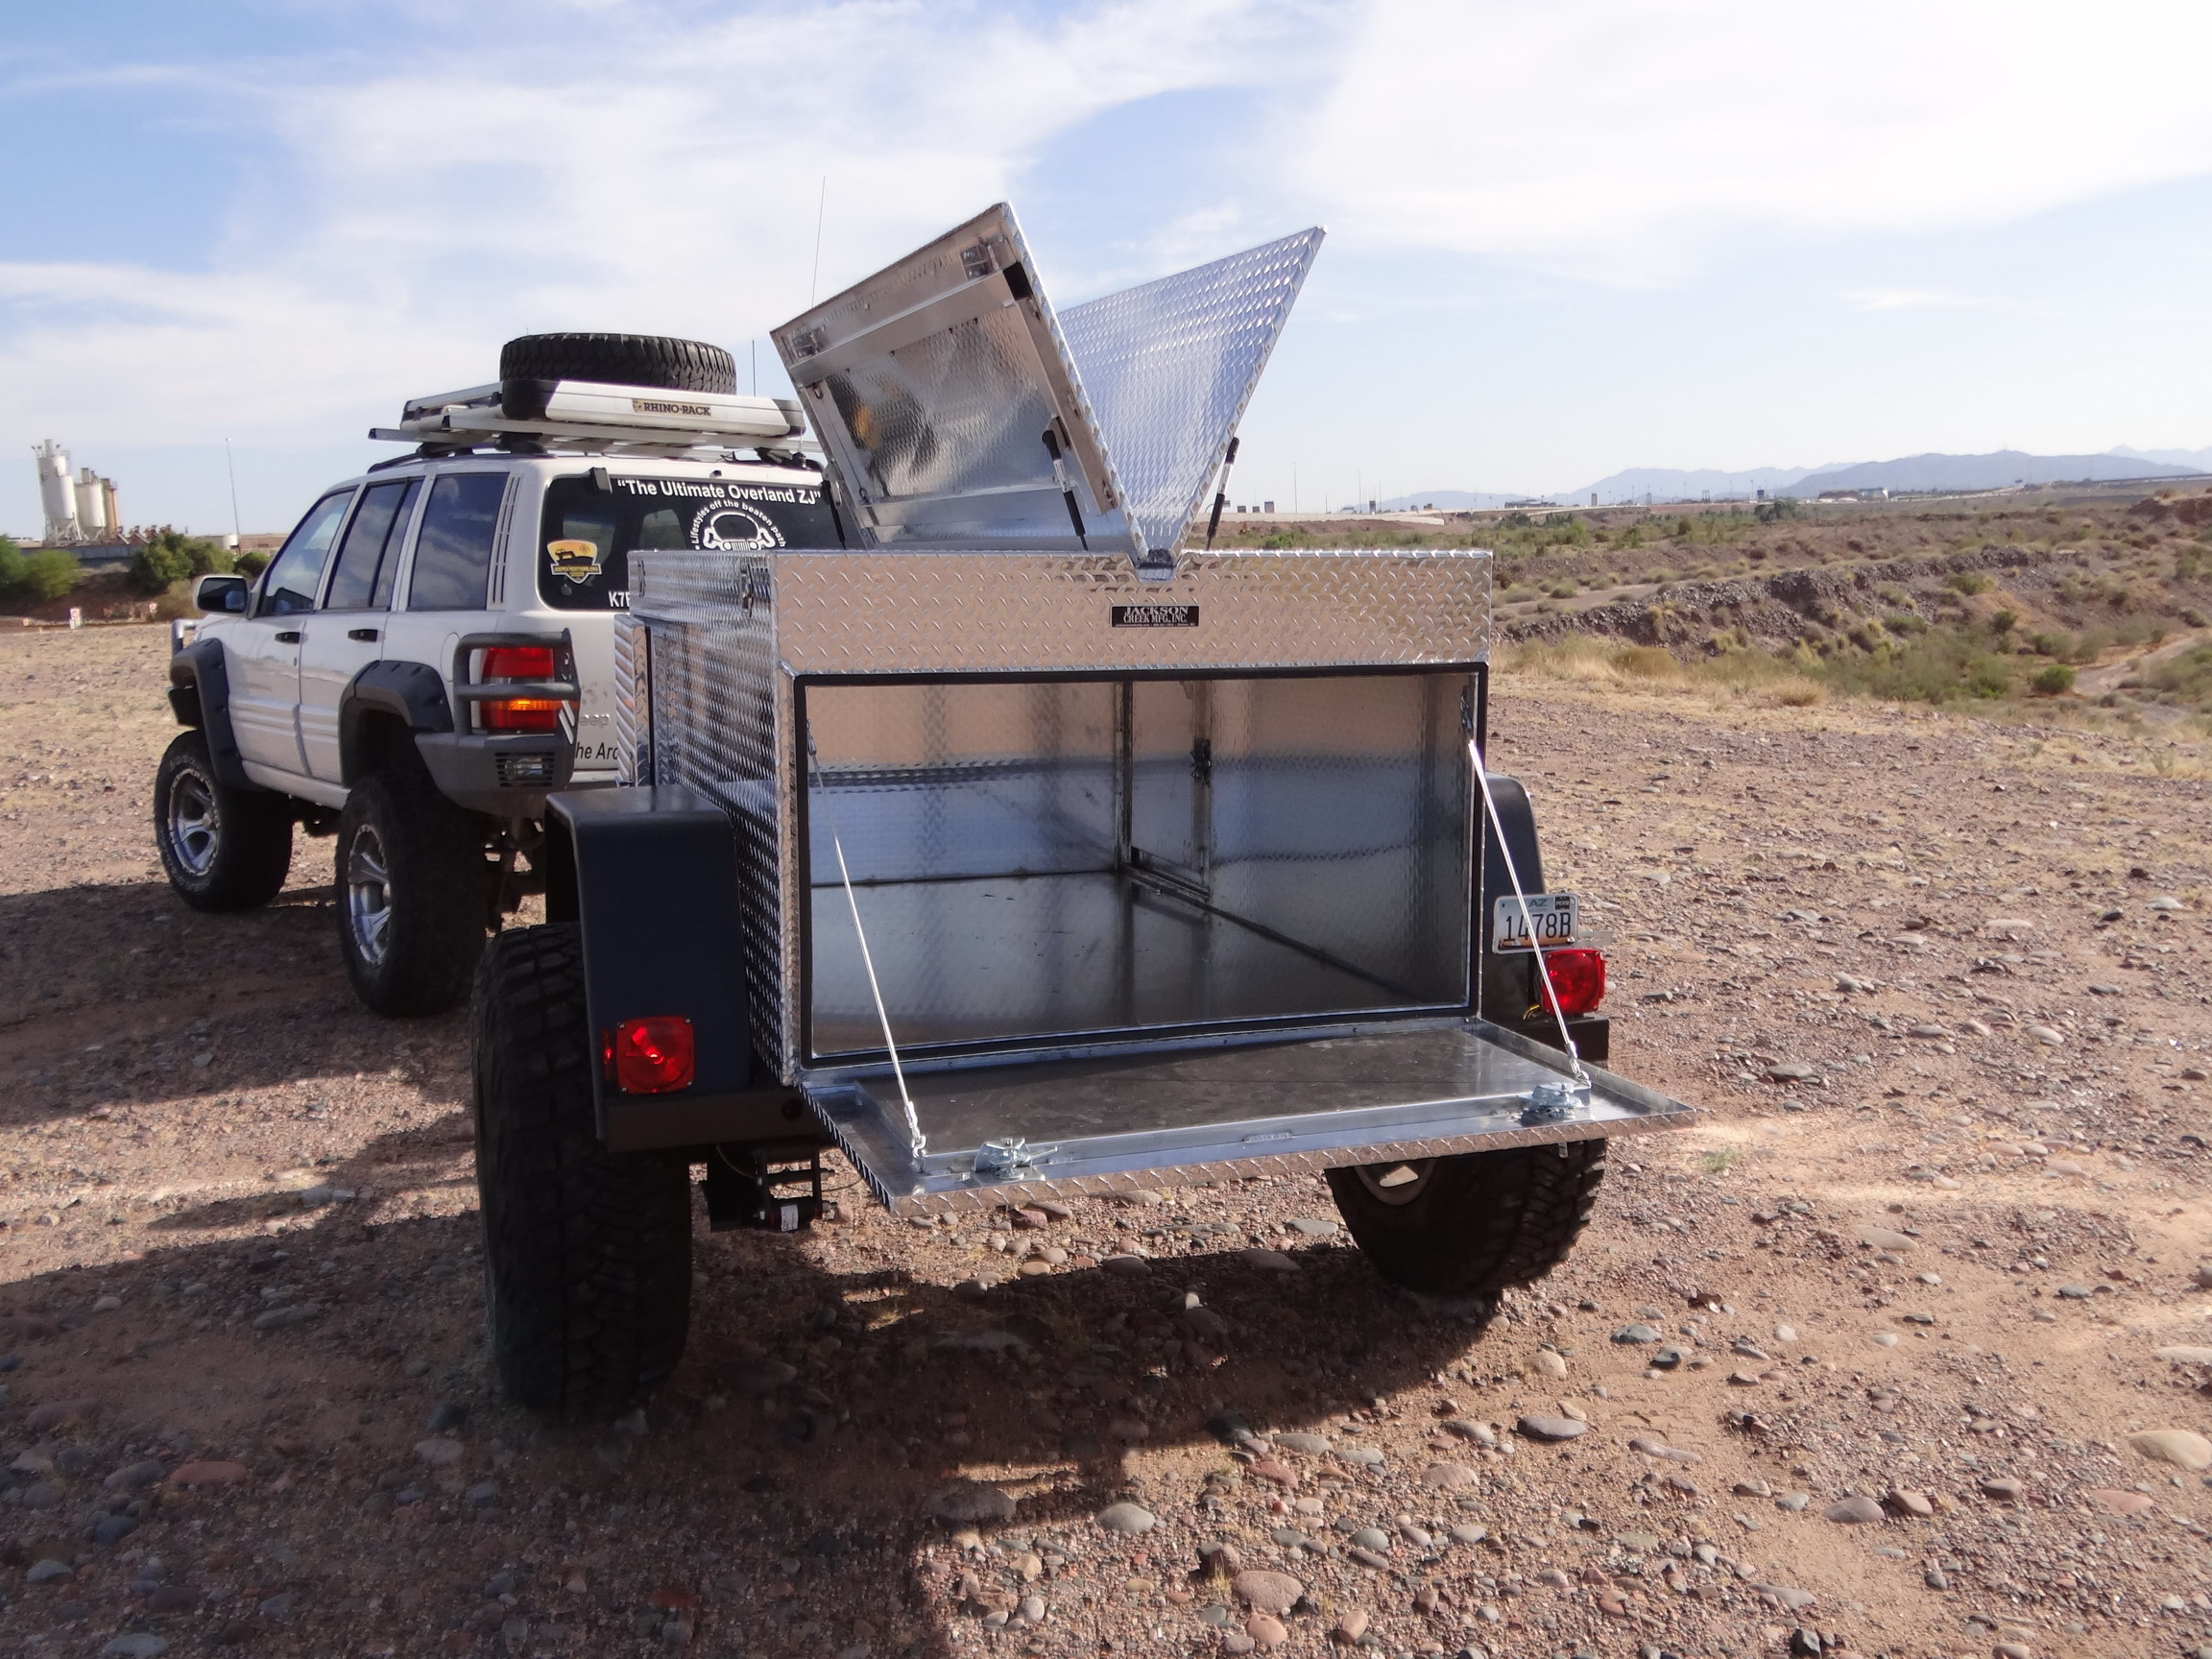
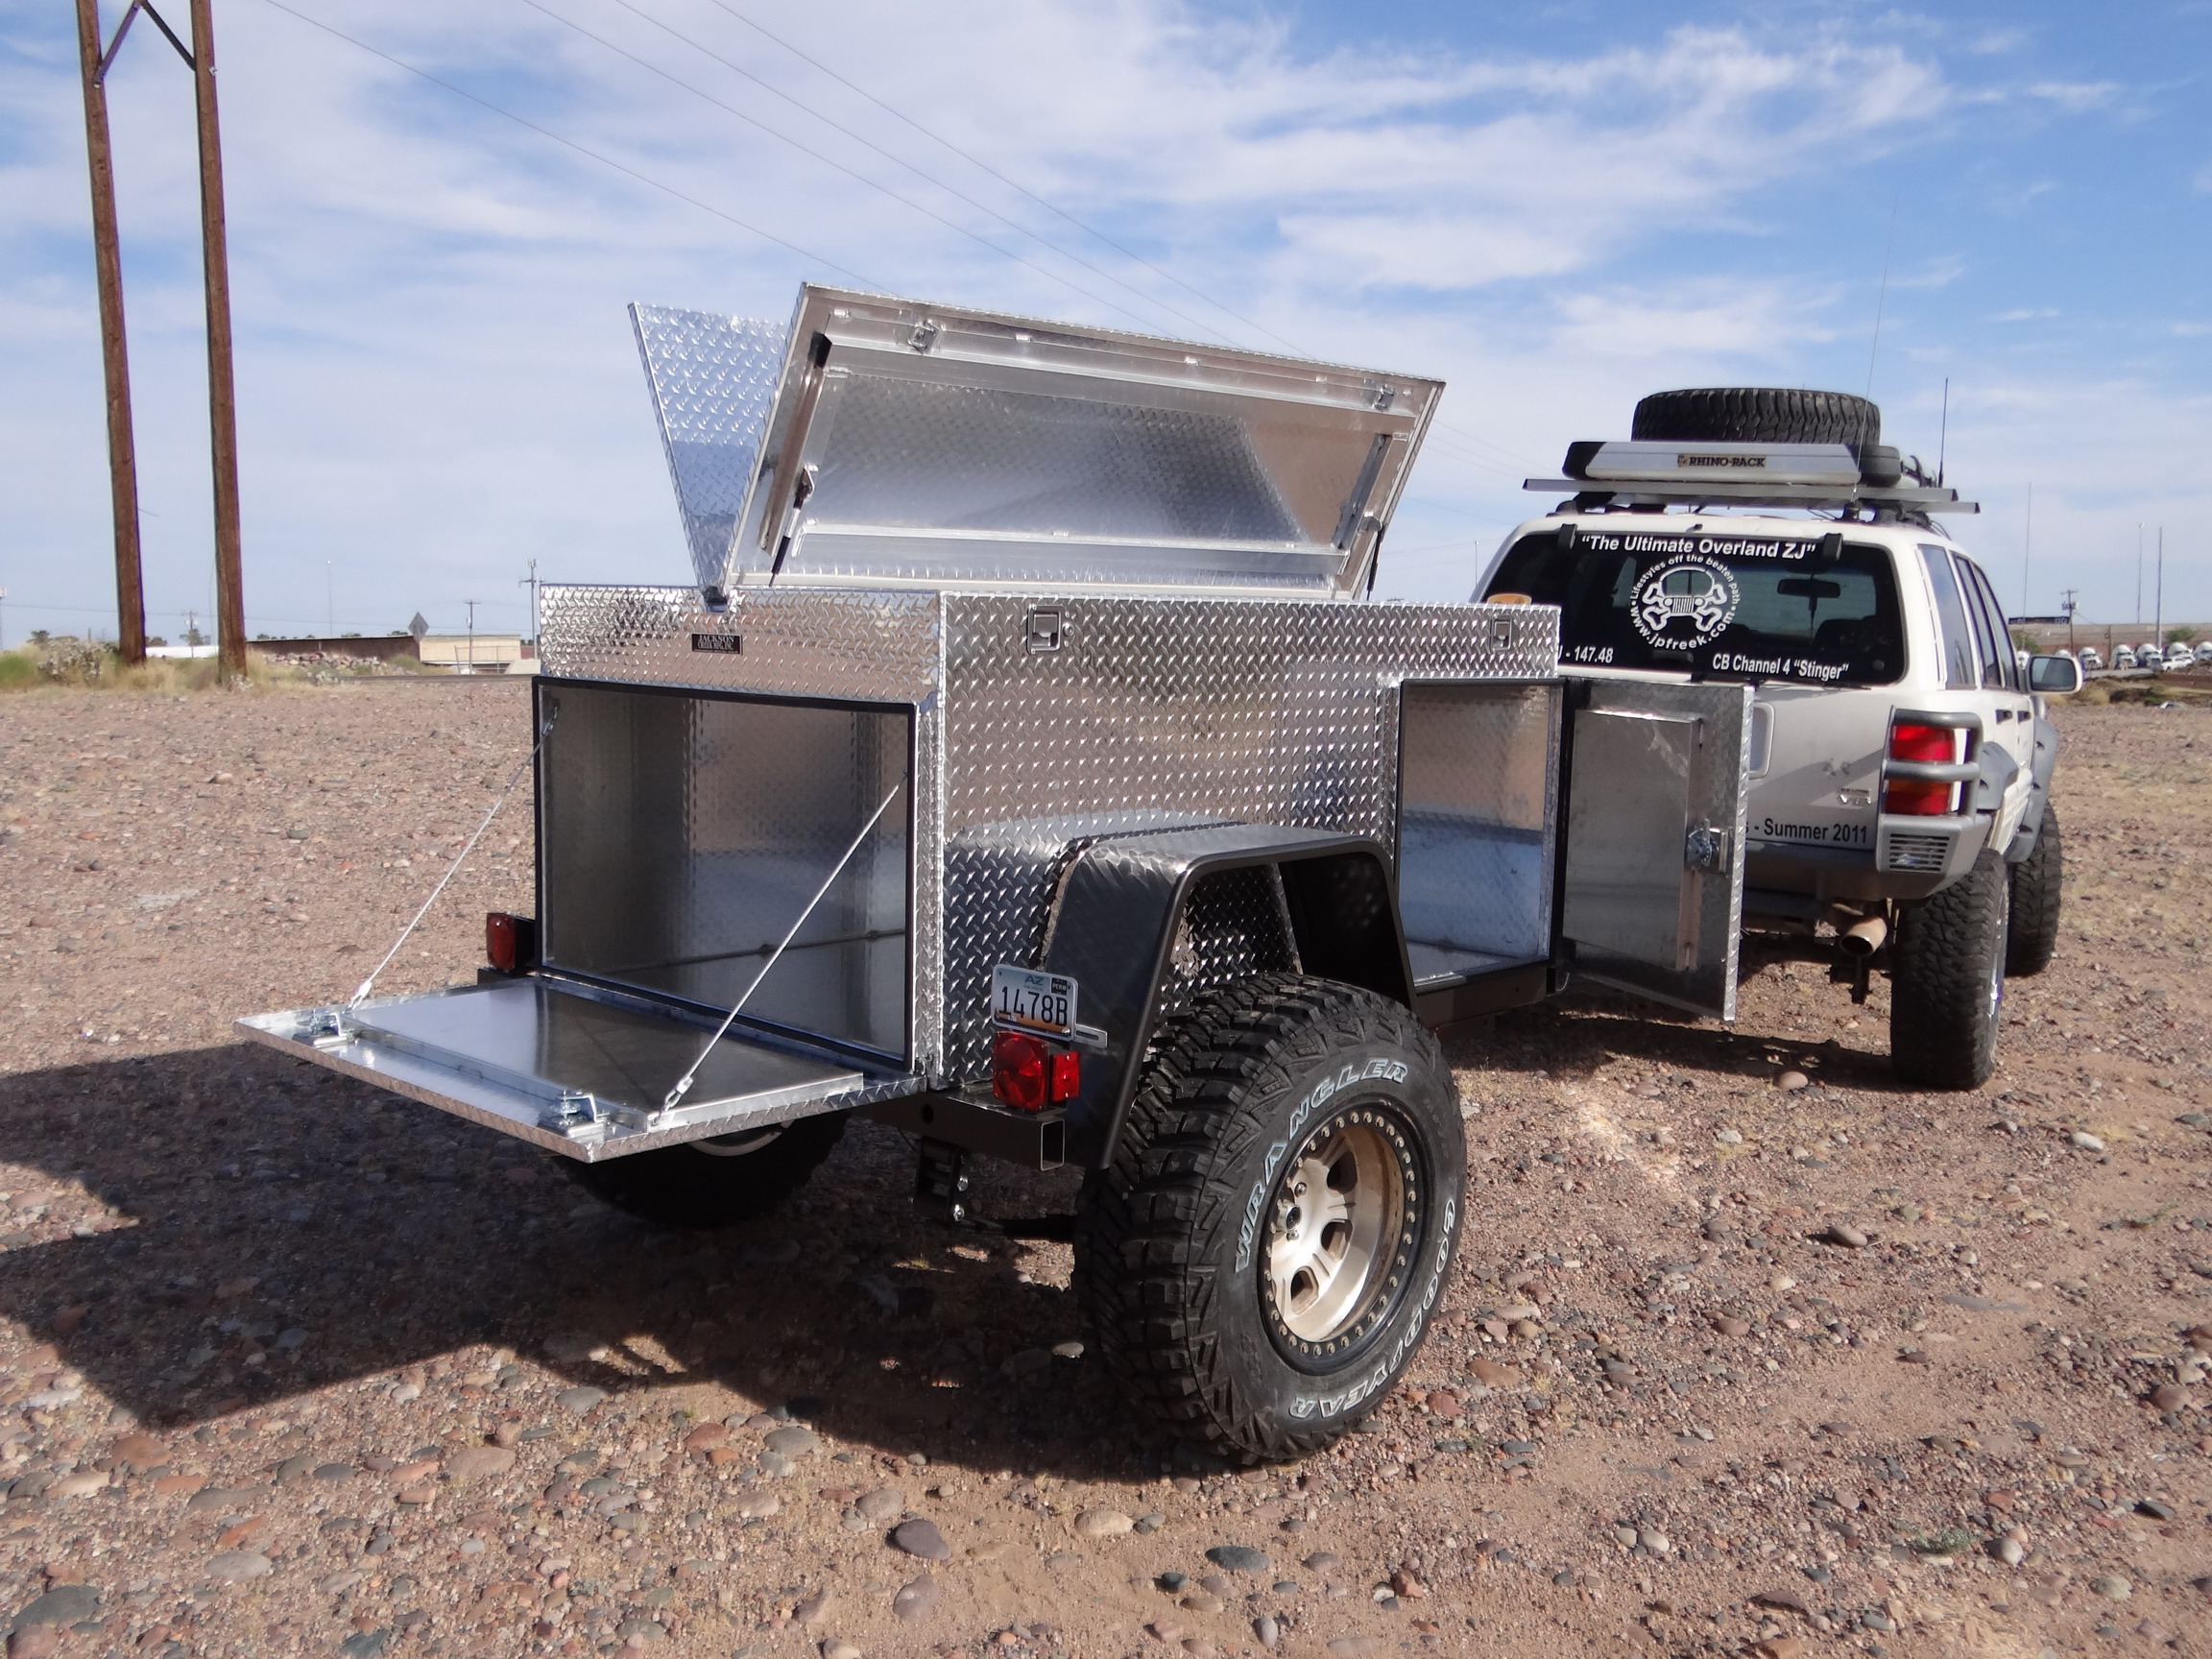
I did make one final change before the box was built and changed it from a double door in the back to a single drop down tailgate style. The thinking was better access to the gear inside and the benefits of a tailgate.
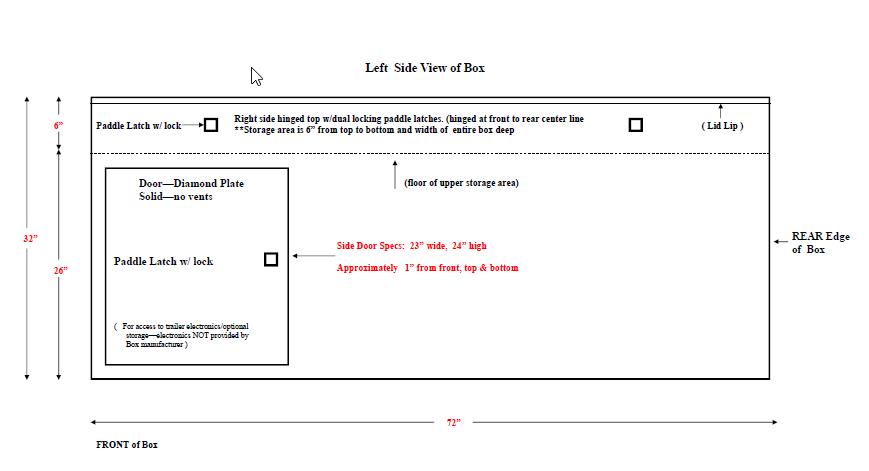
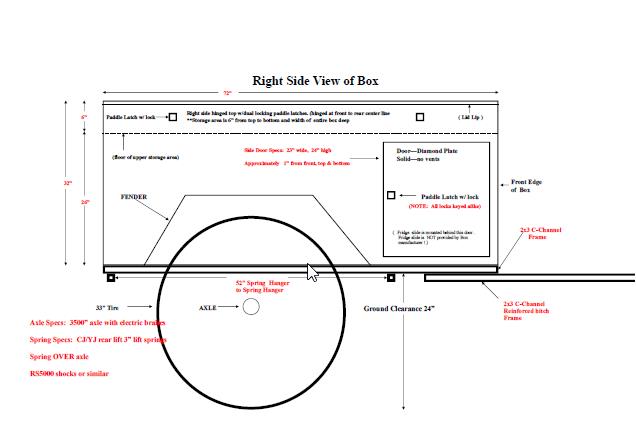
The door on both sides up in the front is for access to possible options in the future. Only one door like this would normally be needed for say a fridge and fridge slide to come out one side but for the additional cost of $200 per door over the basic box, I felt it was worth it so I added both. It's much easier to spend the money now than to try to add them in the future. I'll use one side for the fridge to slide out for access, the other side for access to electronics and storage of small things I need quick access to. It is up to you if you want to do the same.
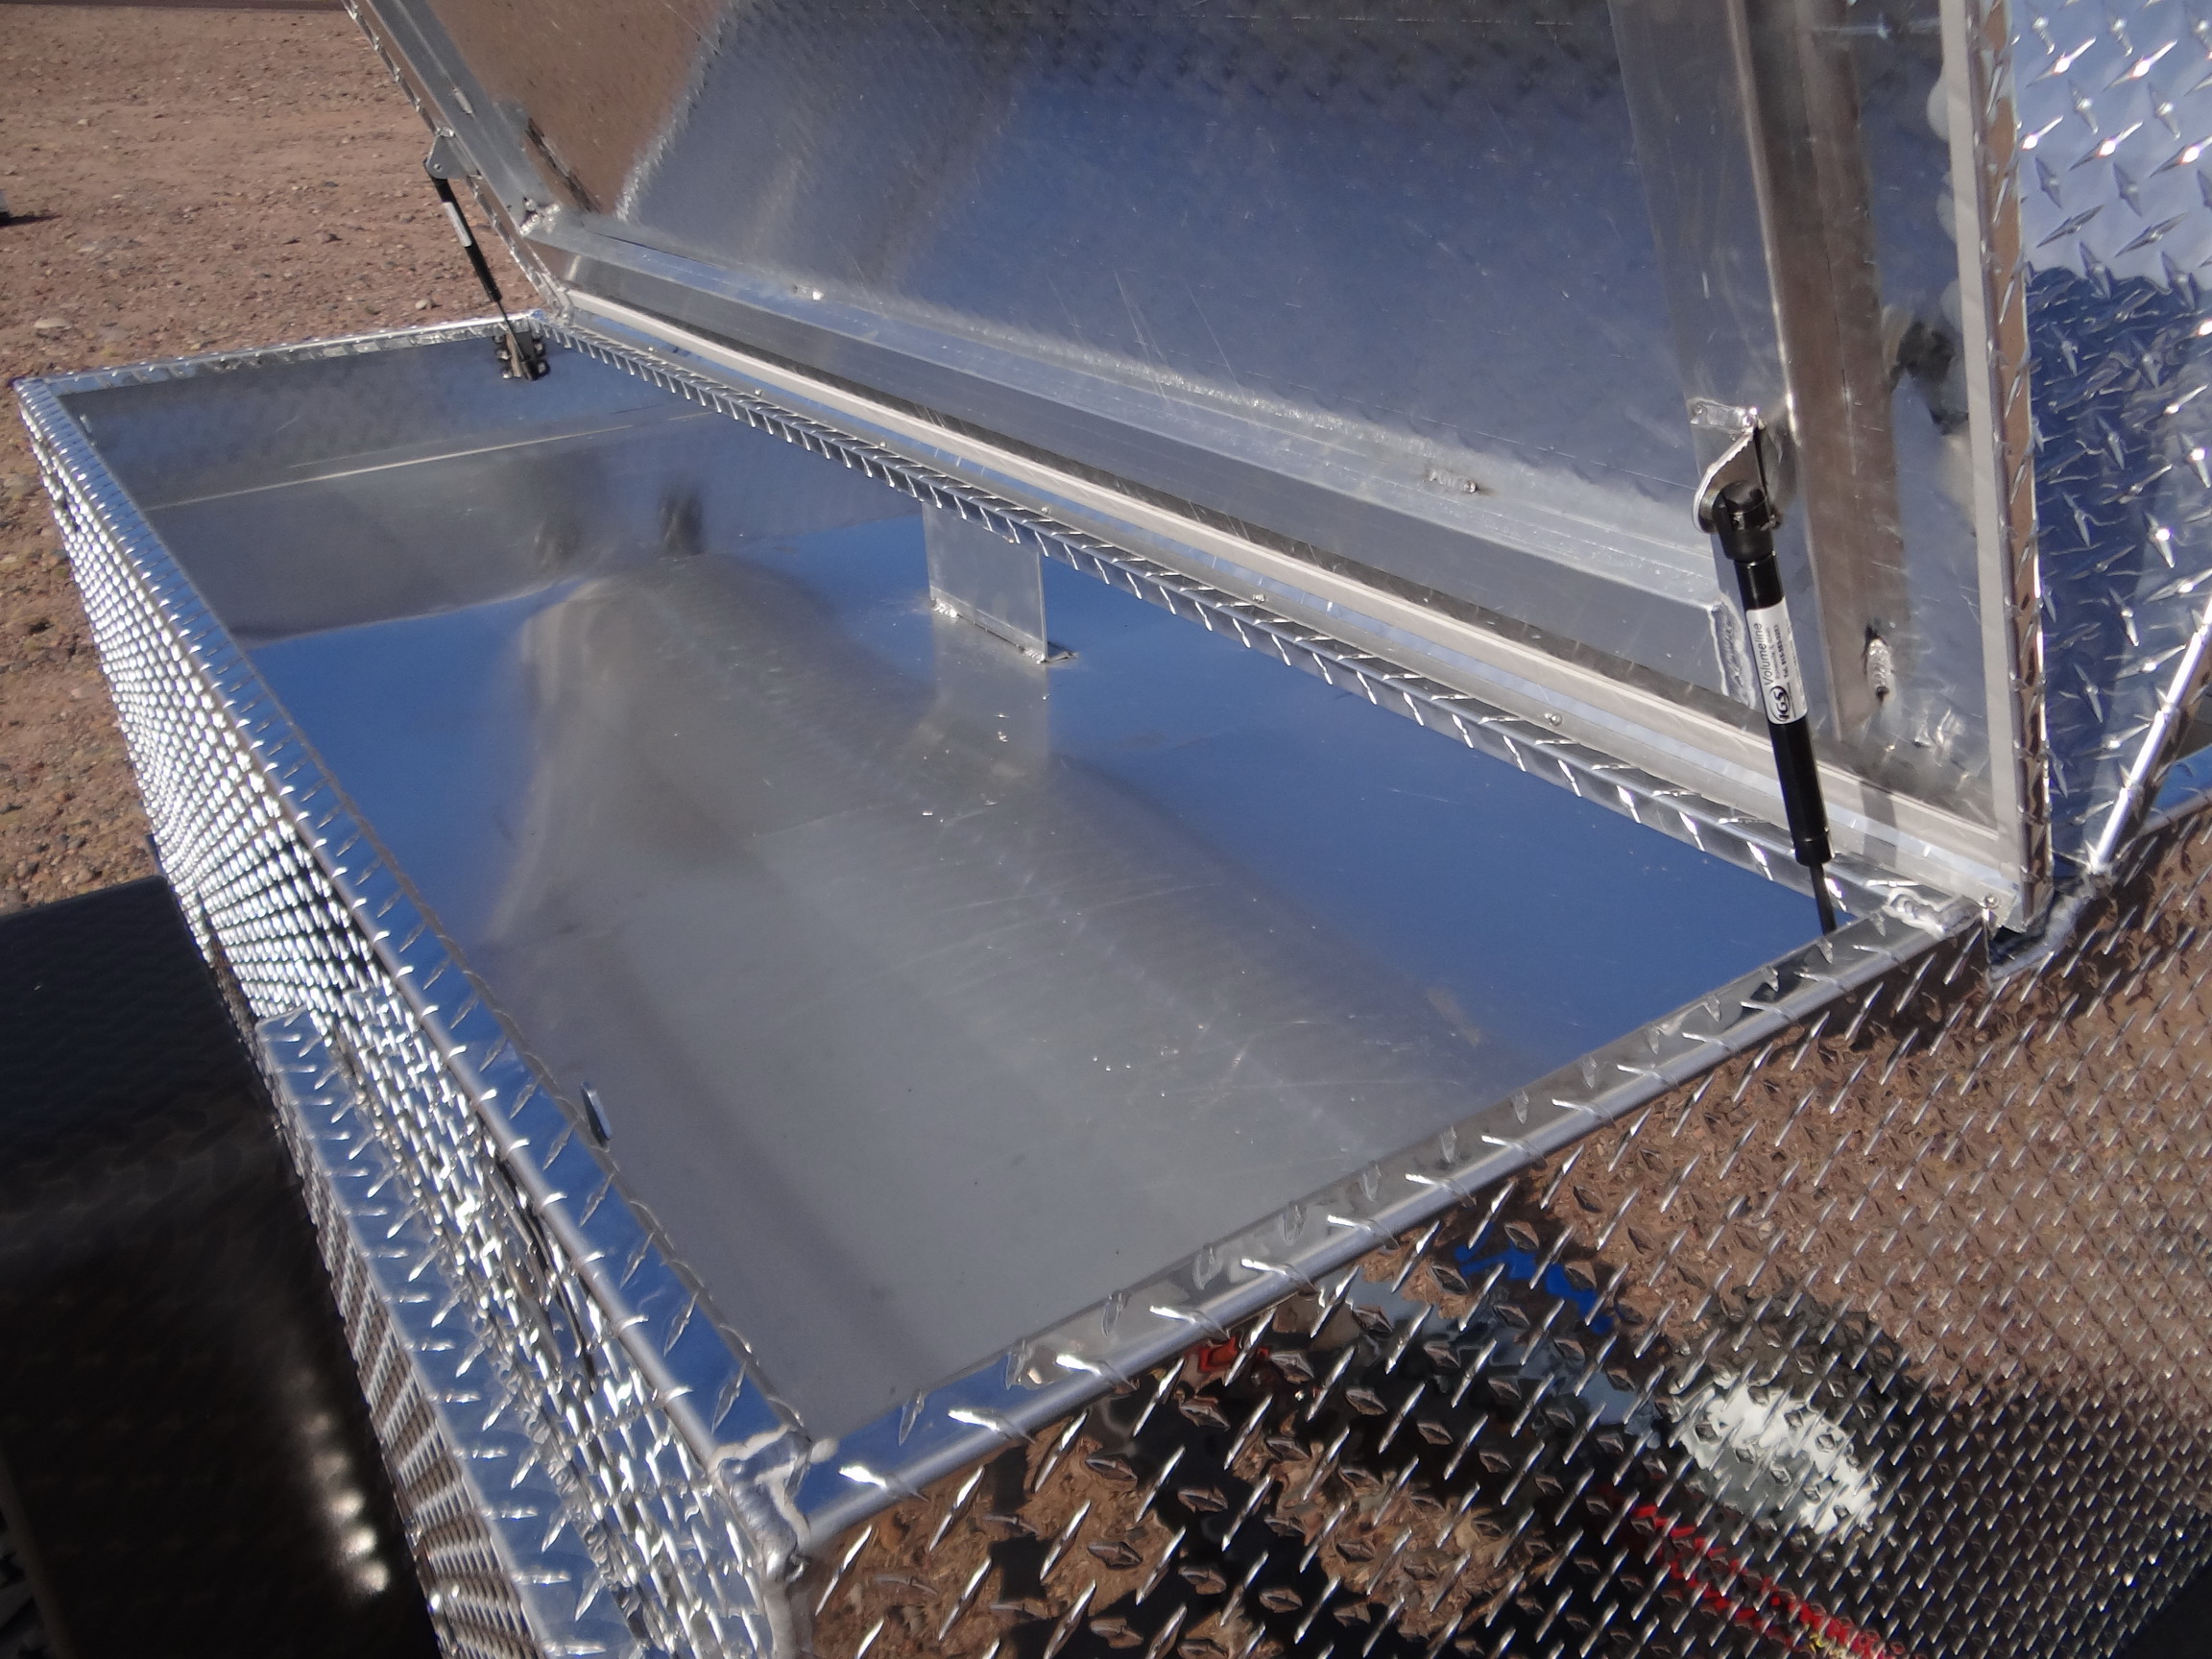
As for a top lid or lids, I chose a dual lid opening, from either side. Most if not all off-road trailers have a single lid that opens from either the right or the left side. I had that in my last trailer and found out that accessing the things on the far side of the opening were all but impossible. so dual hinged lids made a lot of sense. The cost is not much different than one single lid. The 6" of storage at the top was my idea and I like it but you could custom order your box to be 6" lower without the storage. That option would not change the cost but you could mount a roof top tent directly to a stationary top without the need of constructing any special platform for one later.
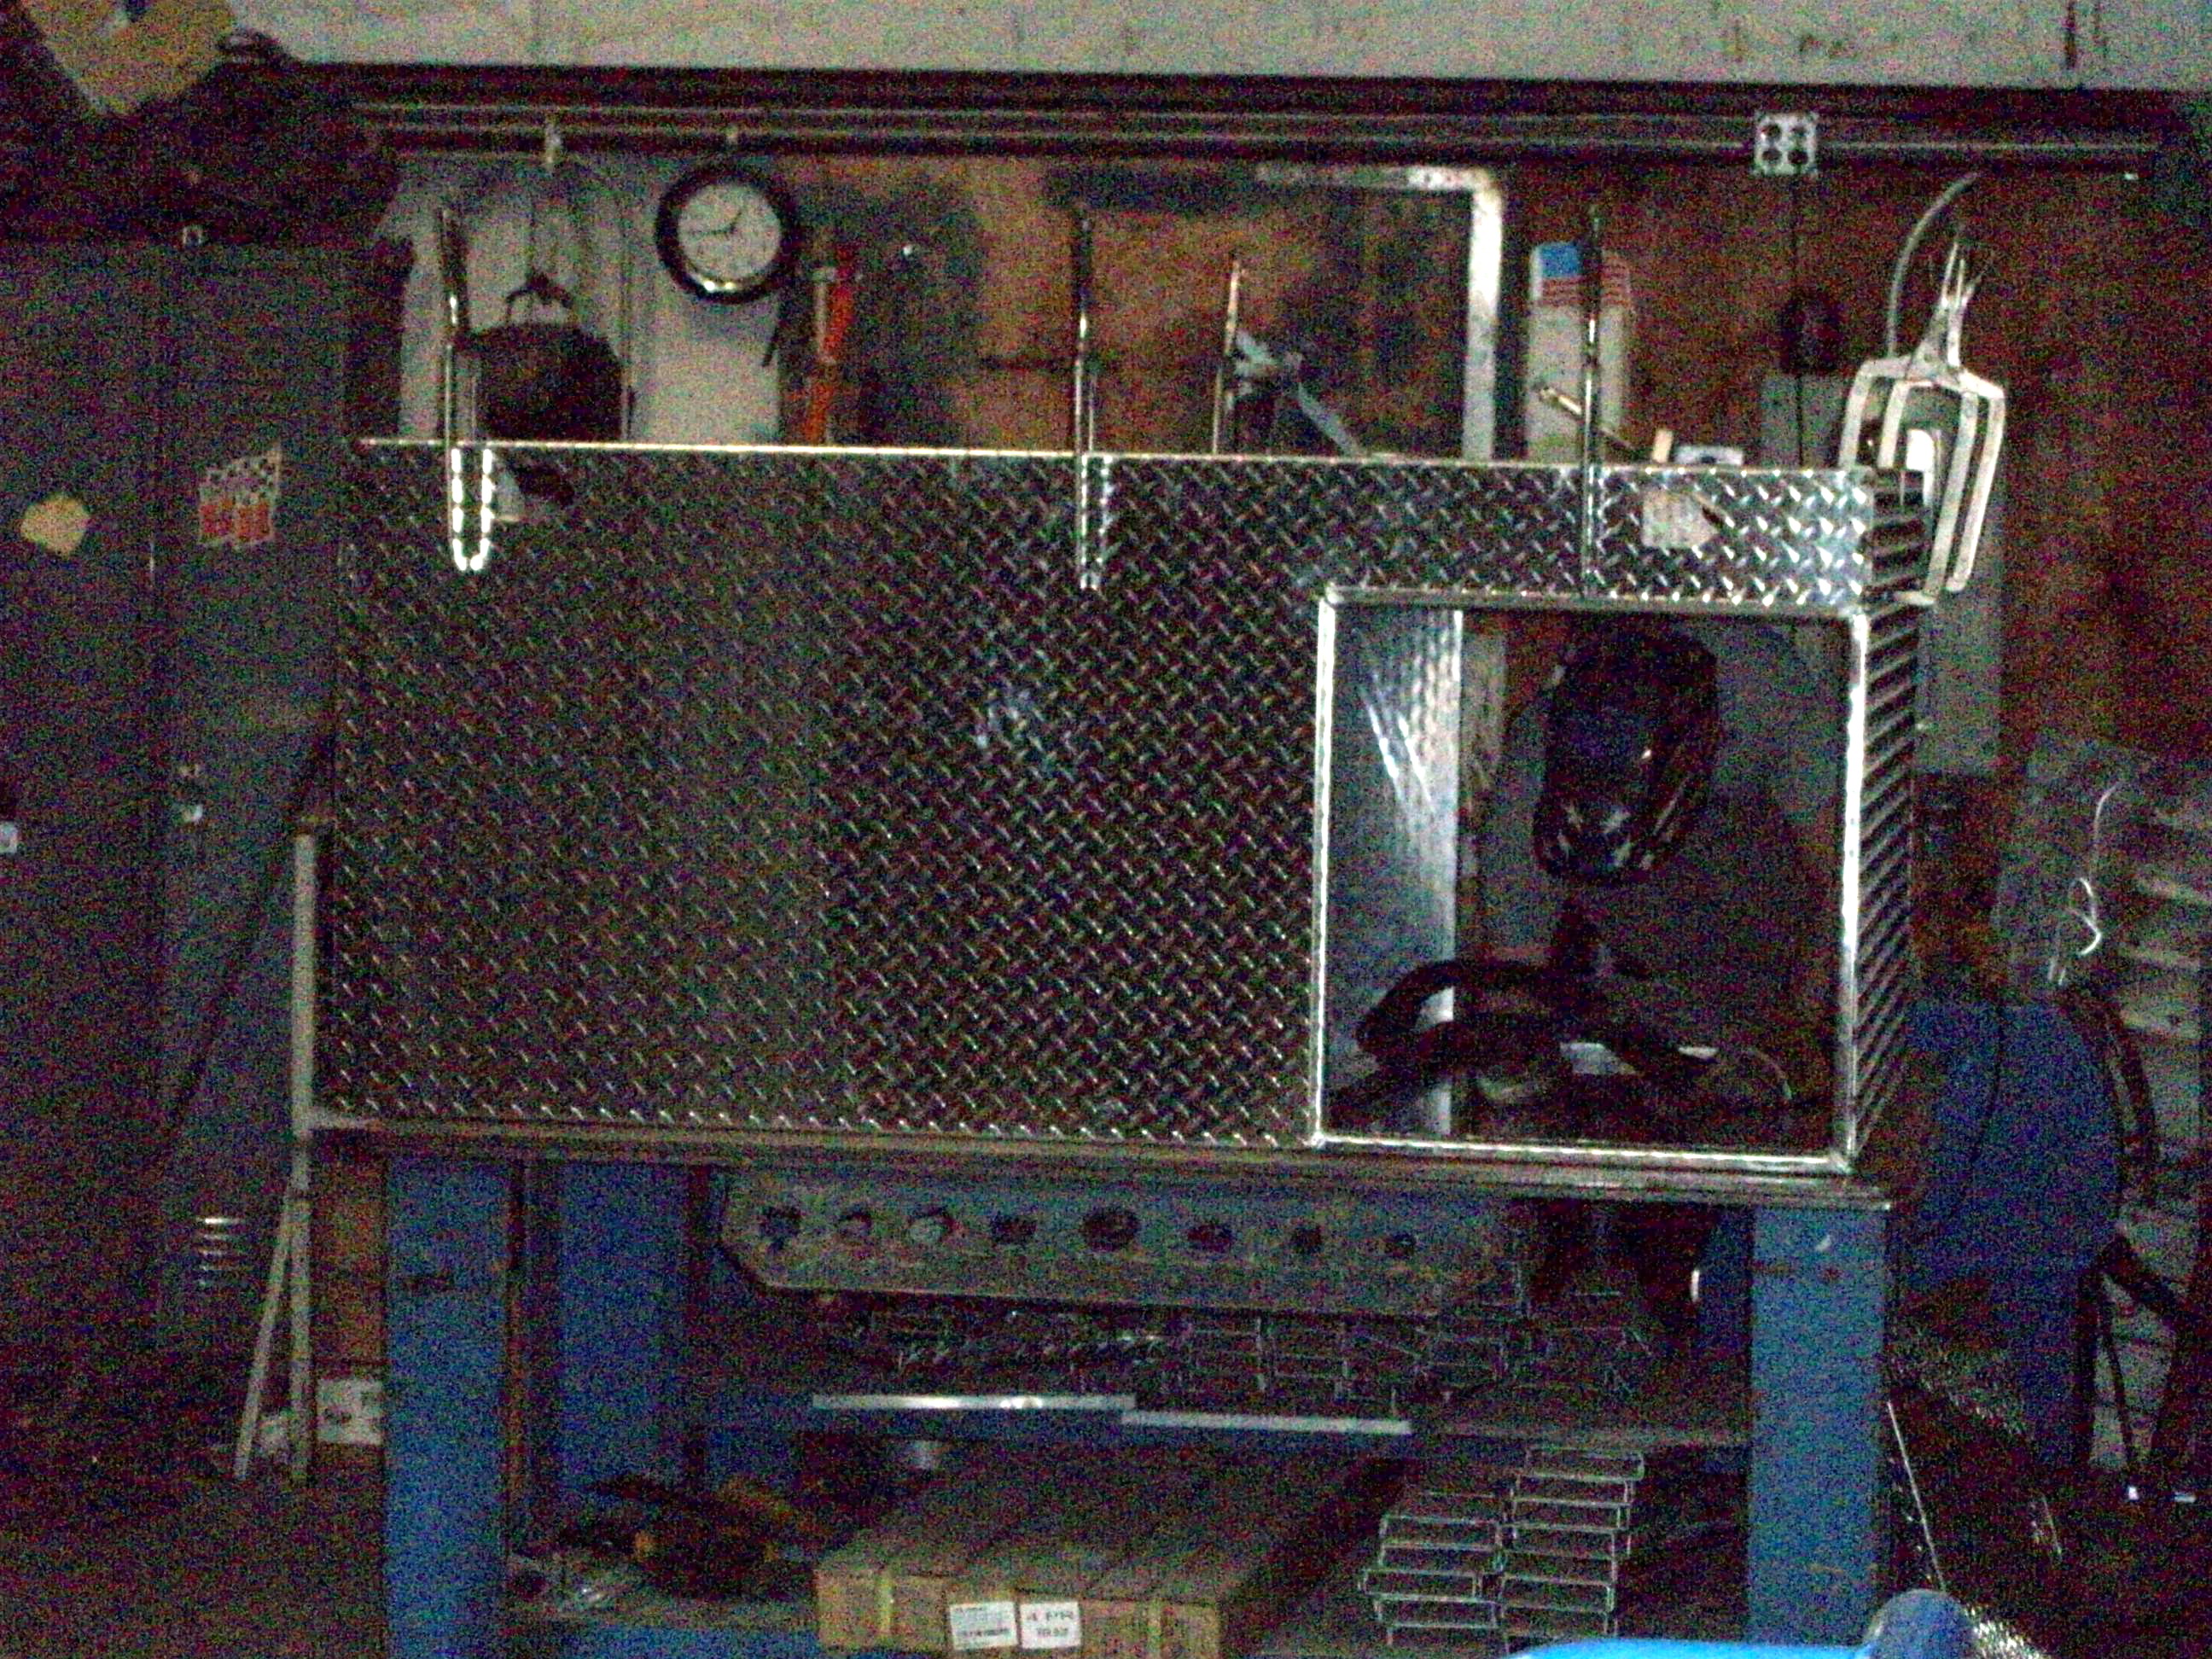
The box is simple, you can order one to suit your own tastes and needs or you can order one like ours. Either way, you are looking at the cost for a basic box without any lid and rear door access to run you just over $1200 as of this writing. Add doors up front on either or both sides for $200 each. Add a single lid or dual lids for right around $300. You can make your box 4ft by 6 ft like mine or any custom size. The height of our trailer is 32". Typical military trailer is 24" high/deep. I wanted more space for this trailer, perhaps you only need 24". As you can see, you can customize and order your box in an endless combination of sizes, features and styles.
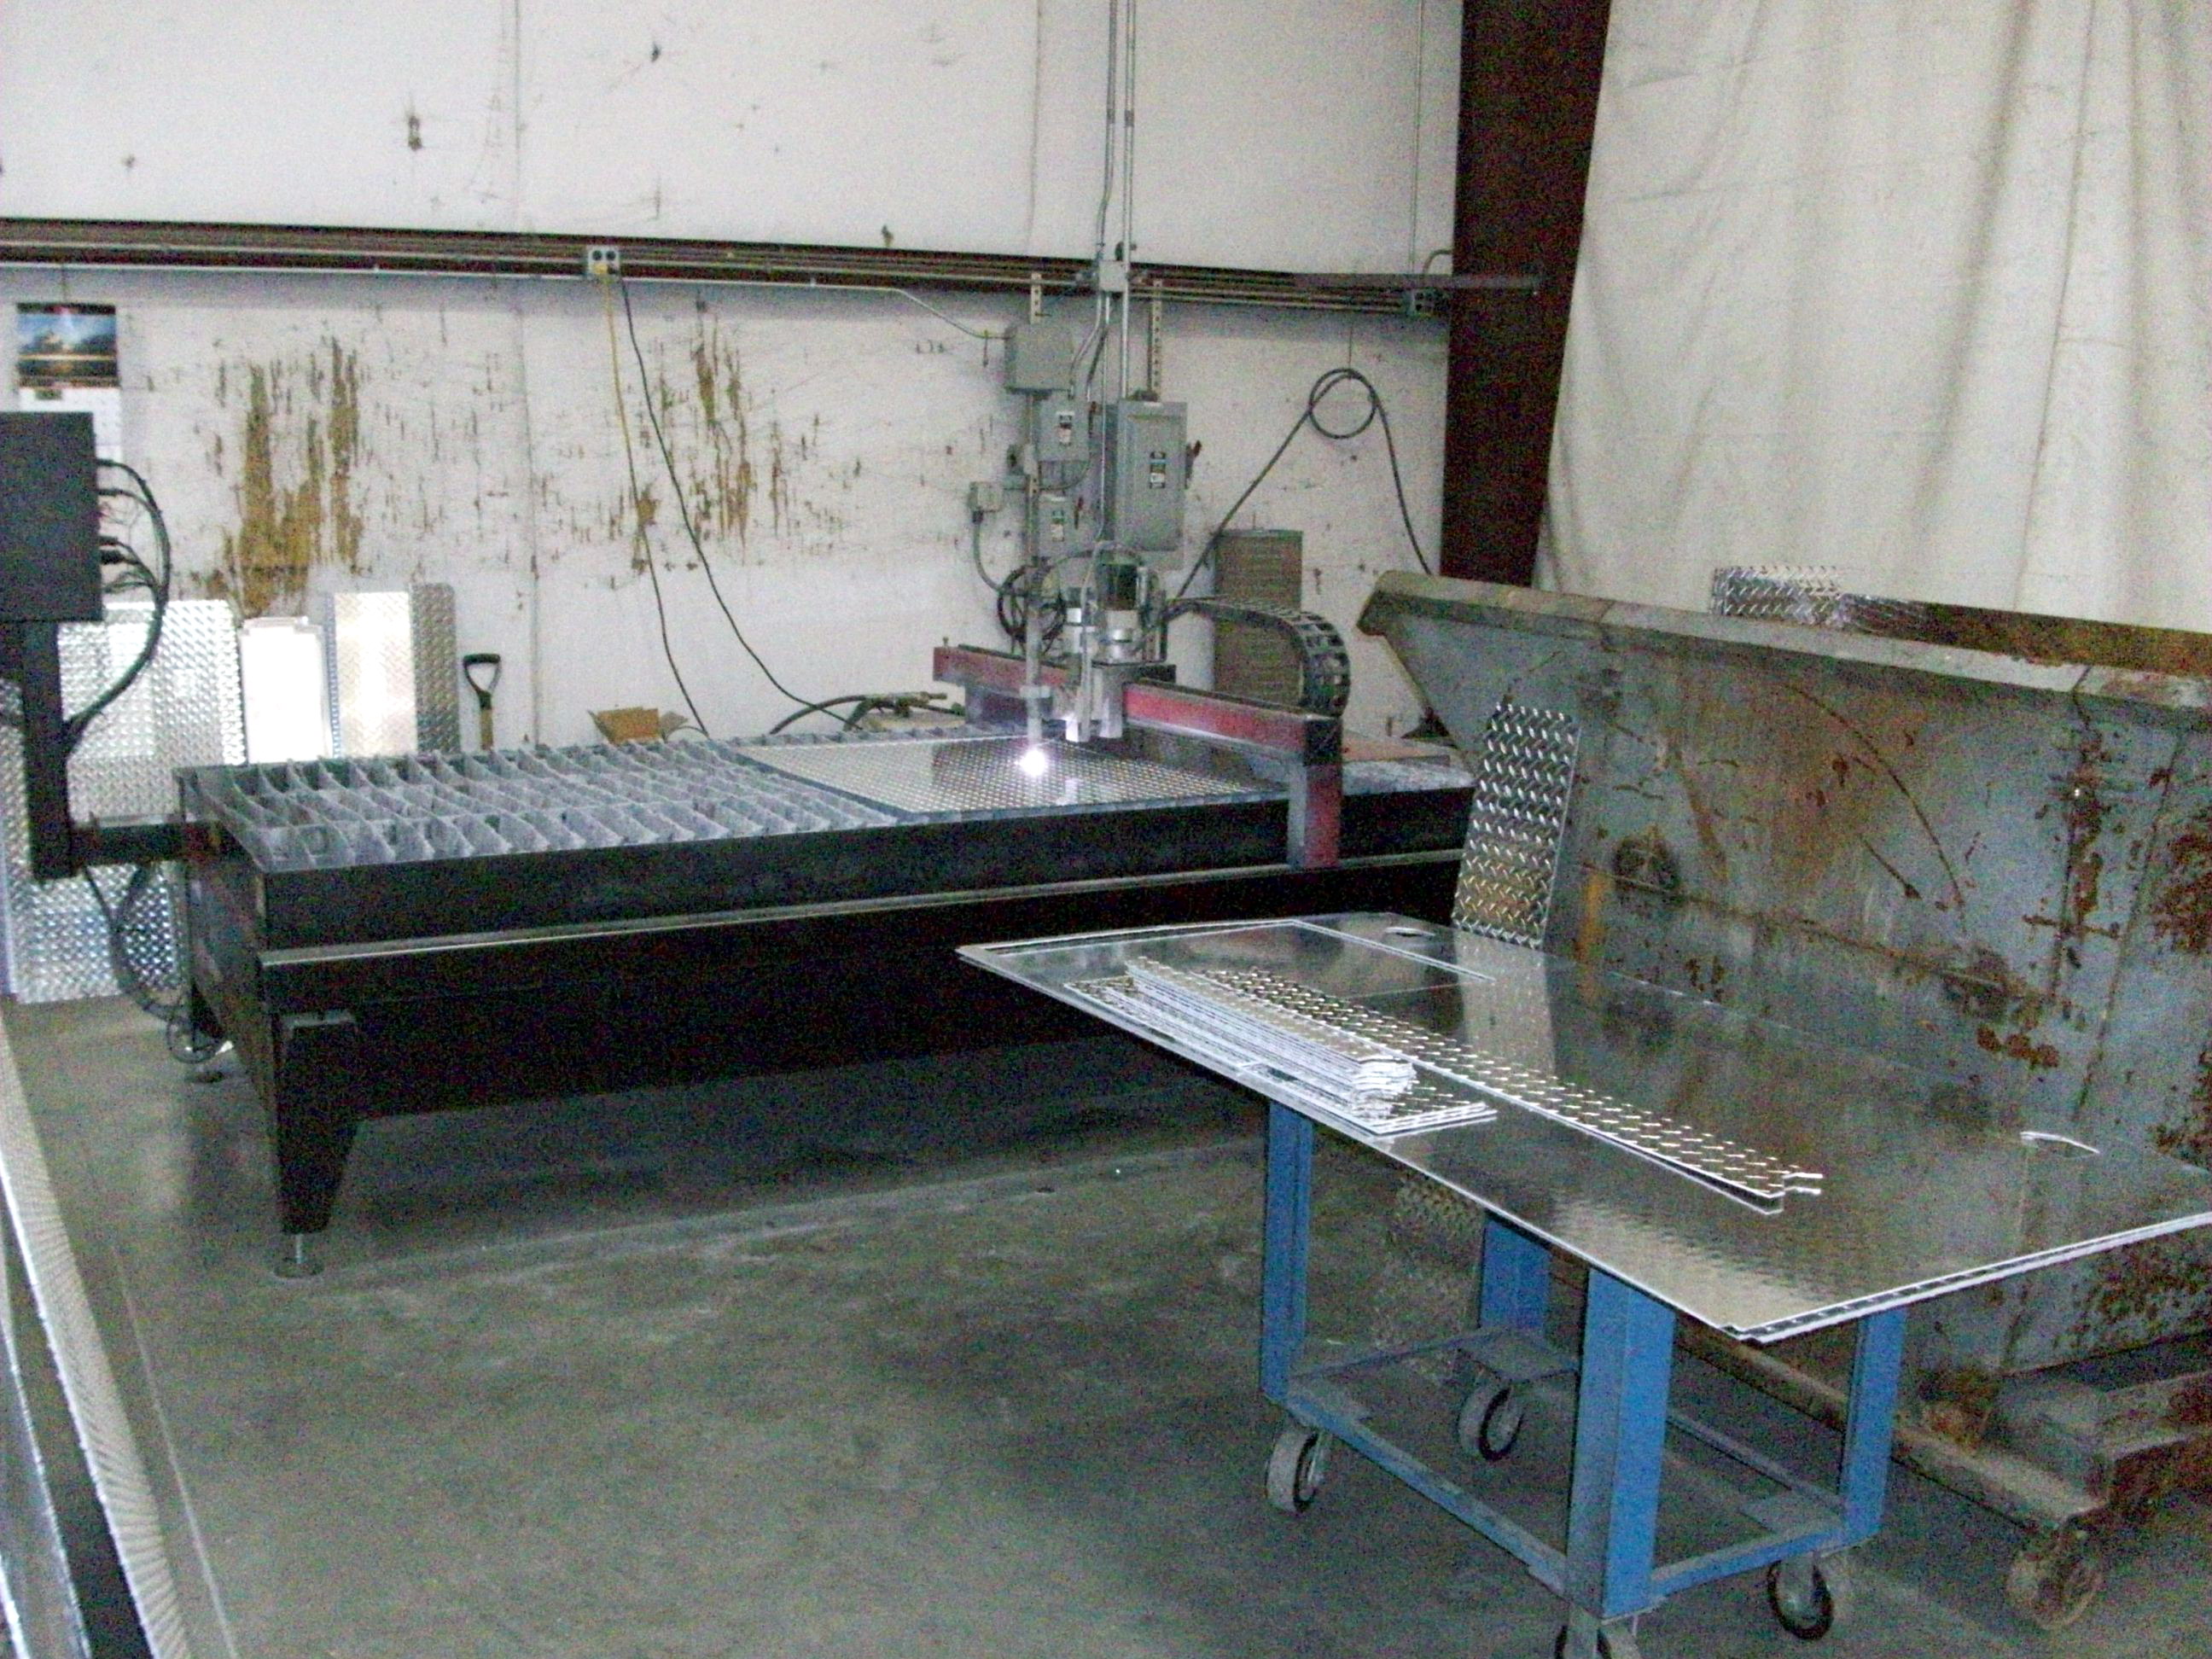
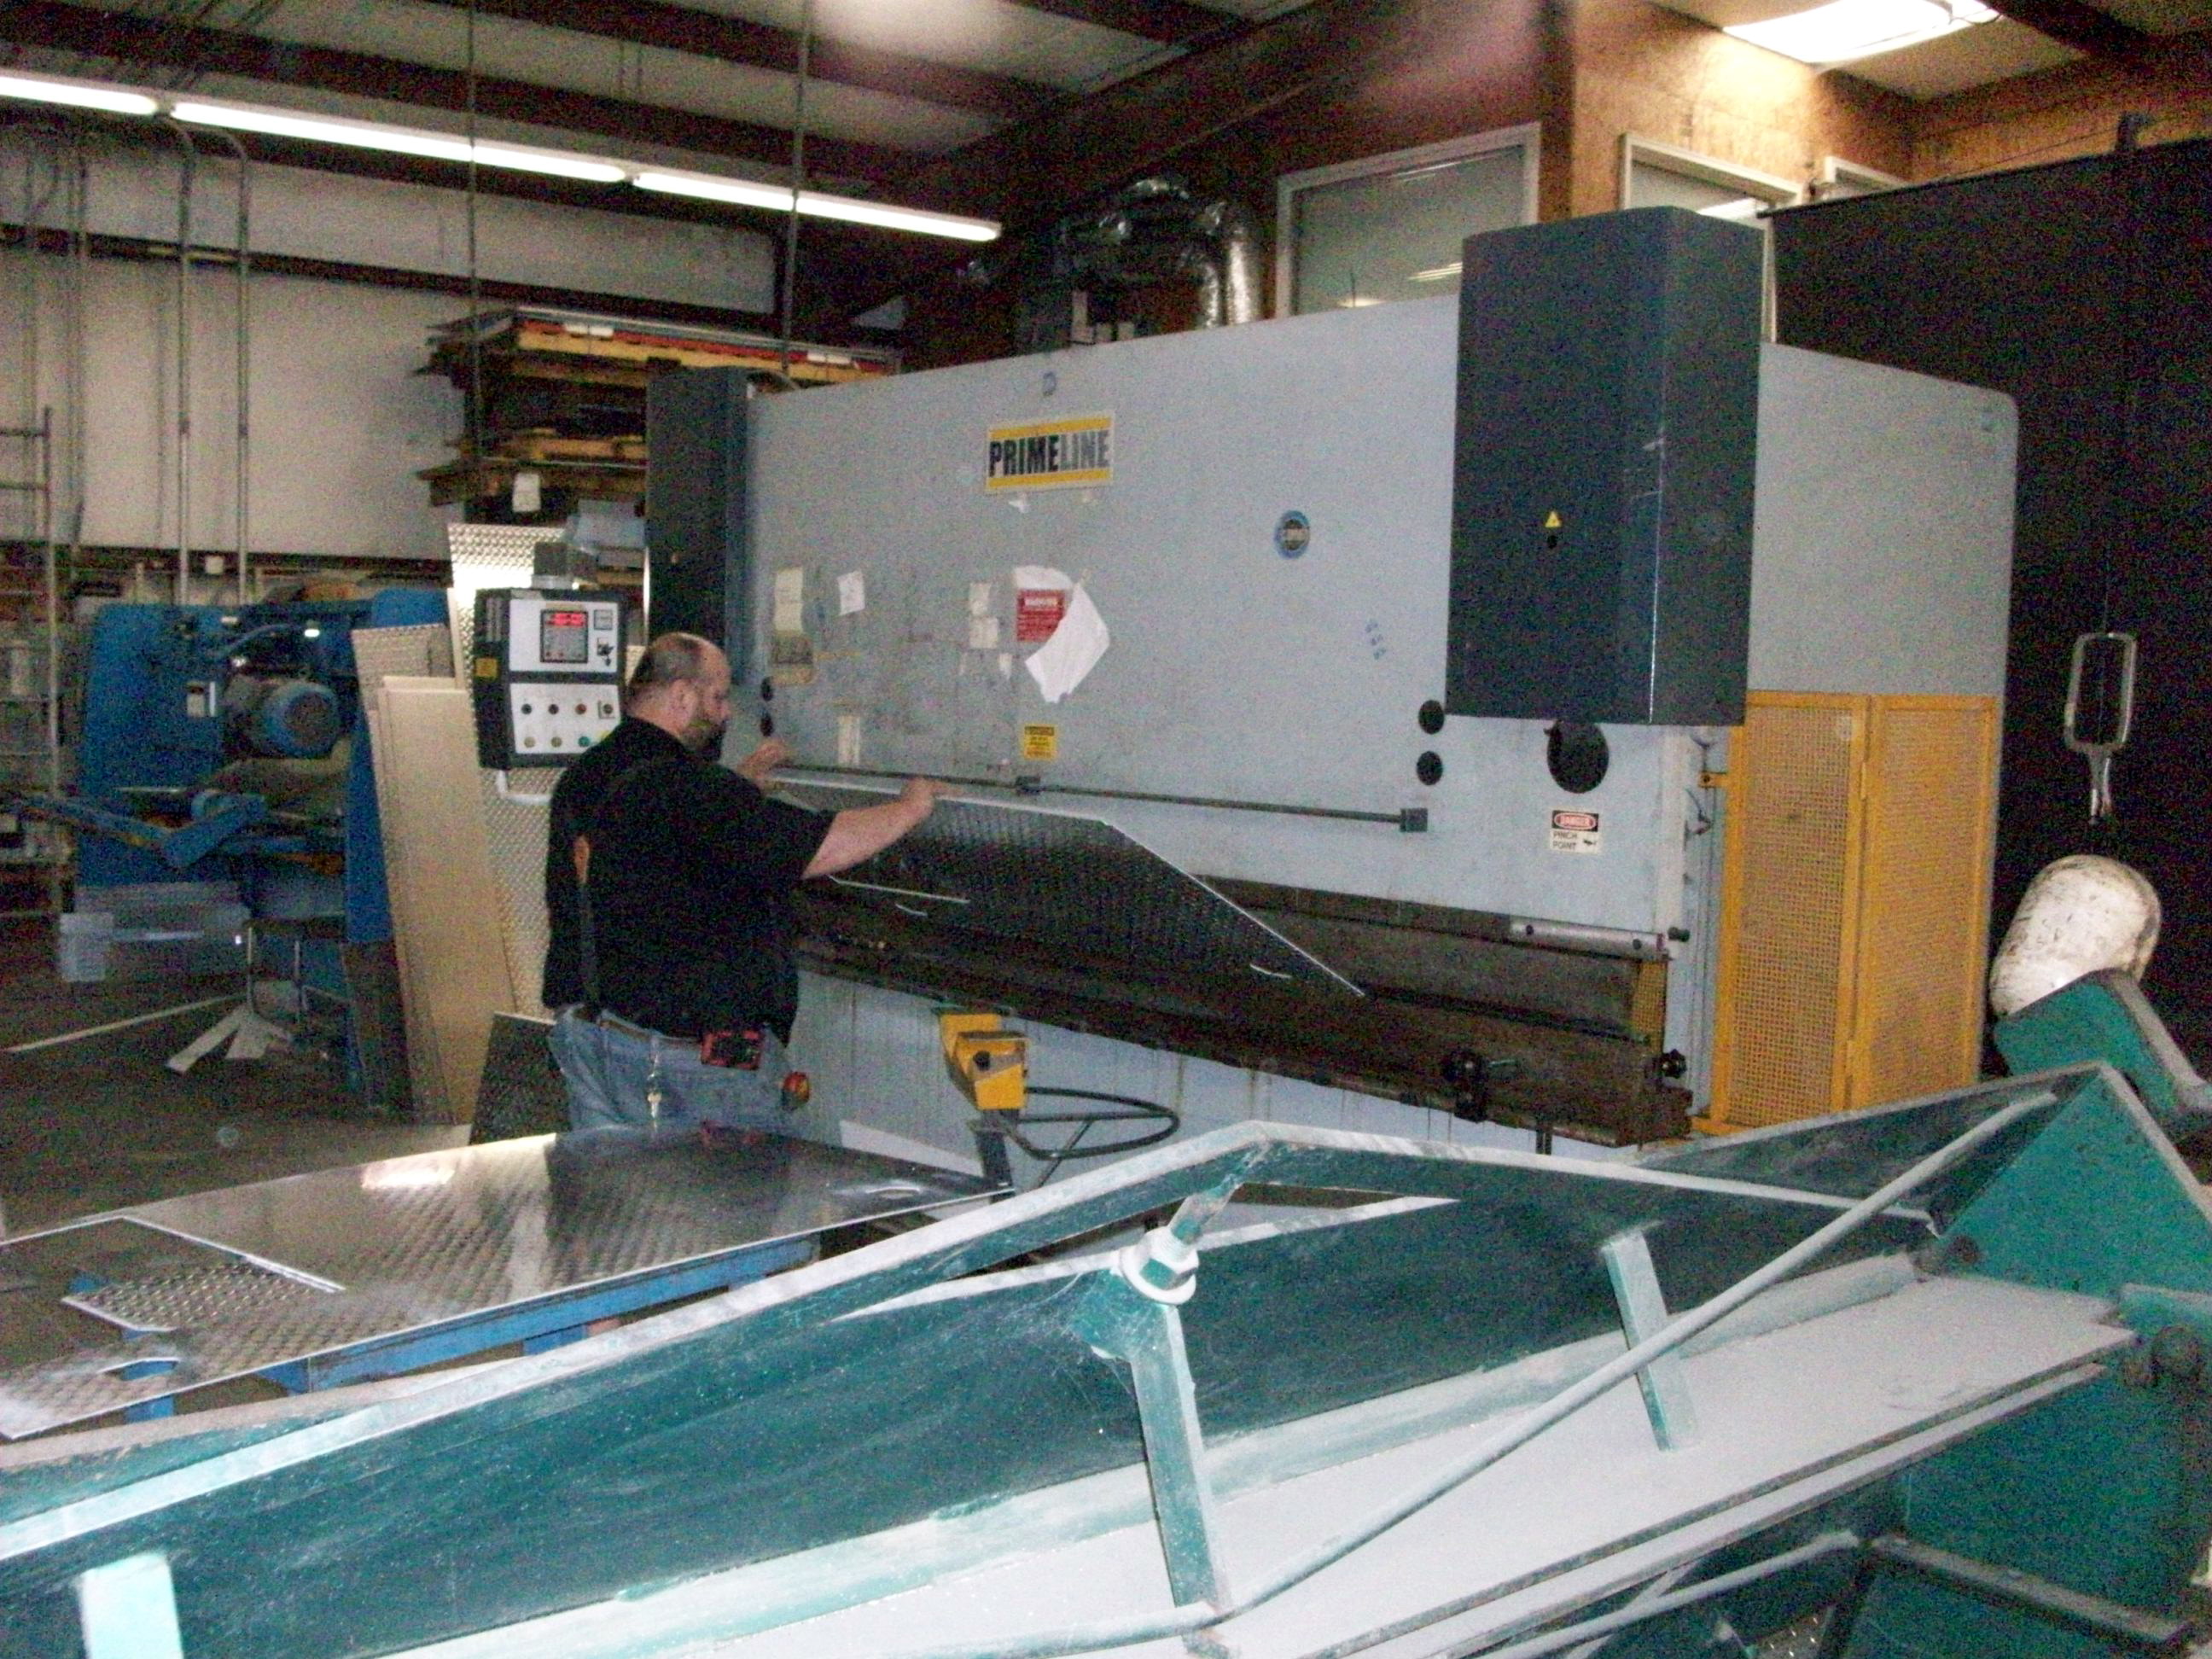
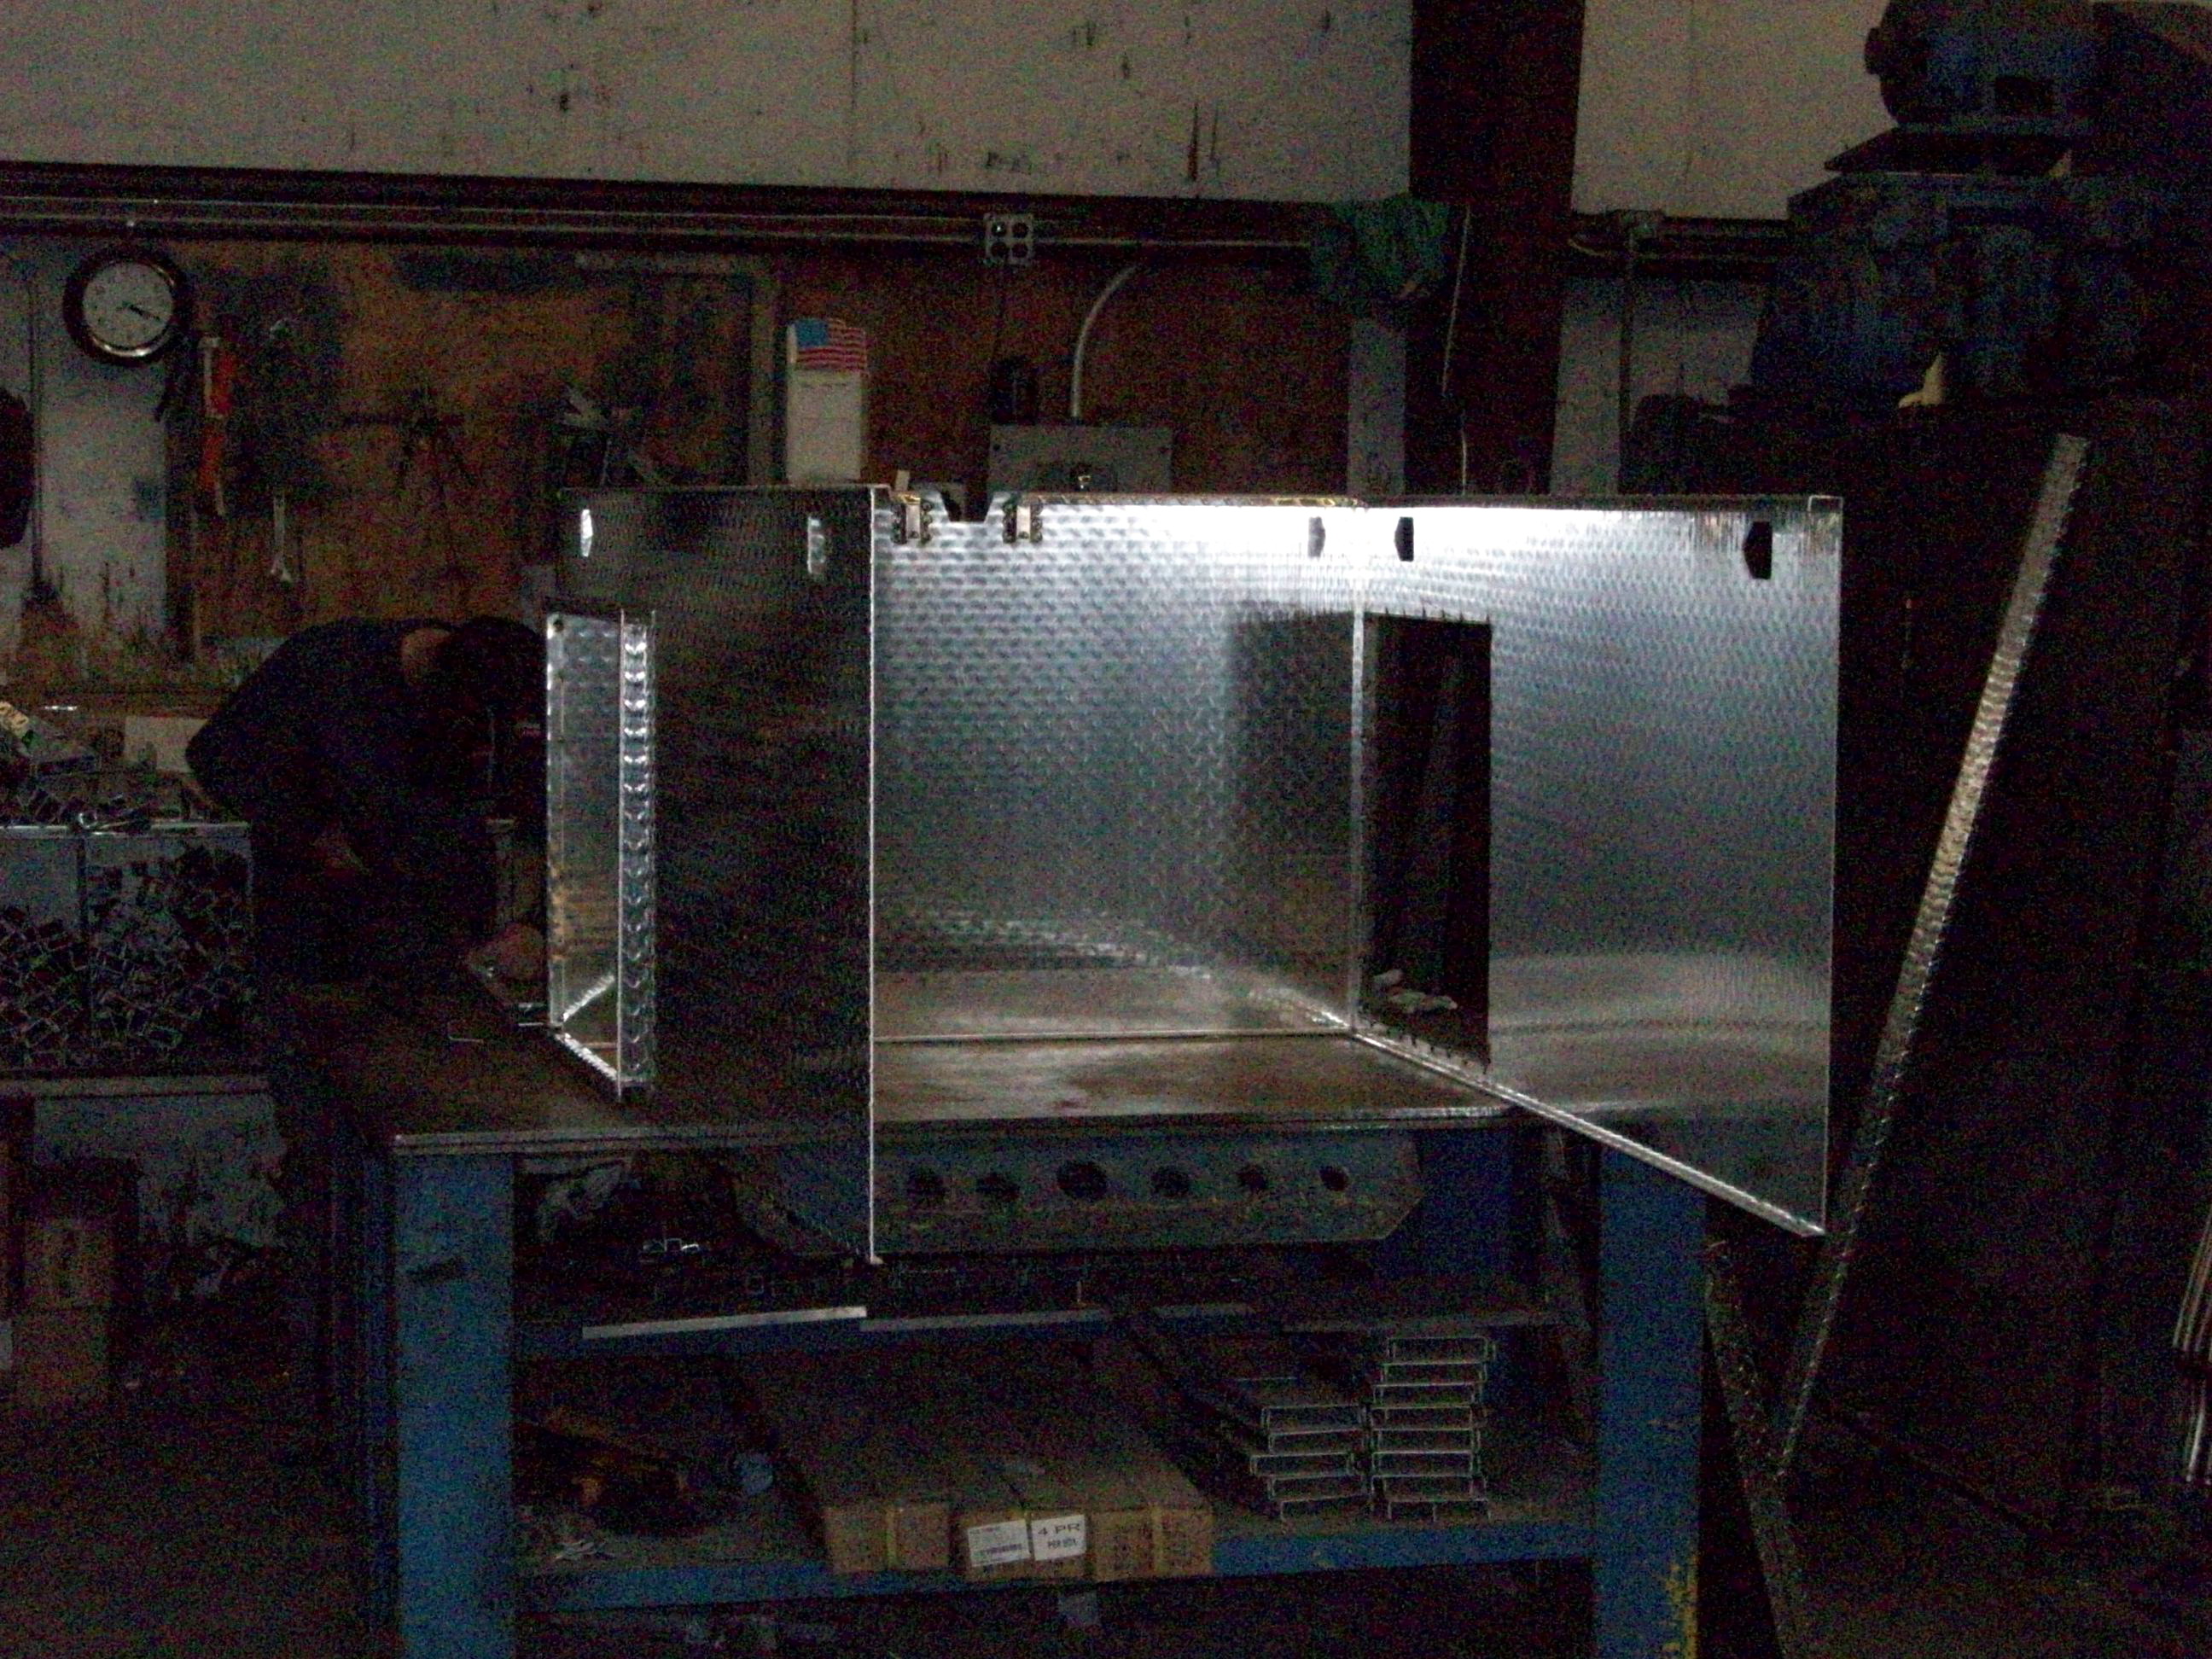
Here are some pictures of the box being manufactured in Jackson Creeks North Carolina facility.

You've decided on your box and placed your order. It took two weeks for mine so I had plenty of time to work on my frame.
STAGE #1 - The Trailer Frame
Option #1 - Pre-cut Trailer Kit
There are a few thoughts on how to go about a frame. The first one is what a number of Jeepers have already tried with success is a pre-fab kit available from a number of sources online. We used a Harbor Freight Super Duty kit. It has a 1980 lb GVWR and a 2000 lb axle making it just about right for our project.

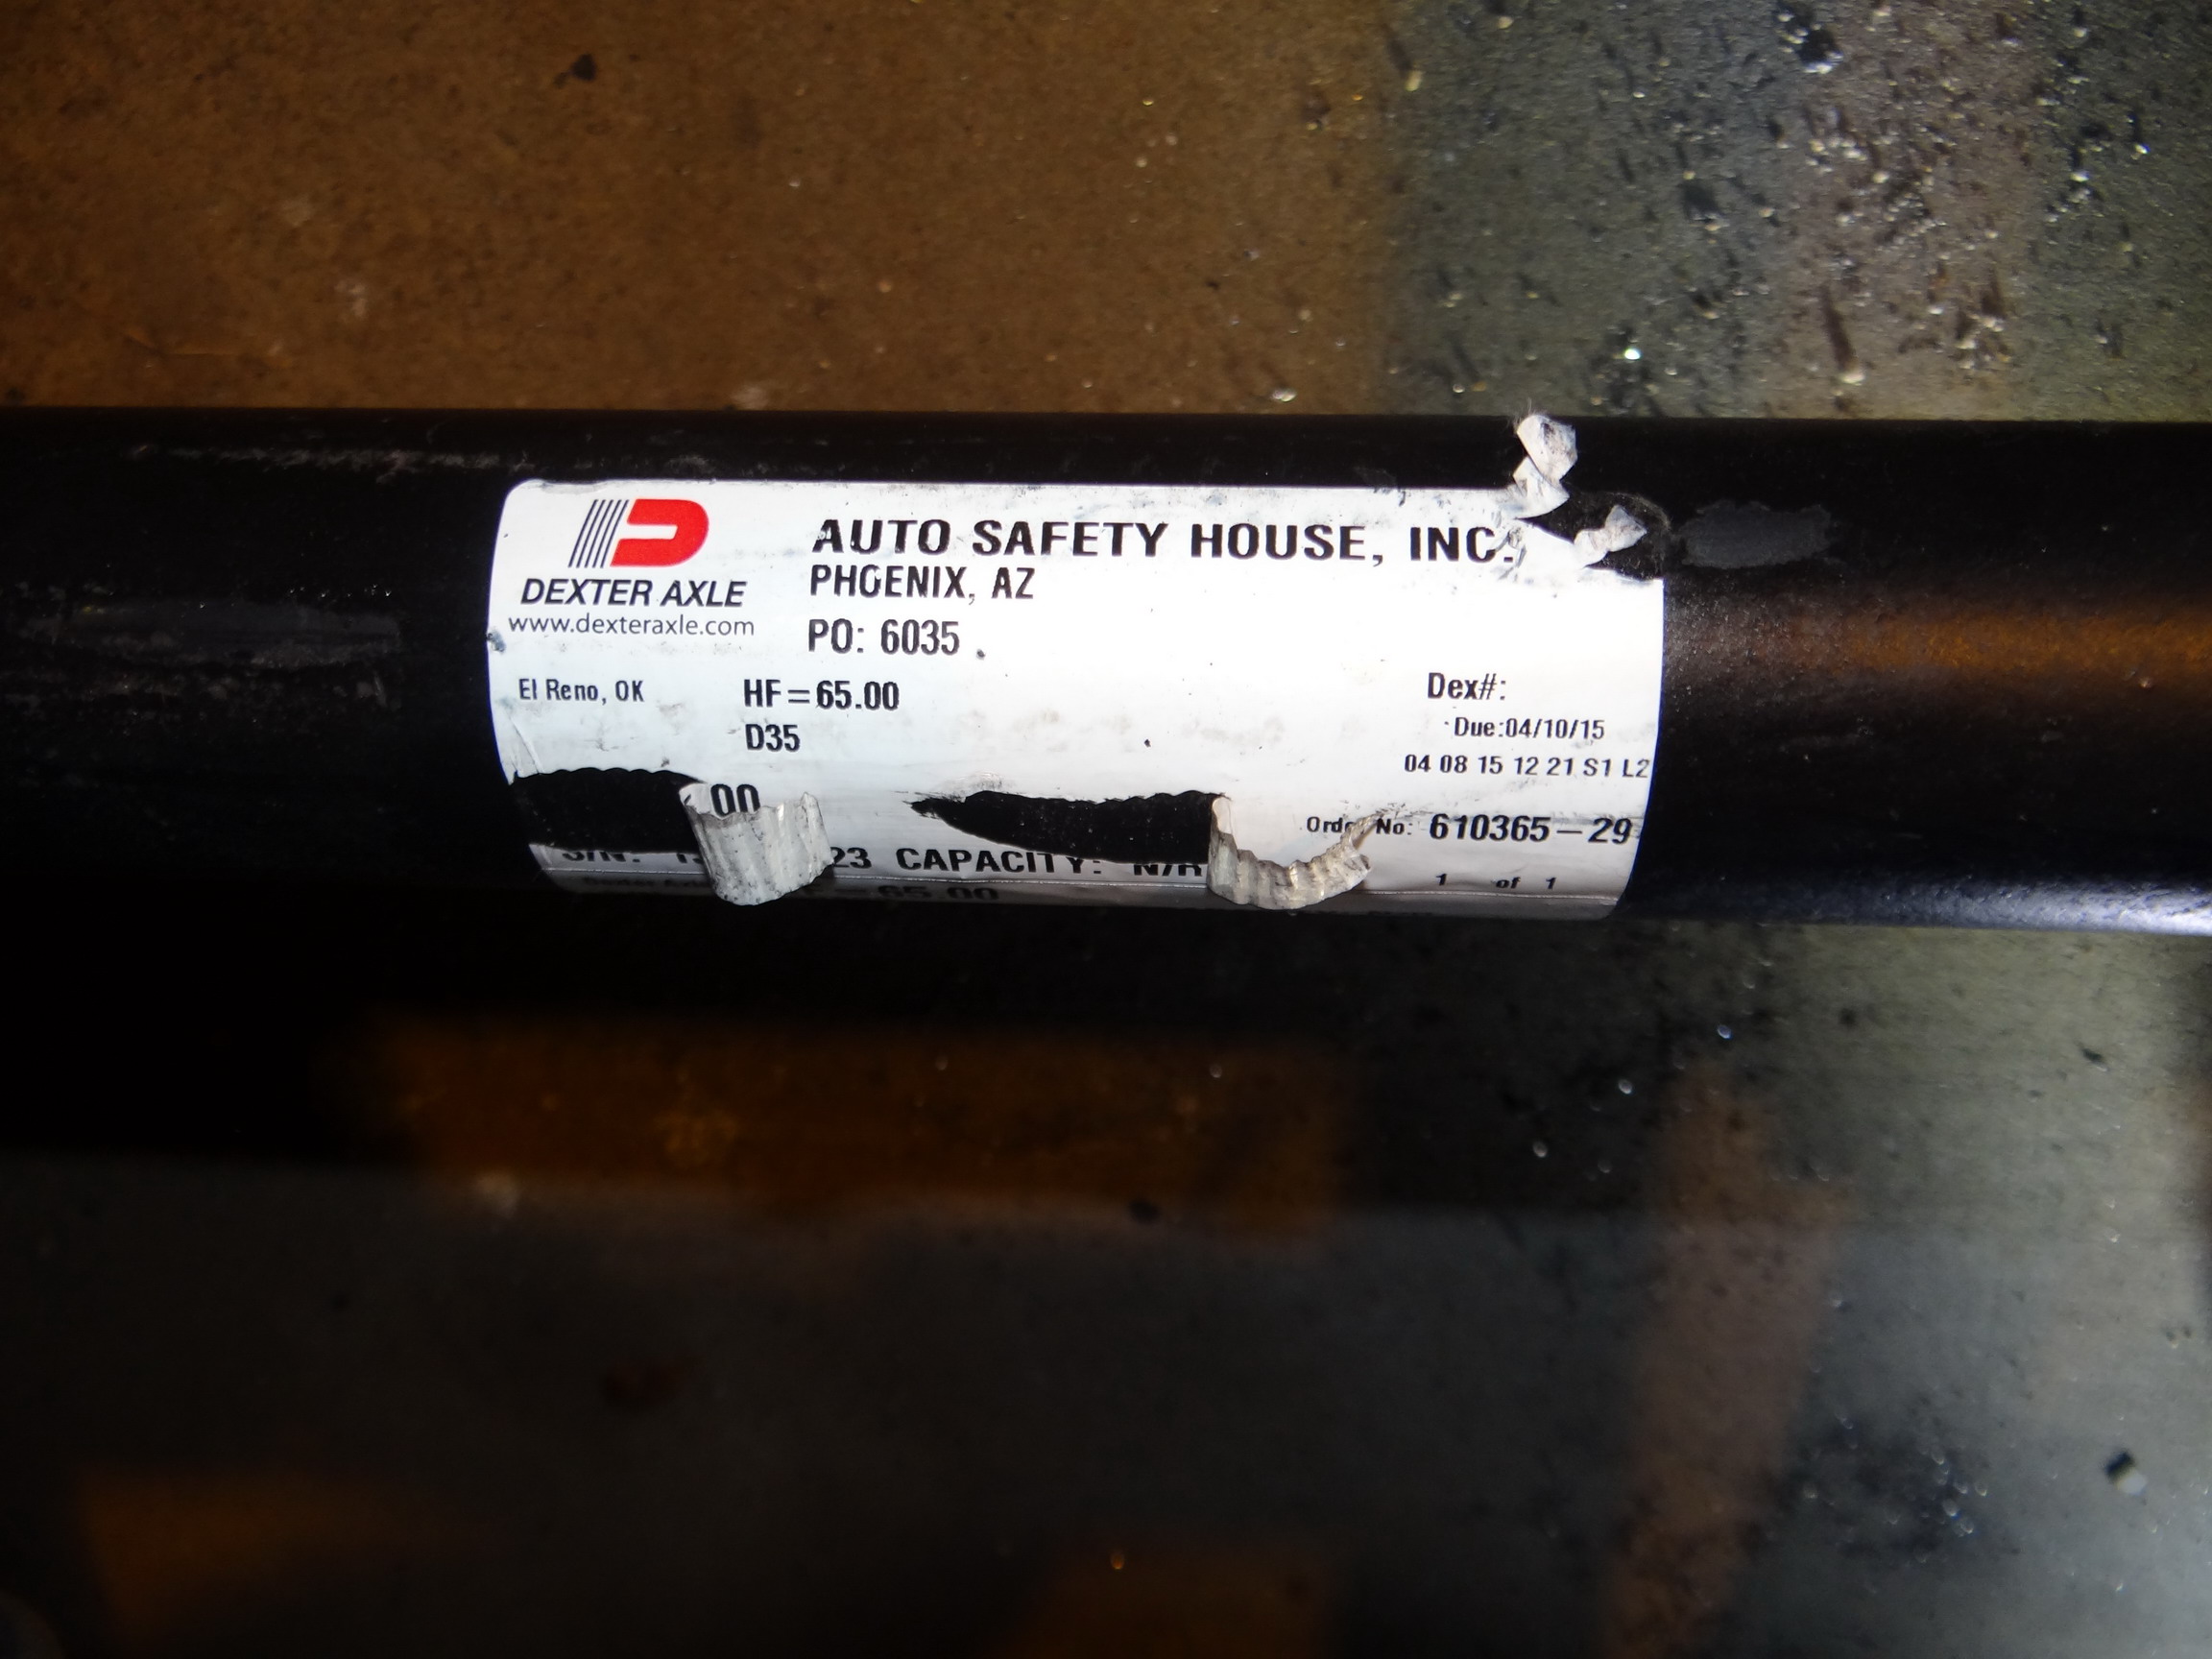
Because of the 1980 lb load capacity, price and simplicity of a pre-cut/bolt together kit, we've decided on this to be the back bone of our trailer project. The kit can be assembled and completed in a day or two at the most. We already know that the suspension of the trailer kit, while rated for 2000 lbs for pavement use, will not make the grade for moderate off-roading. We'll be replacing the springs with CJ7 springs to give it a better ride and better performance on moderate trails. After we got the trailer kit, we also realized that the kit axle was not wide enough to accommodate the wheels and tires we were going to use. We've decided to replace it with a 3500# Dexter axle from Auto Safety House in Phoenix.
We'll call today Day 1. It's Thursday late afternoon and I head down to the Harbor Freight store in Mesa, AZ to pick up the trailer kit. It was on sale and with tax I spent just under $330. Now keep that in mind because we are going to built our basic trailer for under $2500. The kit comes in two boxes that weigh in around 160 lbs each. It was easy to get them home strapped to my "hitch haul" which also makes a good platform to empty the boxes helping to make this a one man job.
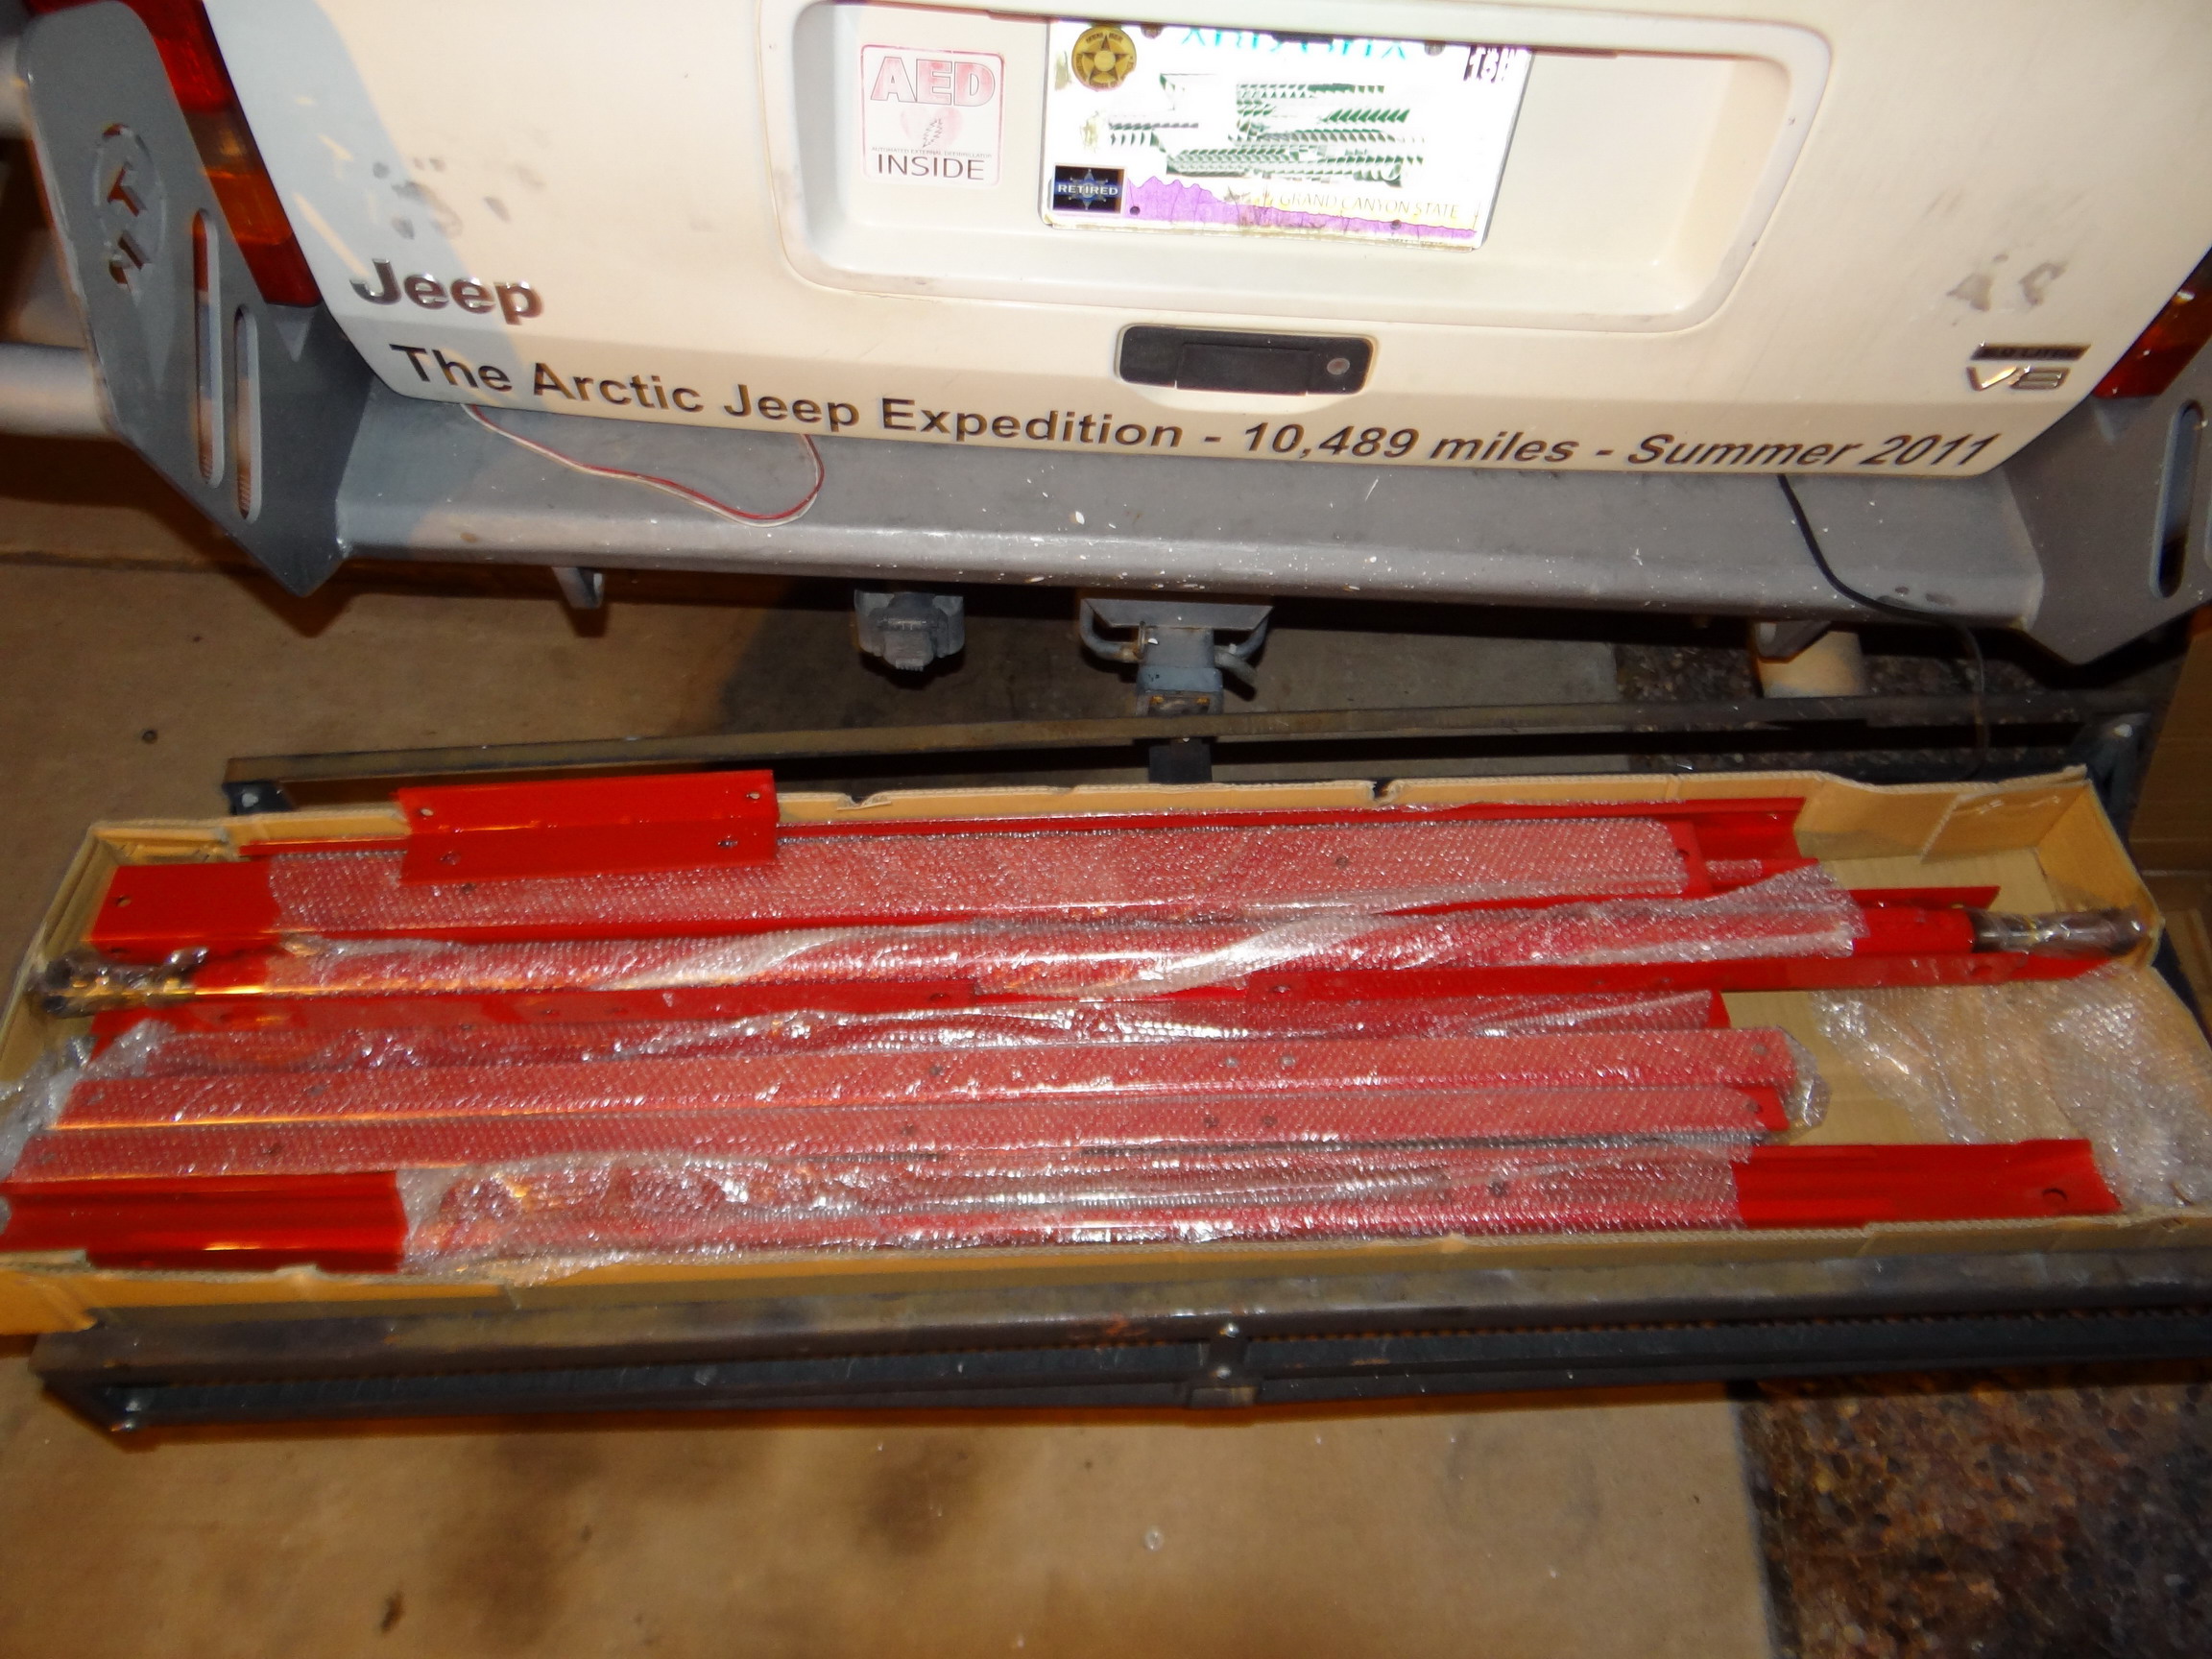
Once home I begin to unpack the 1st box. It contained the wheels/tires, fenders, lights and wiring harness and misc brackets and hardware. I arrange all of this in the garage and begin to unpack the second box which contains the springs, the steel, coupler and more brackets along with the instruction manual (manual? who needs a manual?). I organize the steel in my driveway in preparation of starting the build tomorrow morning.
Friday morning, this is the real Day 1 and I decide to take this easy. I'm not in any hurry and I've decided to tackle this on my own if only to prove that one can do this in their garage or driveway in a weekend. The decision was also made not to use my compressor or air tools because not every one has one available to them. It's going to be my Craftsman 150 piece tool set and three Dewalt 18v tools (1/4" impact wrench, 1/2" drill and my angle grinder).
Because we could not find an acceptable kit for our 4x6 size trailer we'll need to cut about two feet off each of the frame rails to make our 4x8 trailer the perfect 4x6 size (we think) for off-roading. This can be done easily with a hack saw, reciprocating saw or a cut off wheel. You're basically eliminating the front cross member and an approximate two feet shortening of each of the side rails. The extra cross member that will be left over we'll use to further beef up the trailer.
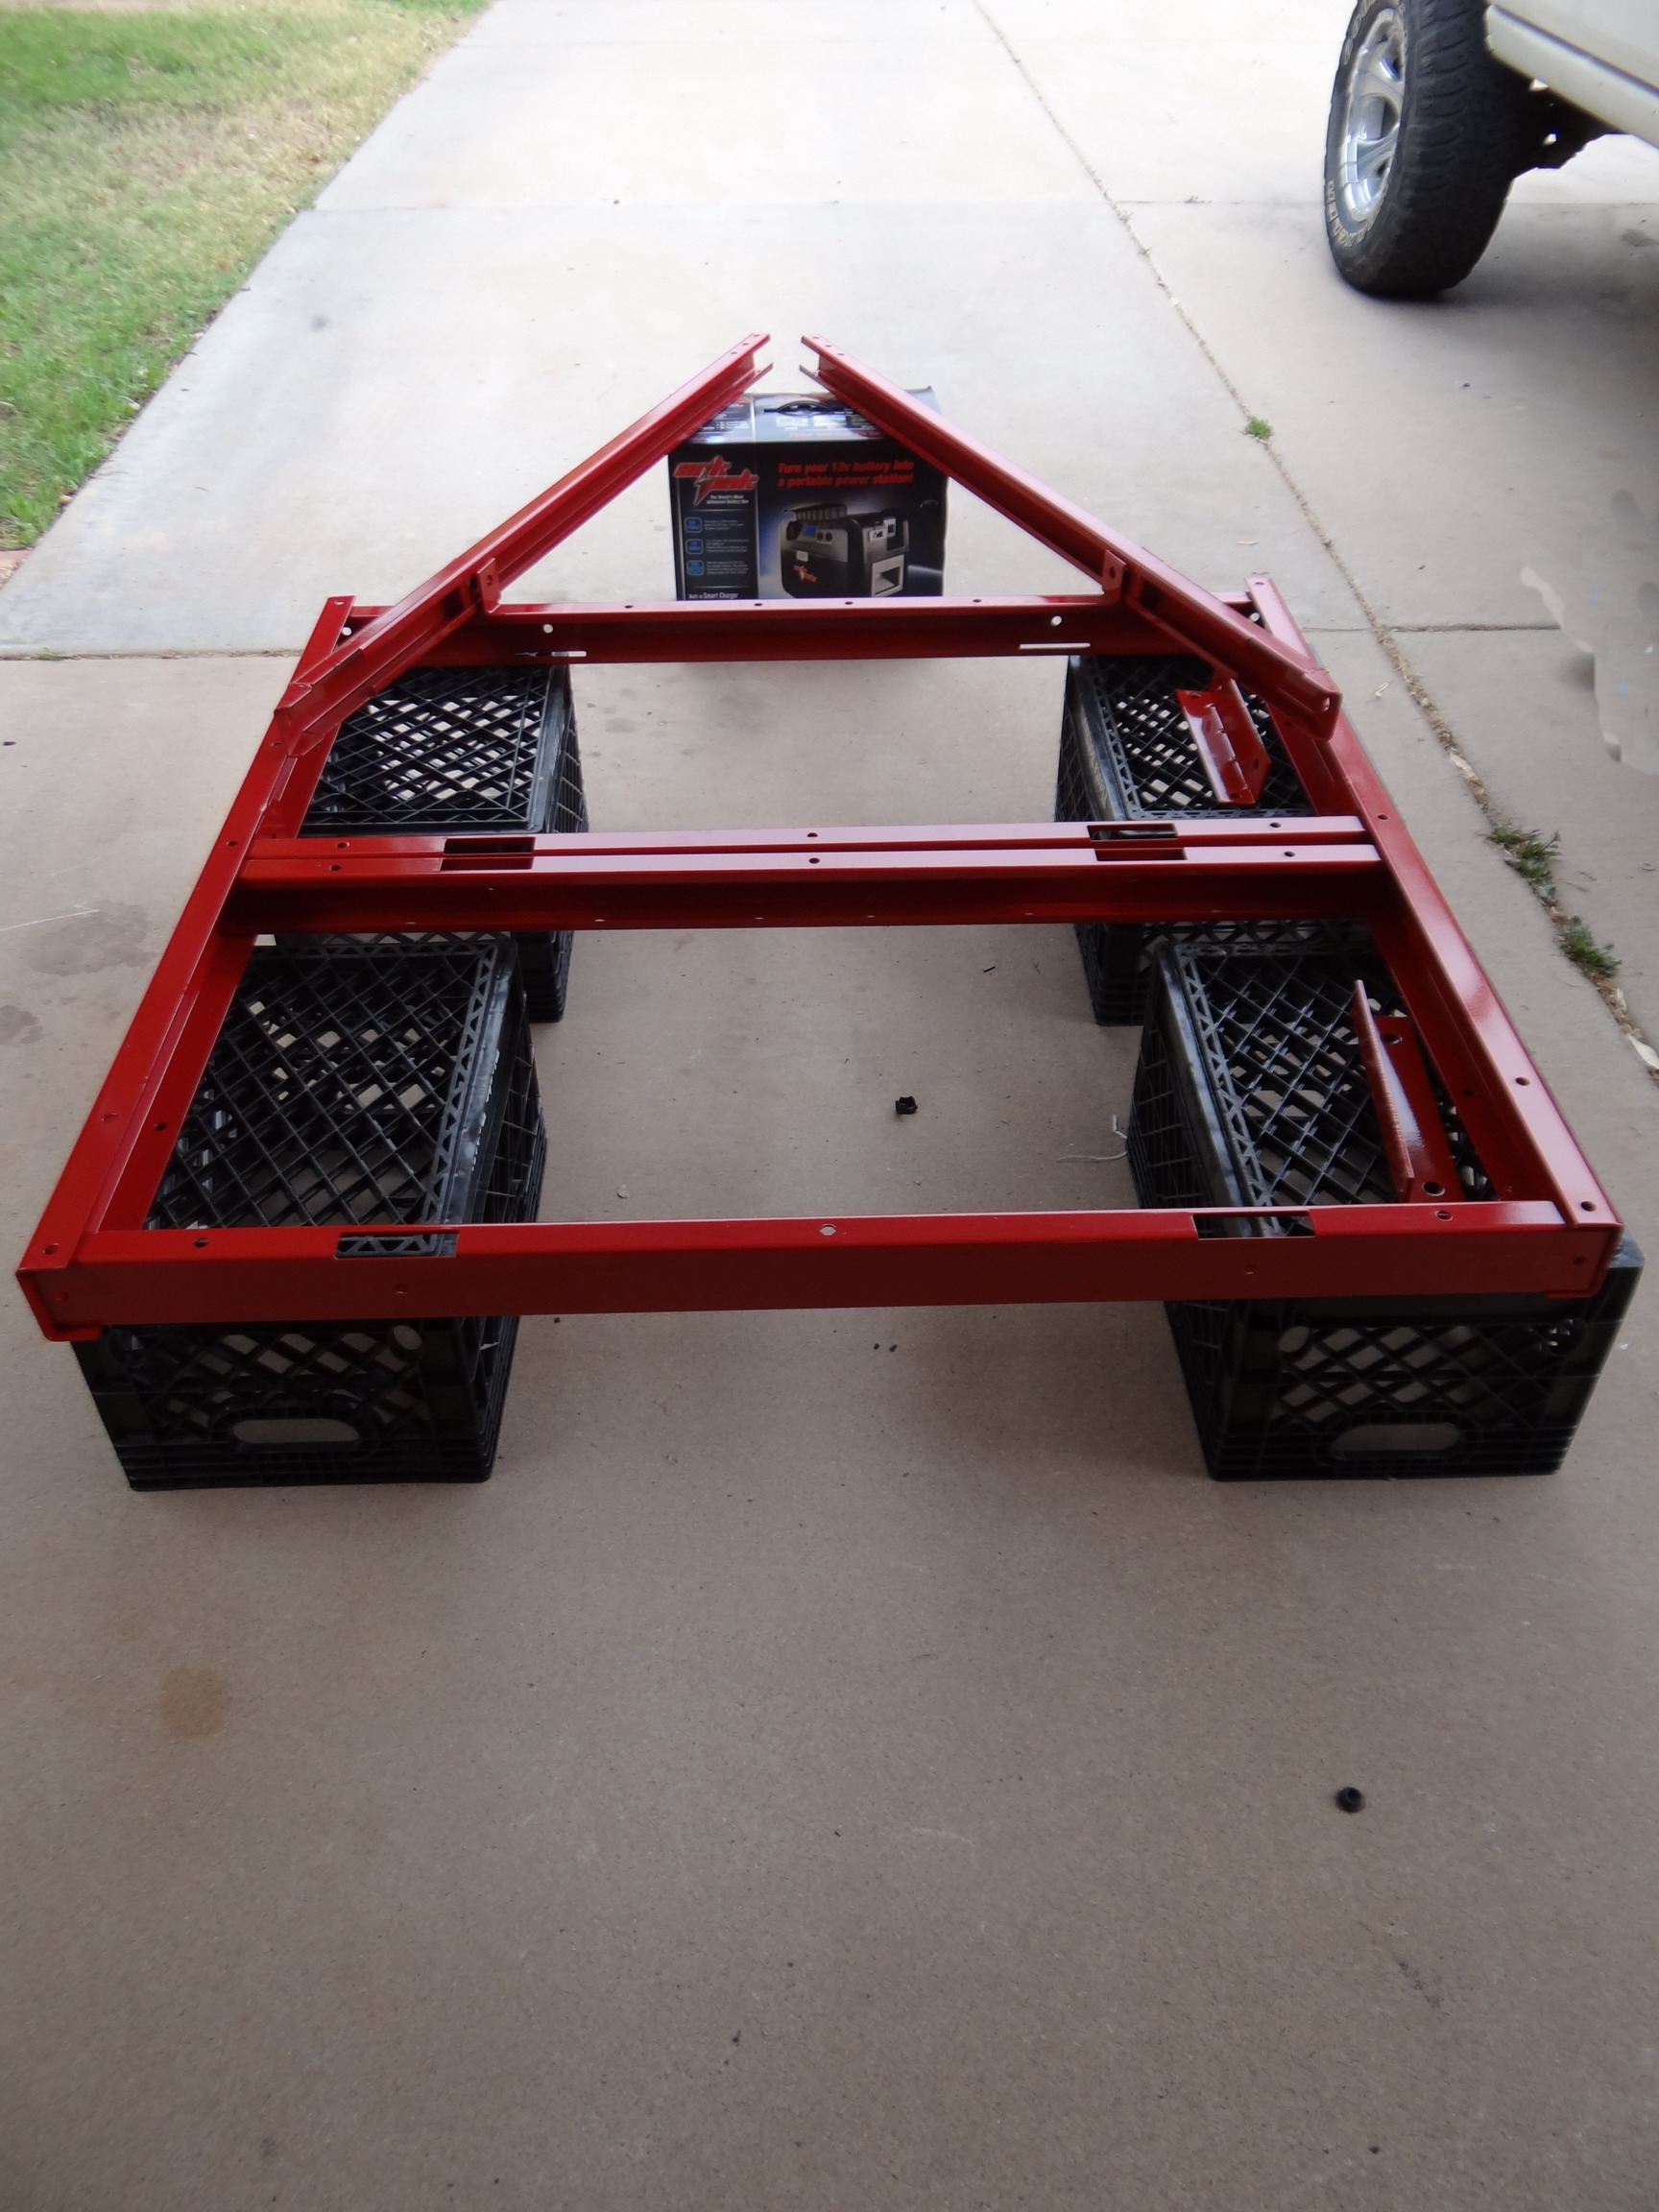
The instructions say to build the frame in two sections, front and back so I get right on the front first. To make things easy I set the pieces up on a couple of milk crates and an empty box. Putting the right and left frame rails in place and placing the cross beams in their proper locations I start bolting things together. It is important that you do not tighten up the bolts because you will have to square the trailer up later and then tighten the bolts down. With the front frame now together the right and left hitch frames are put in their proper place and loosely bolted down. Think I will take a break and head to Ace Hardware for some Grade 8 hardware and Industrial Metal Supply for the steel I need to beef up our kit frame.
Front Frame Construction:


I start again after lunch and as late as it is, I've got less than ninety minutes of time invested so far in the build. You might ask why some Grade 8 hardware? I've decided to use Grade 8 bolts in 7 1/16" for all the corners and the bottom of the frame. The steel picked up consisted of 10ft of hitch stock, 8ft of 2x2 .250 square tubing, 8ft of 2x3 angle iron in 3/16" and 10ft of 2x3 .125 rectangular tube for a rear bumper and a stiff cross member up front. I had IMS cut the long lengths into the size of pieces I am going to use. The hitch stock will remain one big piece.
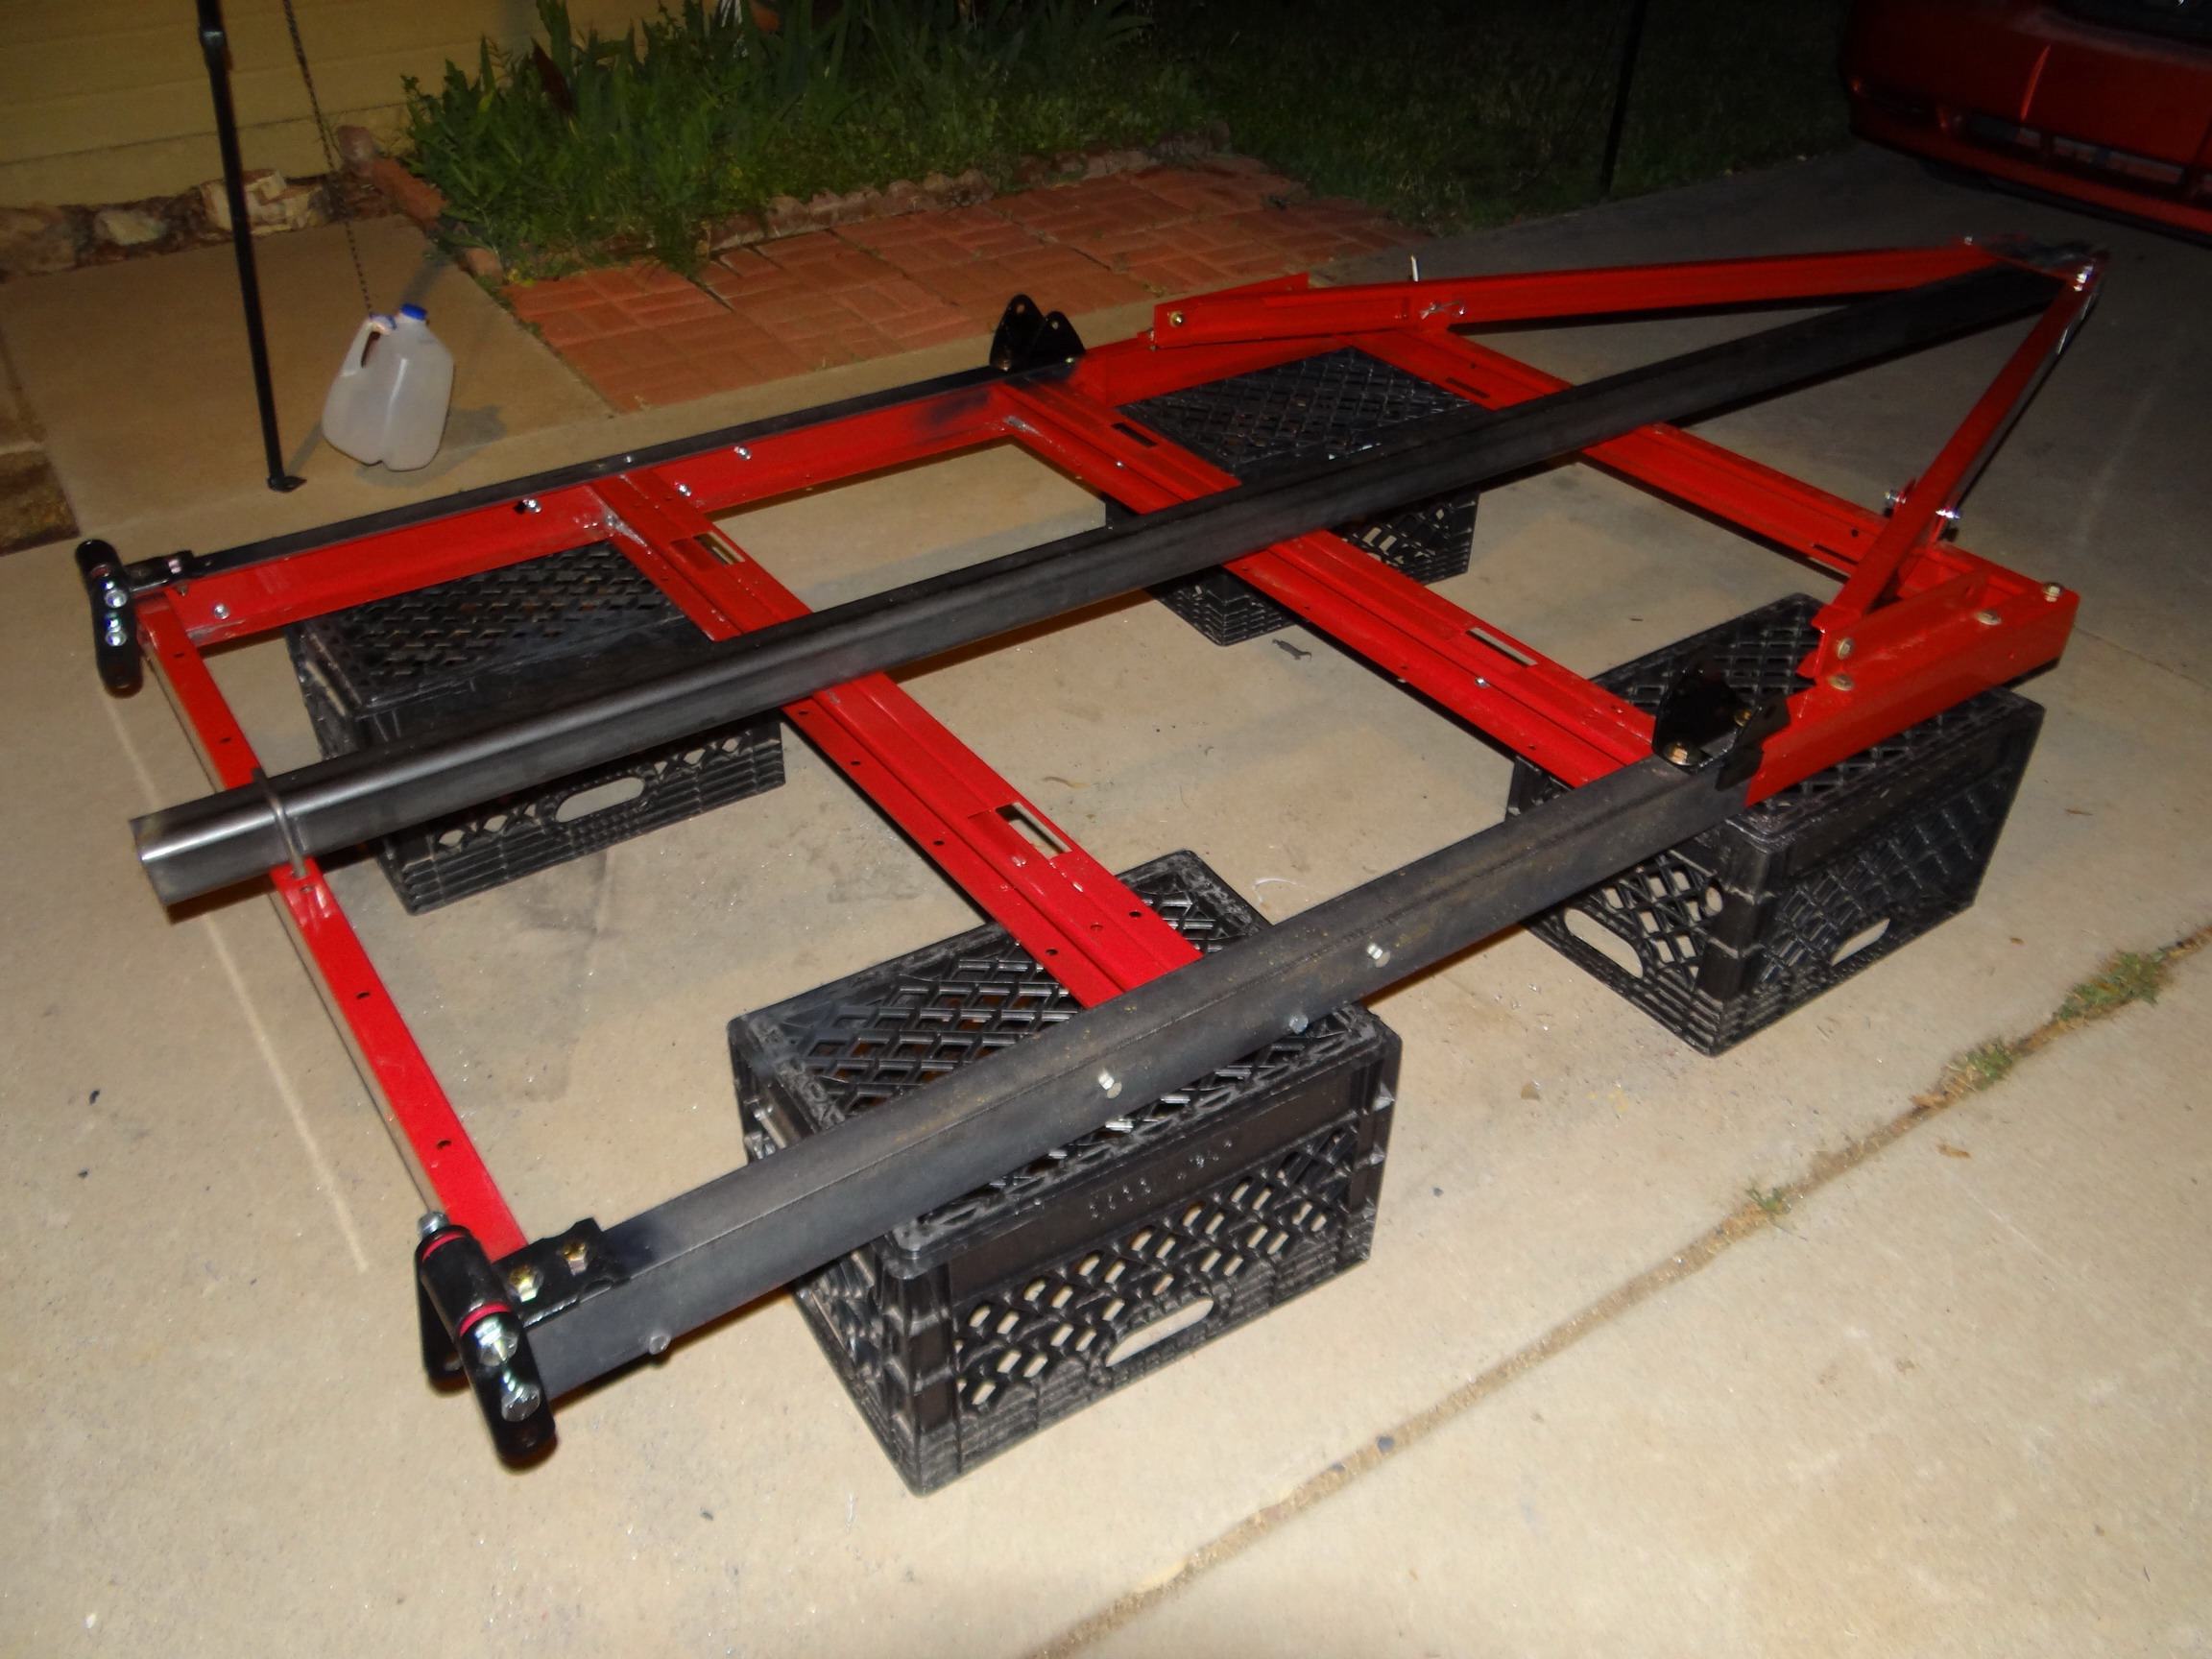
Since I need to modify the frame from 4ft x 8ft to 4ft x 6ft I've decided the best way from from the rear section of the frame. Normally I would cut one of the remaining frame rails in half making them 2ft each but I'm customizing my design a bit and have cut two 22" frame rails which I will assemble with the remaining two cross members. you might also notice in some of the pictures that I left the frame pockets "up" in the front and down in the back and on all cross members. It doesn't matter but I'm not ever going to need to use the stake pockets so I decided to place them down giving me more steel up top to fasten in to.
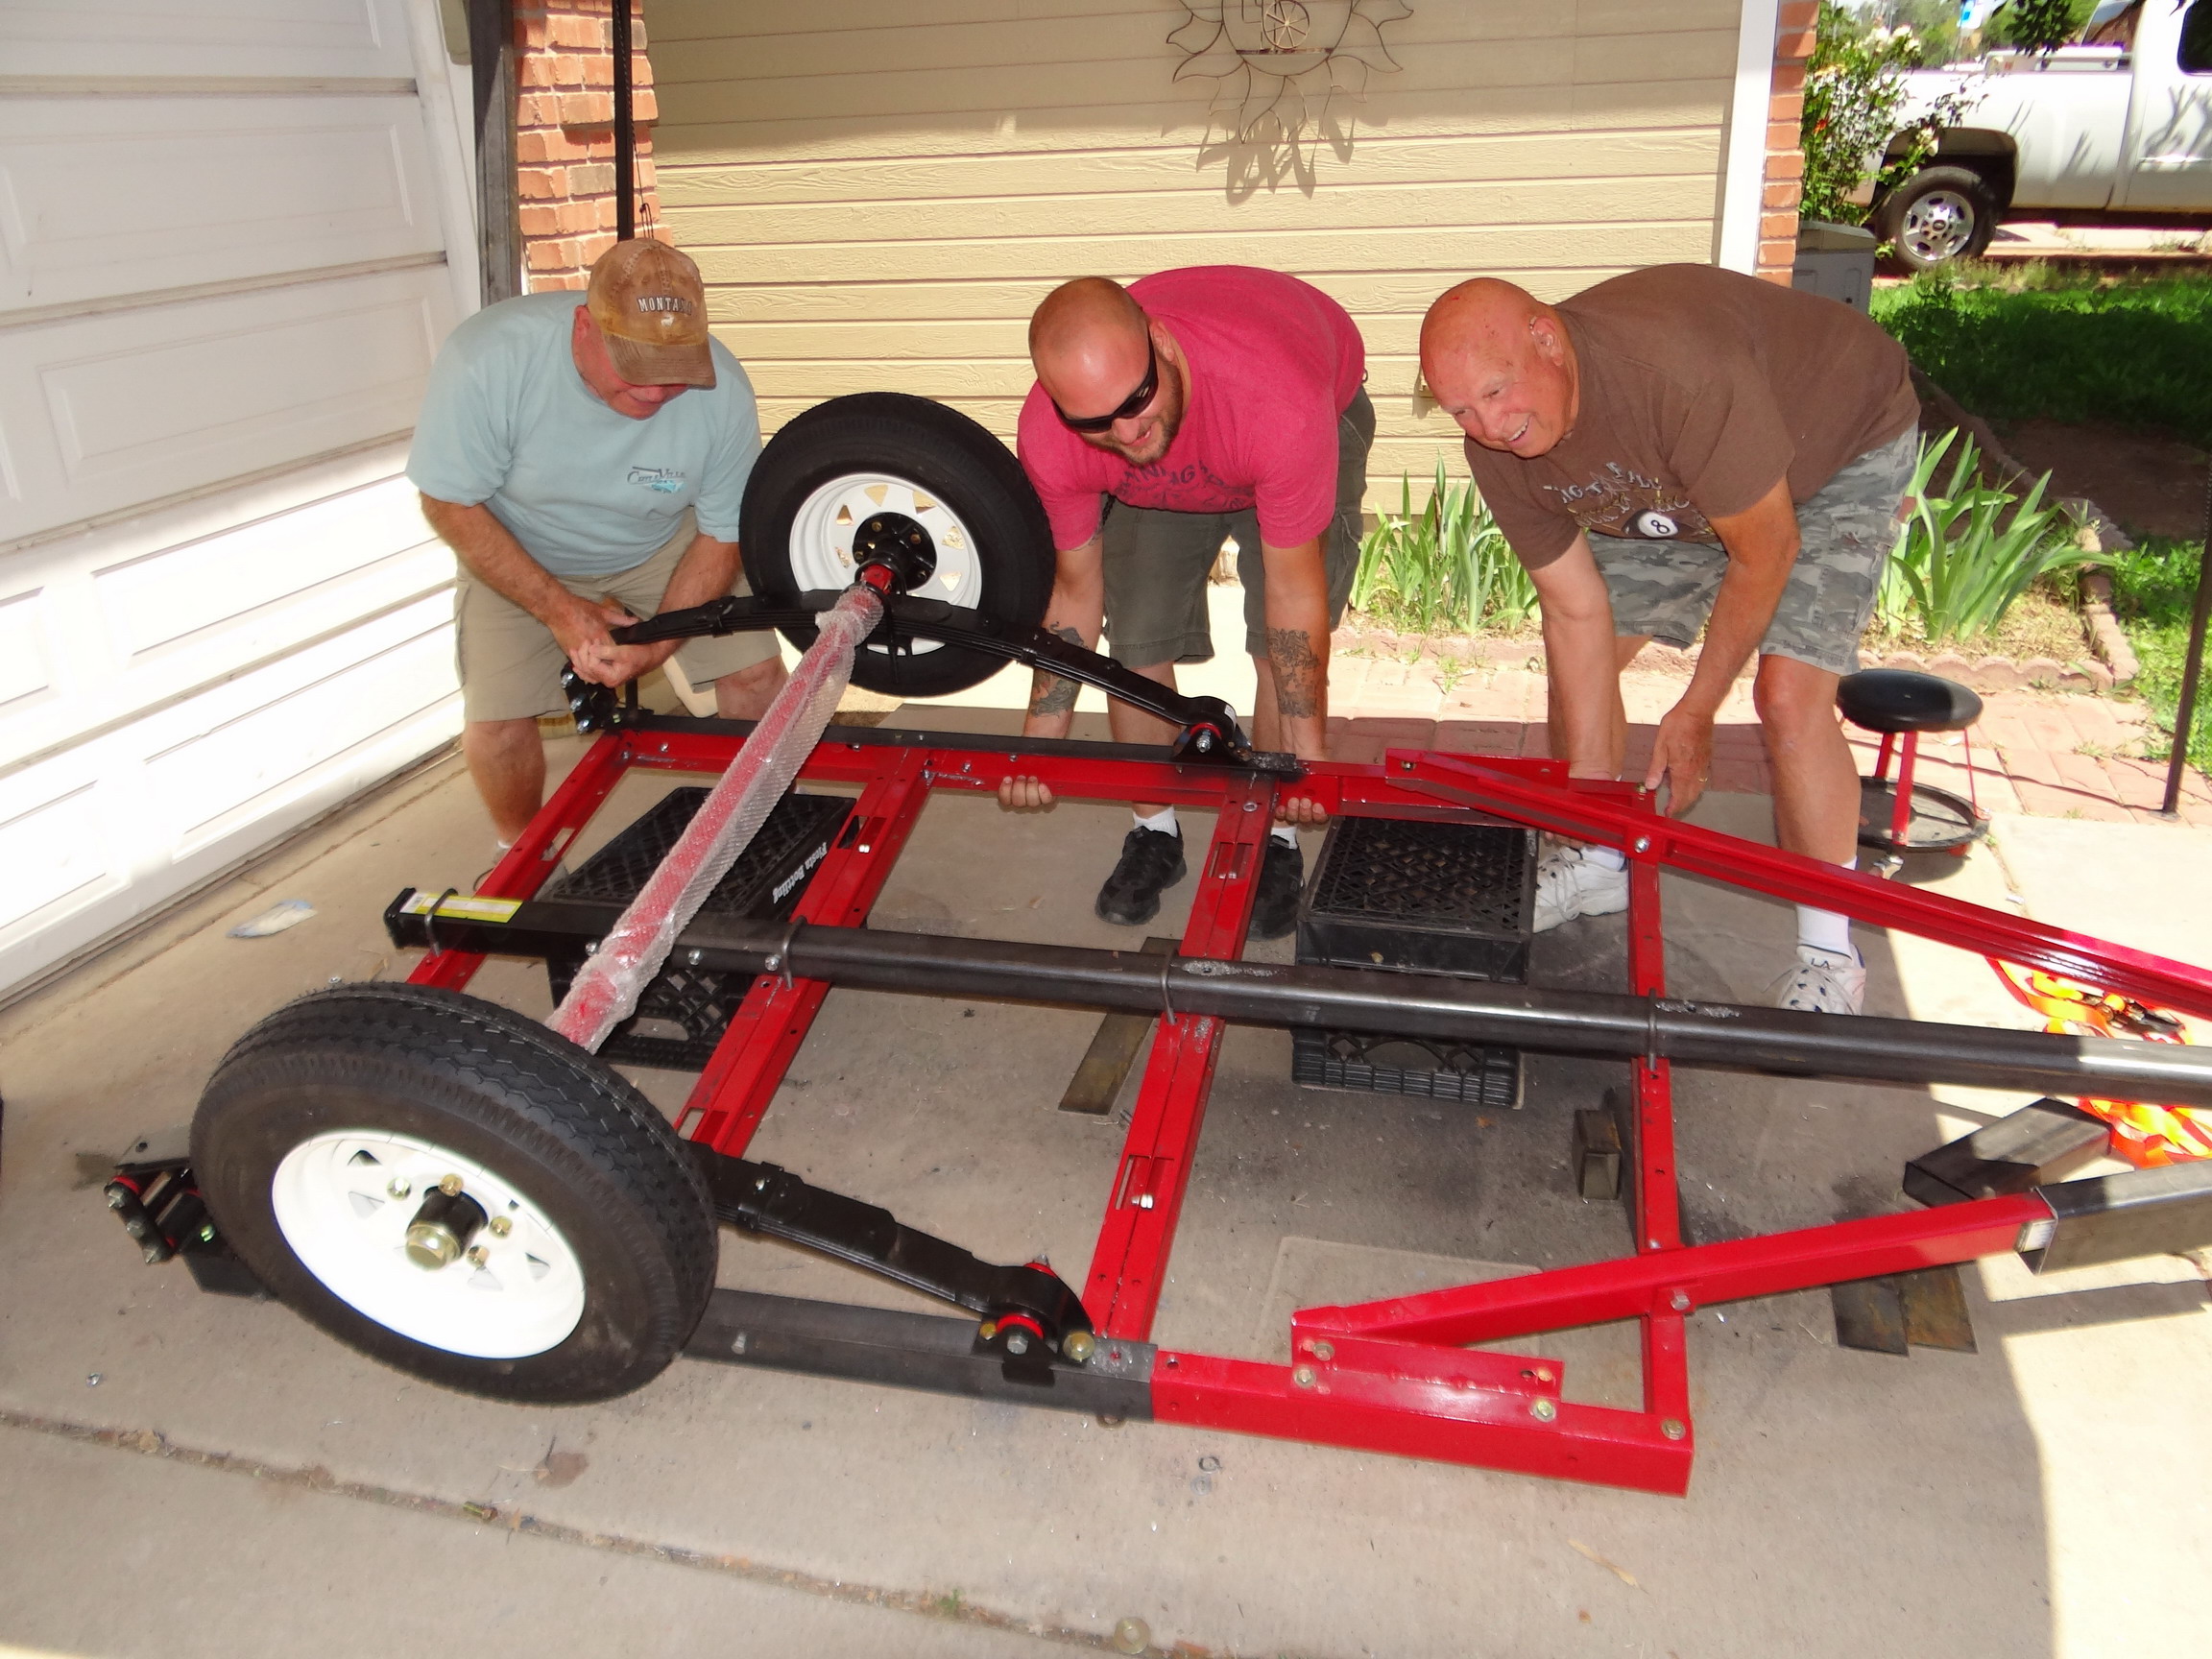
After two of the kits frame rails are cut we are ready to assemble the trailer frame. Once the front frame and tongue components are bolted together it's time to build the rear frame. The rear frame took less than an hour to assemble and square up. We now bolt it to the front frame as shown in the instructions, only it's two feet long instead of four.
Rear Frame Construction:


Once that is done, keep the frame supported and prepare to attach your 2x3 angle iron to each side lining up the edge of the iron with the rear edge of the trailer frame rail. Drill 1/2" holes thru the steel at all of the cross members and a few in between and secure it with Grade 8 bolts, not the ones provided with the kit. With the angle iron secured to the bottom of the frame drill 5 equally spaced 1/2" holes in the side of the angle iron into the frame rails and again secure with Grade 8 bolts.
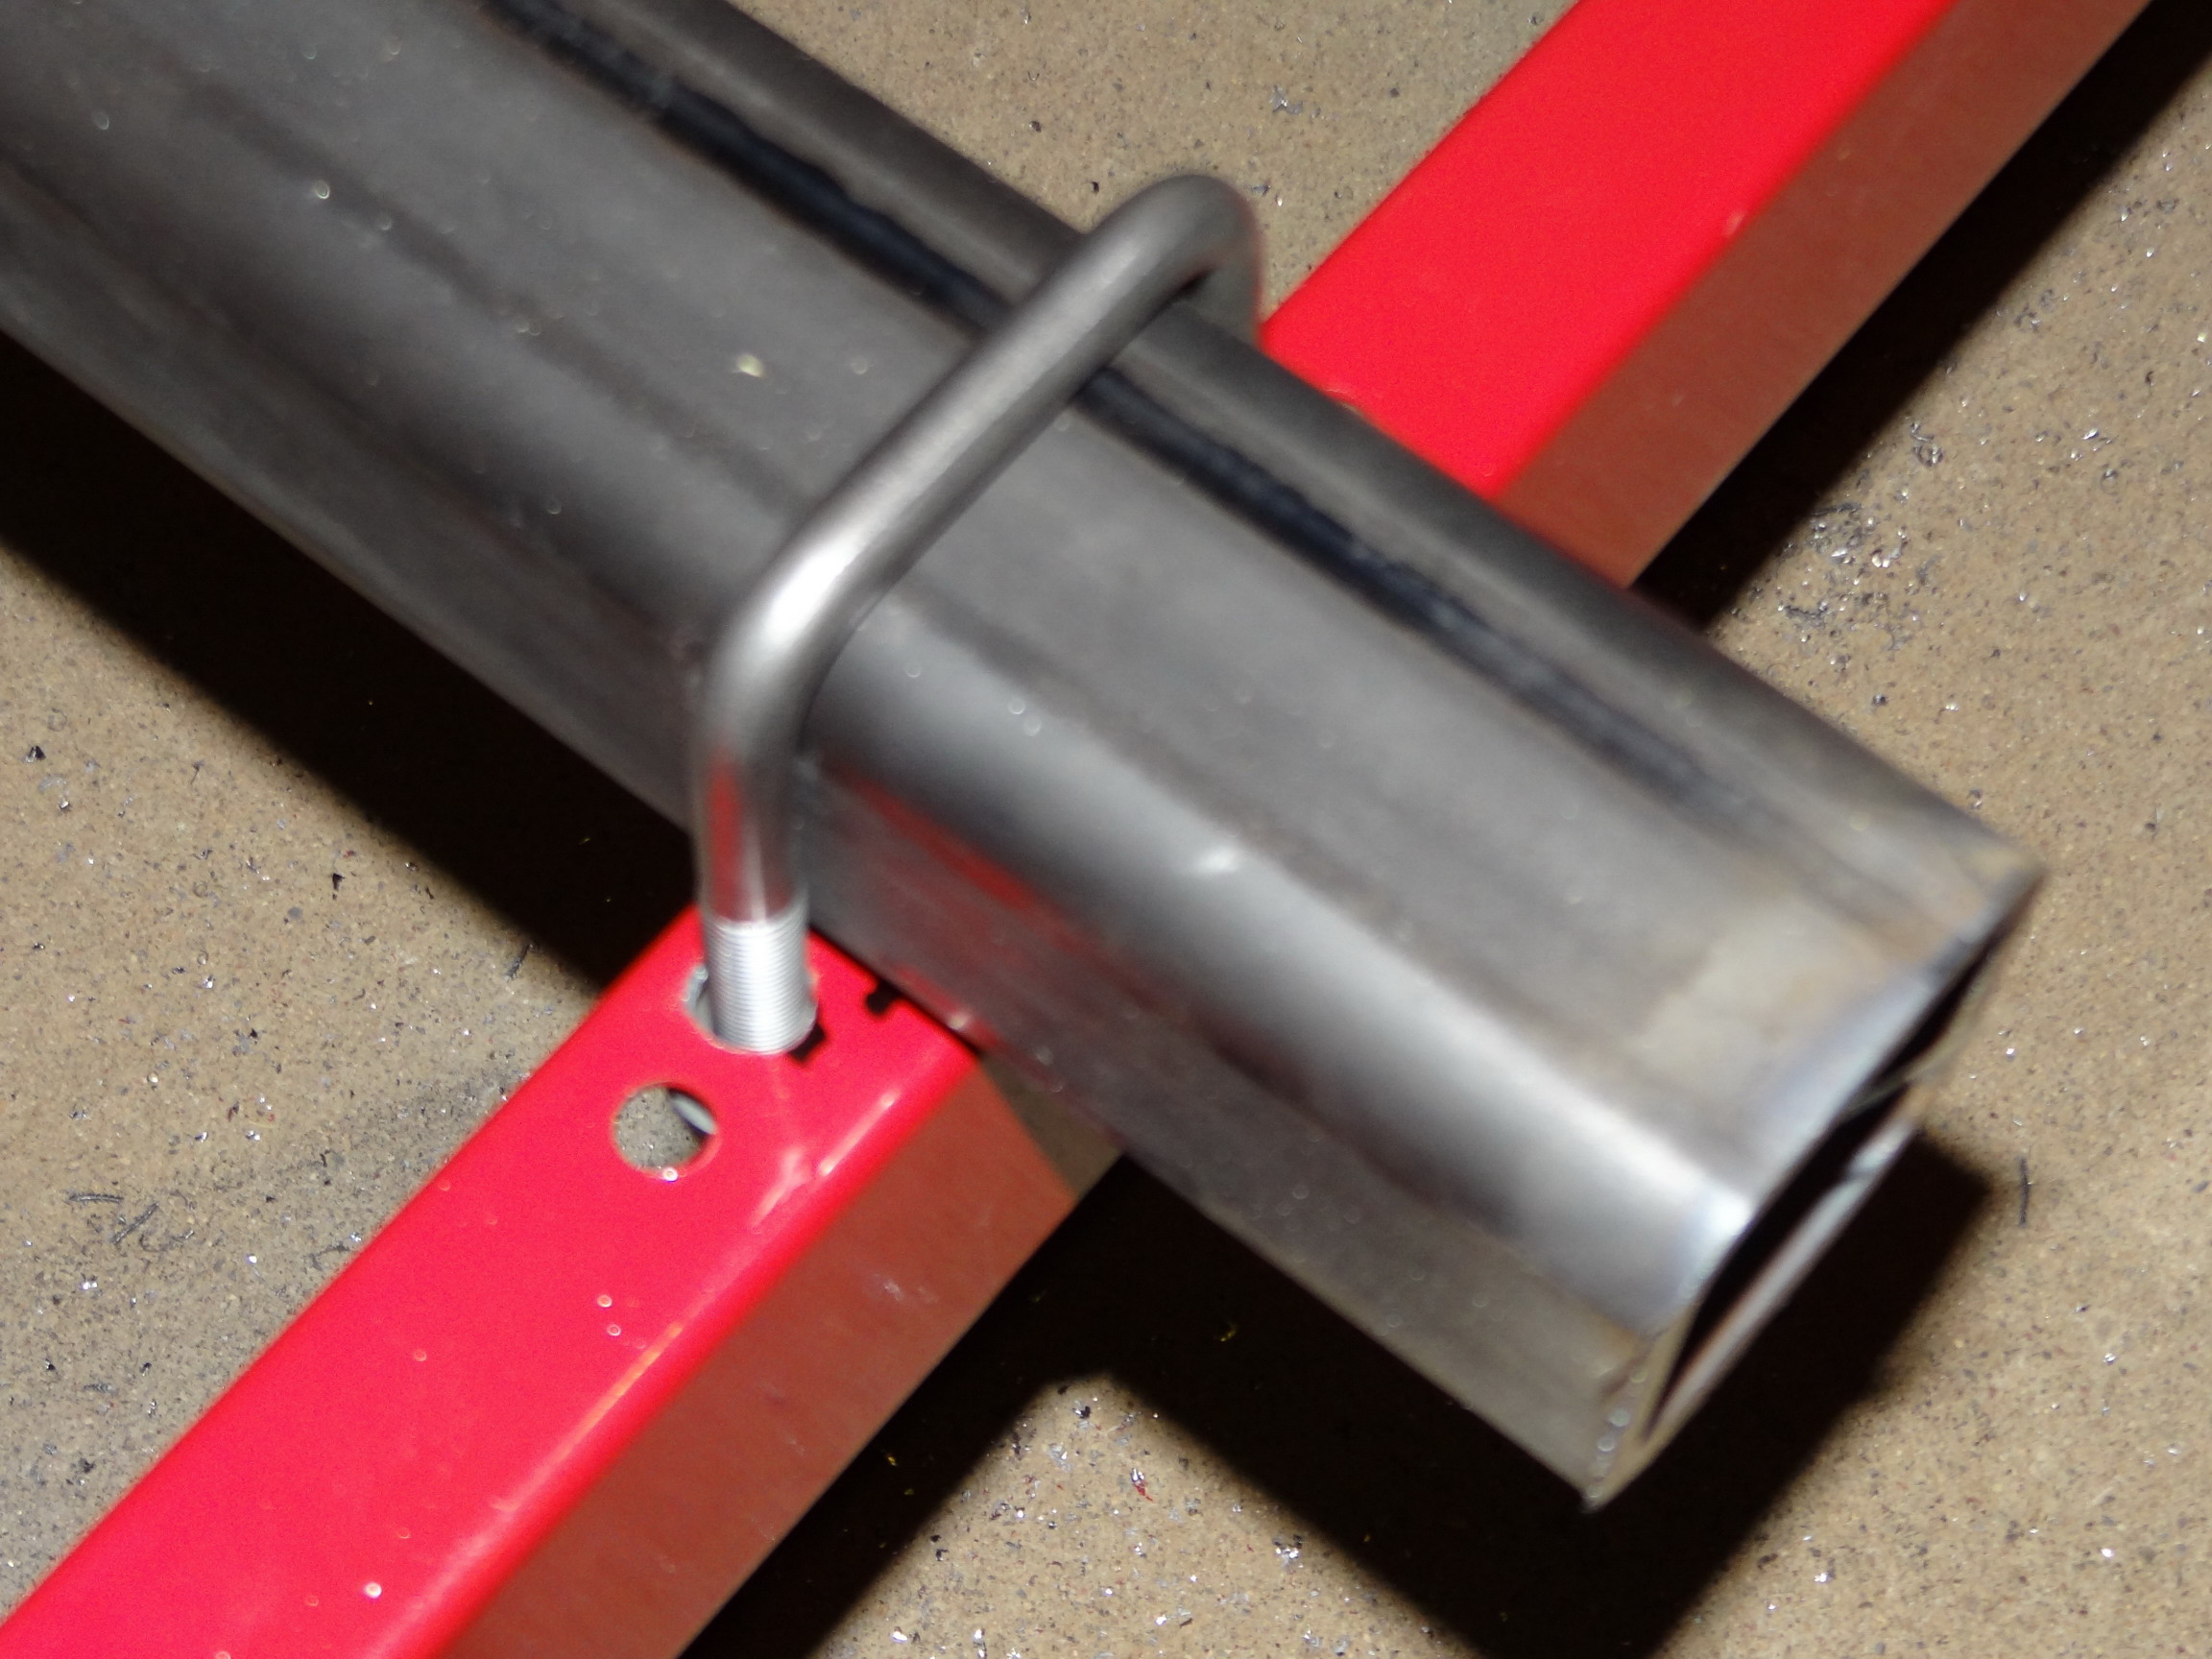
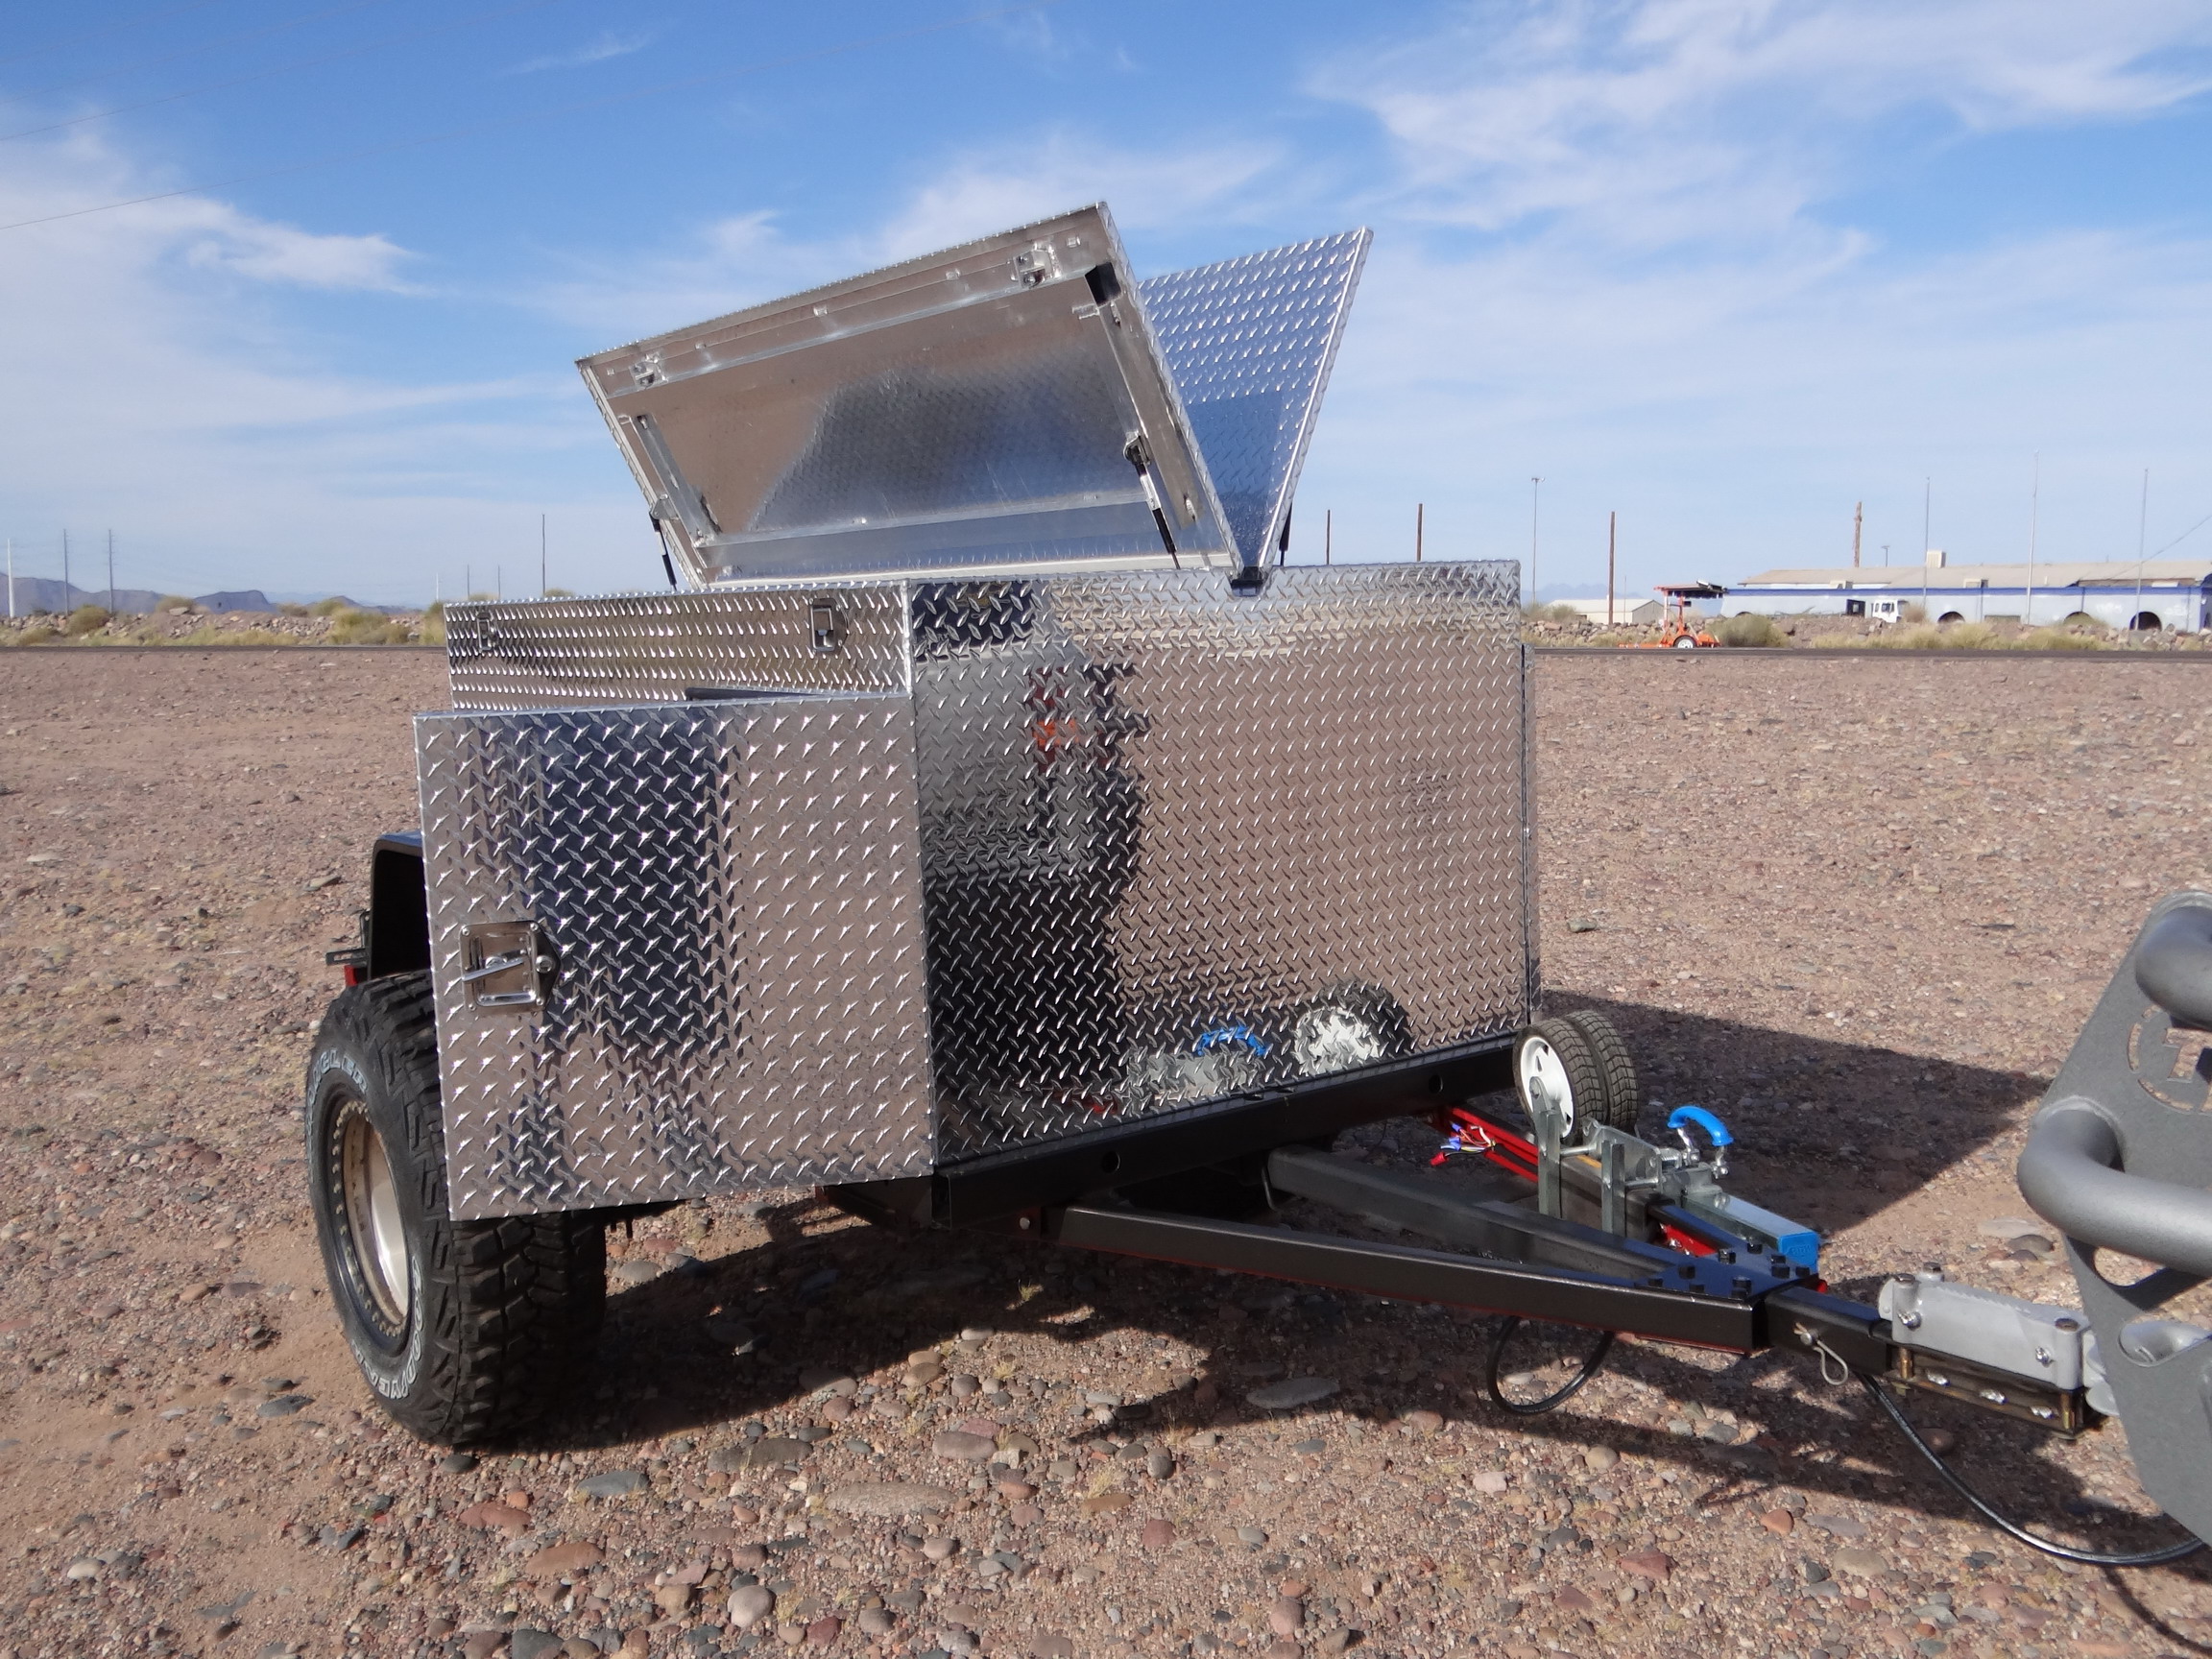
With the angle iron attached we move to our 2nd modification to beef up our trailer frame. We need to attach the full length hitch tubing (2 1/2" x 2 1/2" x .250 square tube). I decided to cut the hitch tubing to 9'6". It will be fastened to the frame with six 2 1/2" x 3 1/2" 7/16th's square u-bolts that were custom made for about $4 each at Straight Line Suspension in Mesa, AZ. Not only will this add strength to our trailer, it will also allow us to use a detachable front coupler to hinder theft and to allow receiver mounted accessories like a "Bumper Dumper" or a bike rack on the rear.
Angle Iron and Hitch Stock Ready for Bolts:


With the hitch stock now bolted to the trailer frame, it's time to double check the squareness of the trailer, make any necessary adjustments and tighten all the bolts again. With everything done so far we are ready to bolt on the springs and flip the frame over making it right side up. Once you've done that, its time to mount the 2x3 square tubing on the front and rear of the frame. The long piece will go on the back, the 4ft piece on the front. We've spent about $70 on square u-bolts and Grade 8 bolts which we'll add to the final cost.
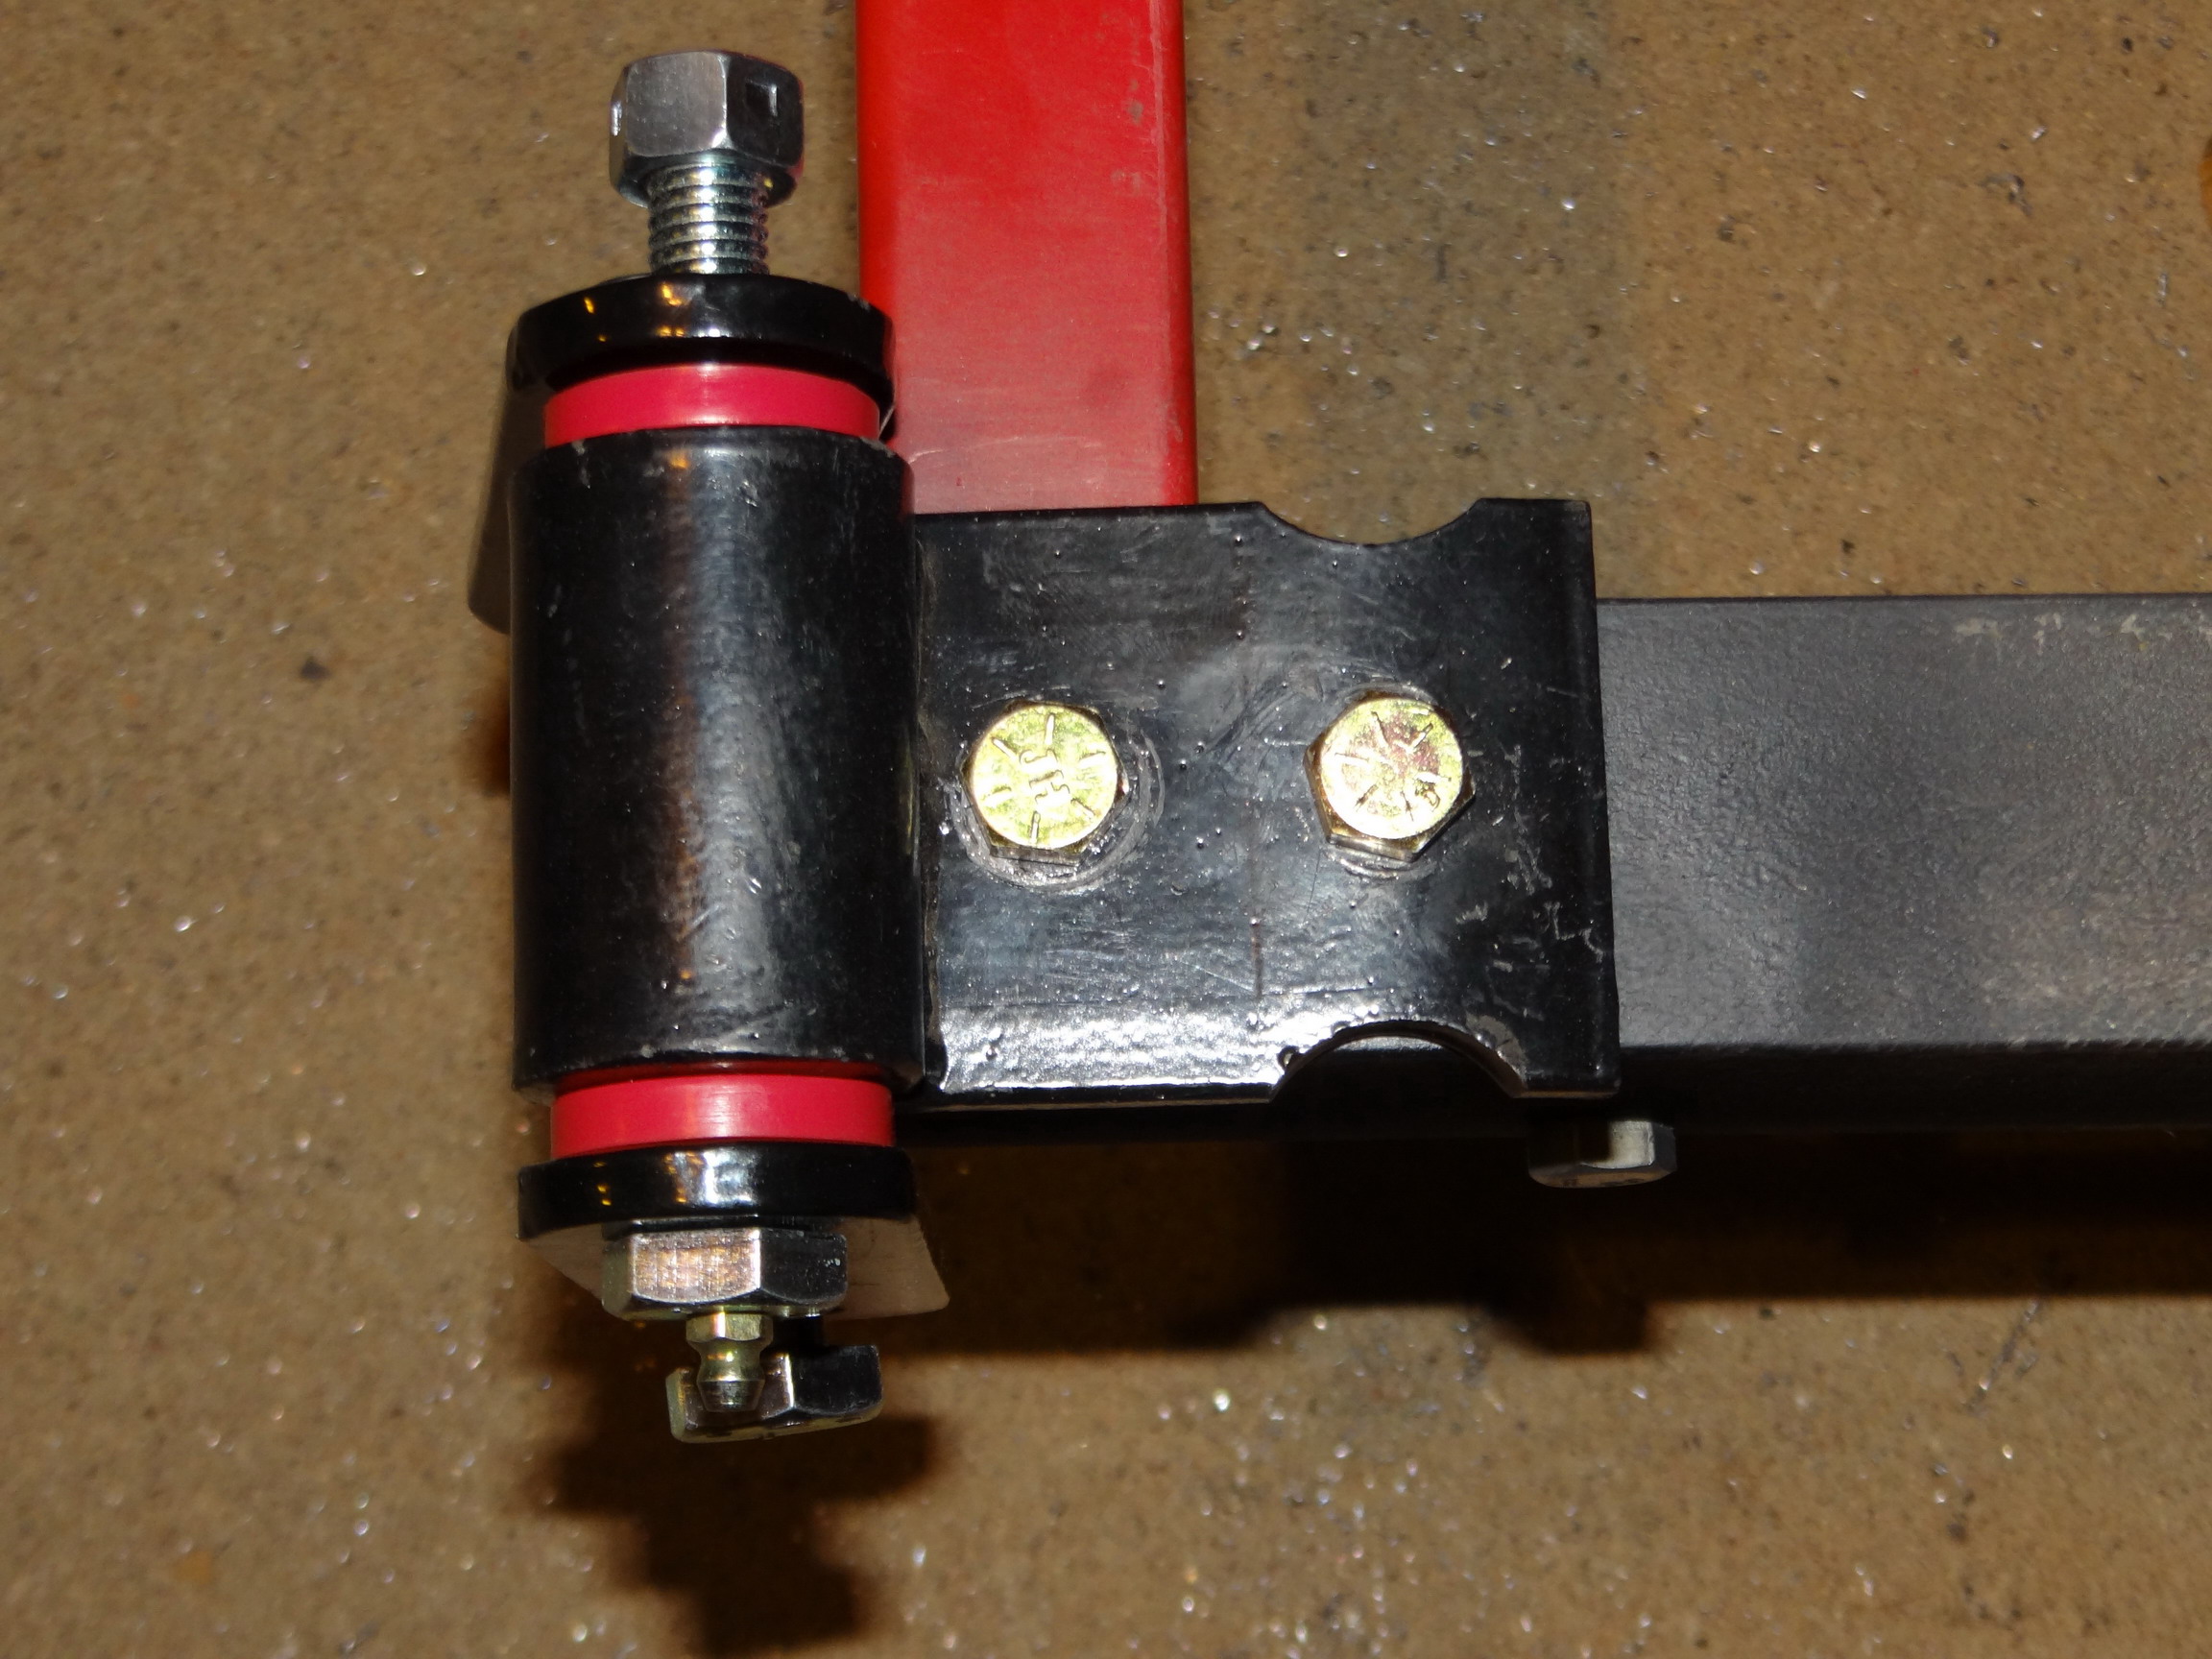
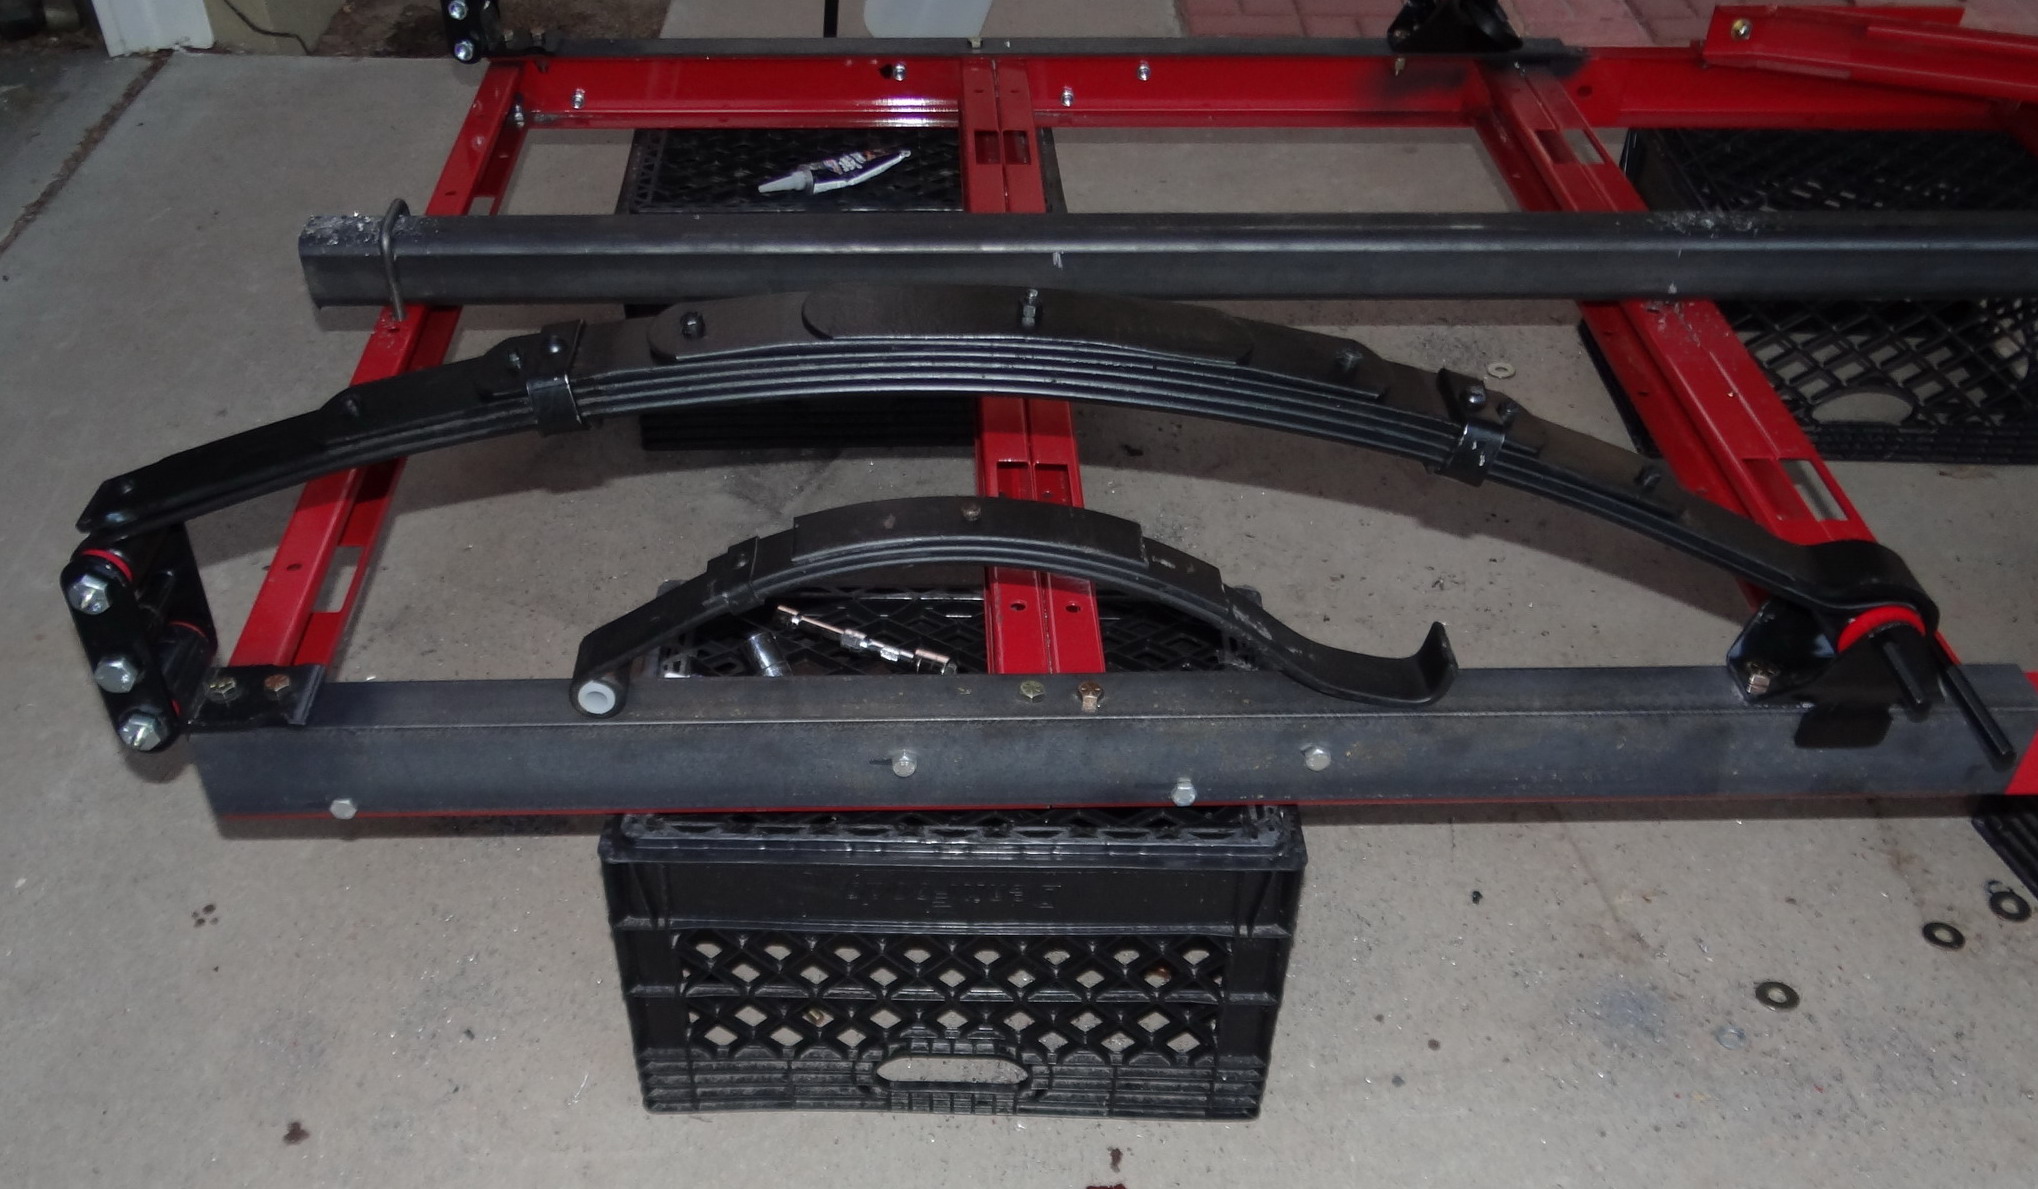
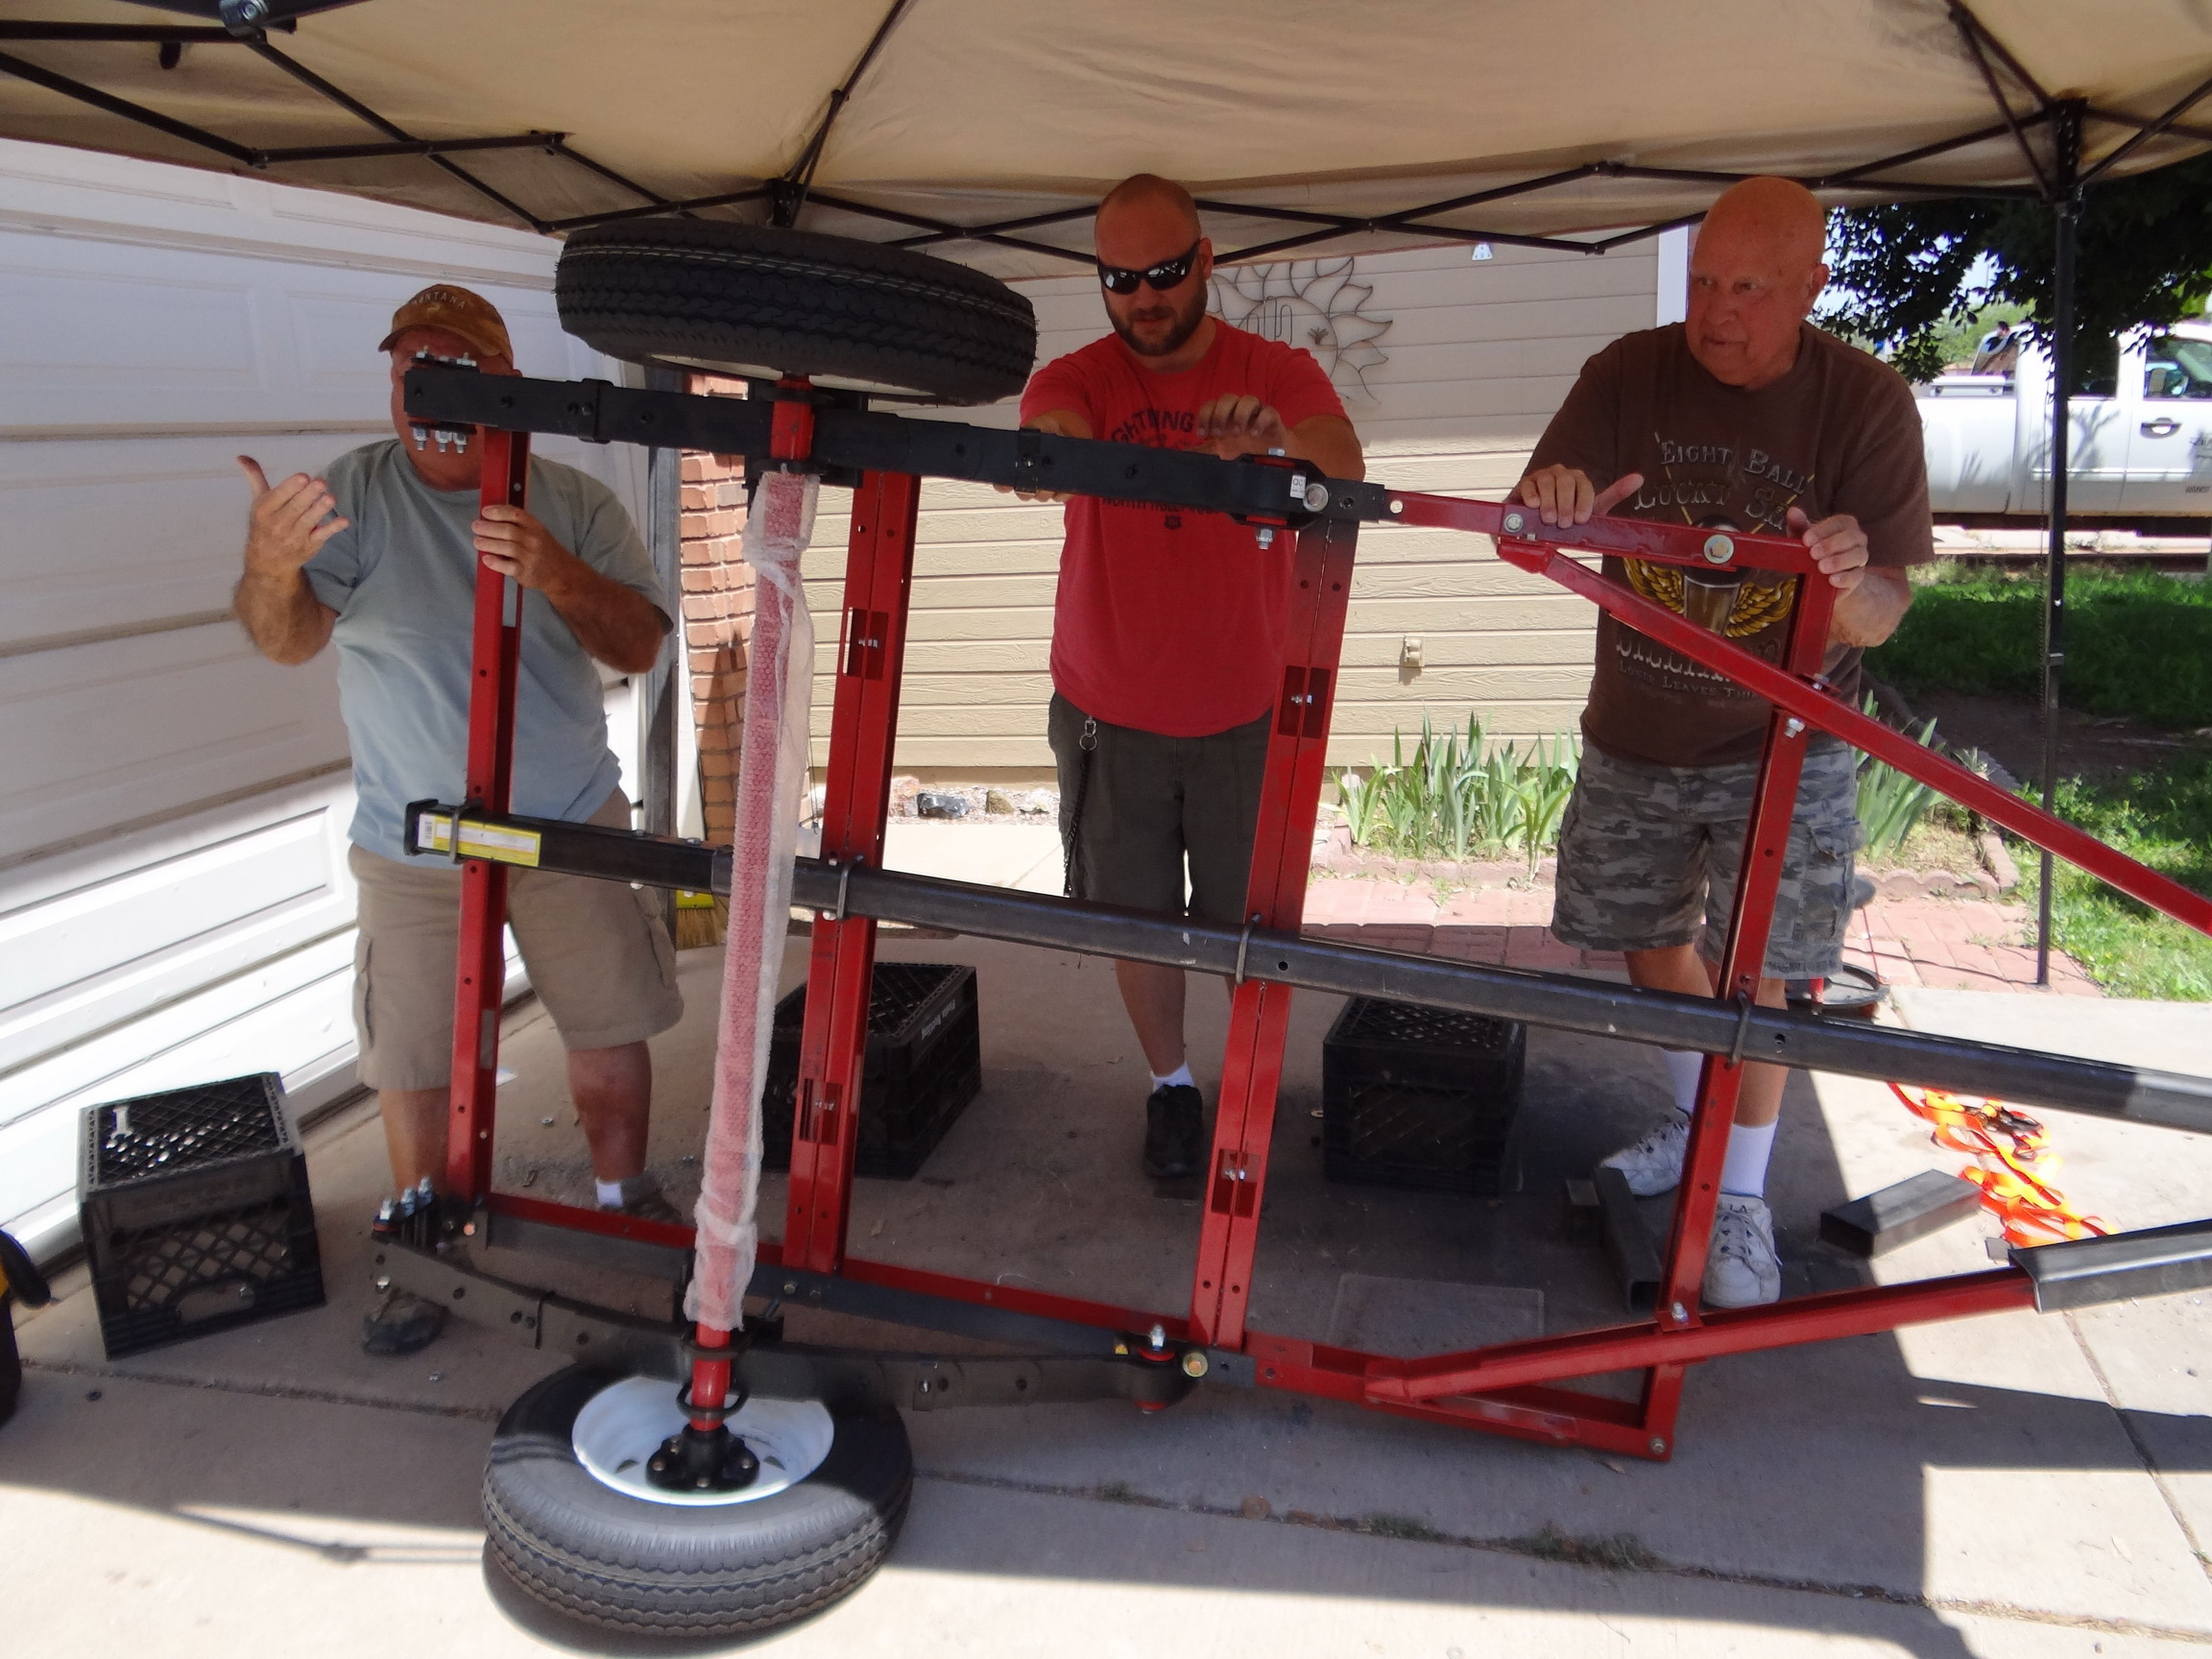
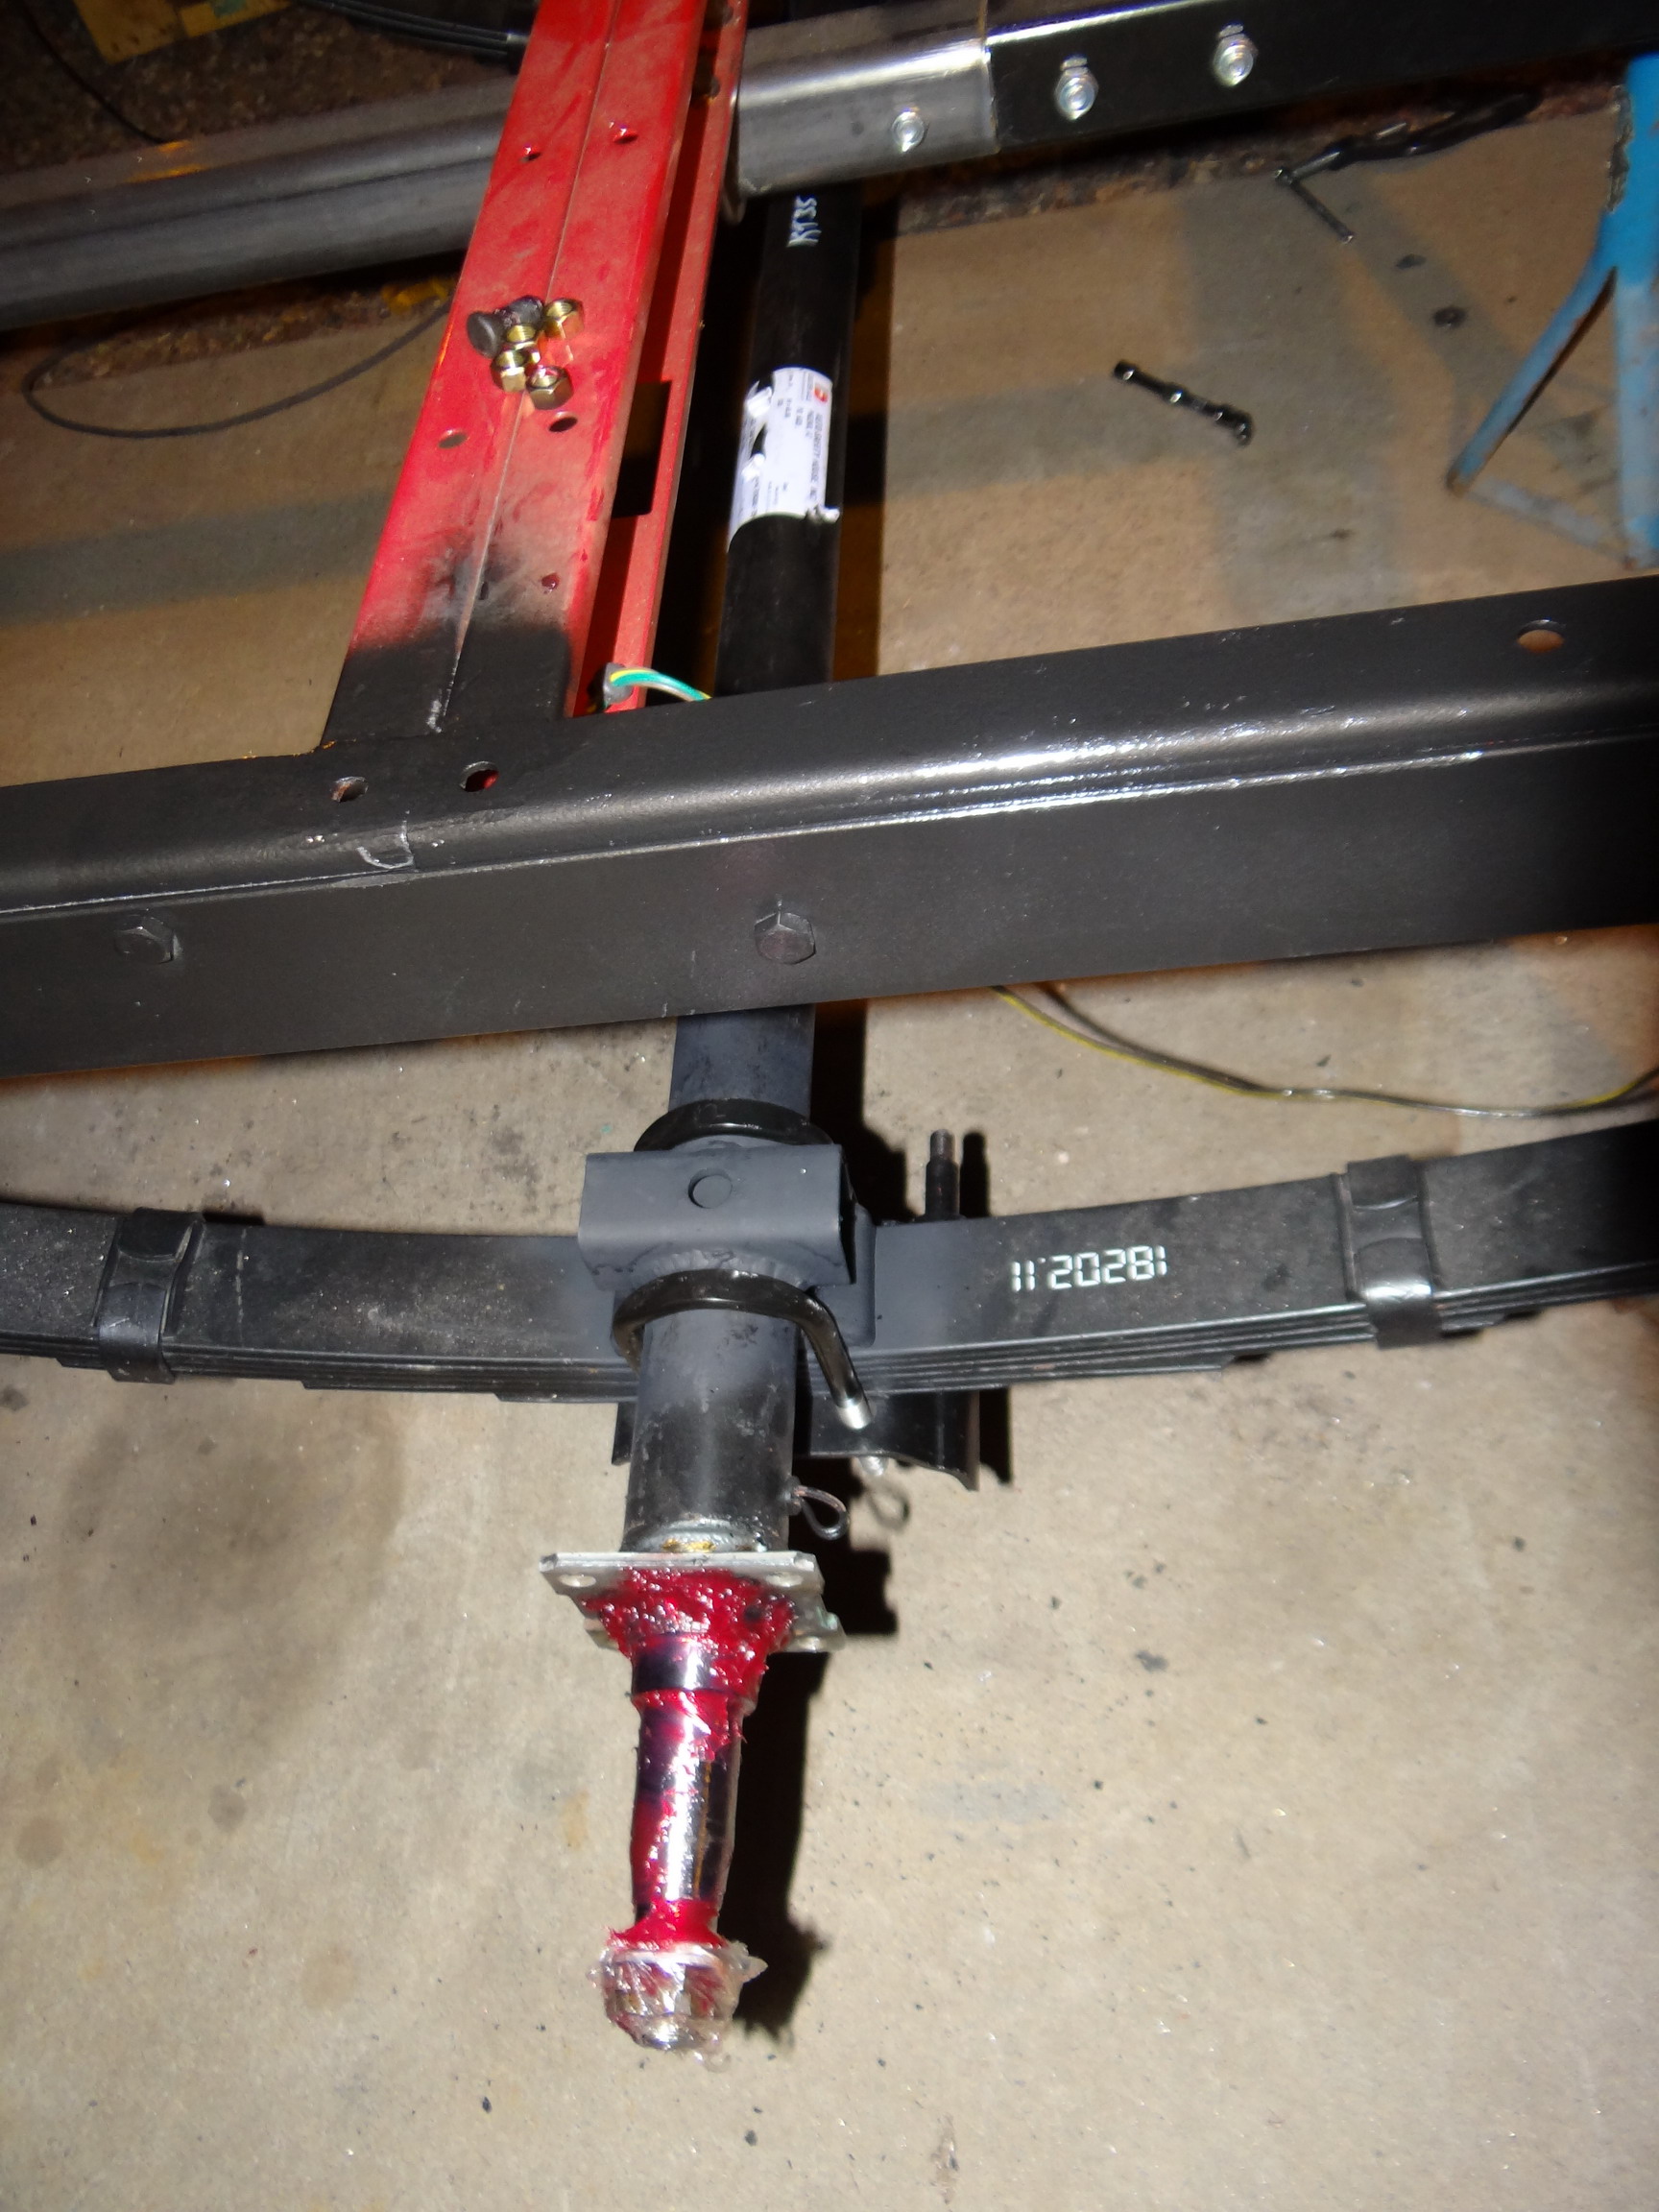
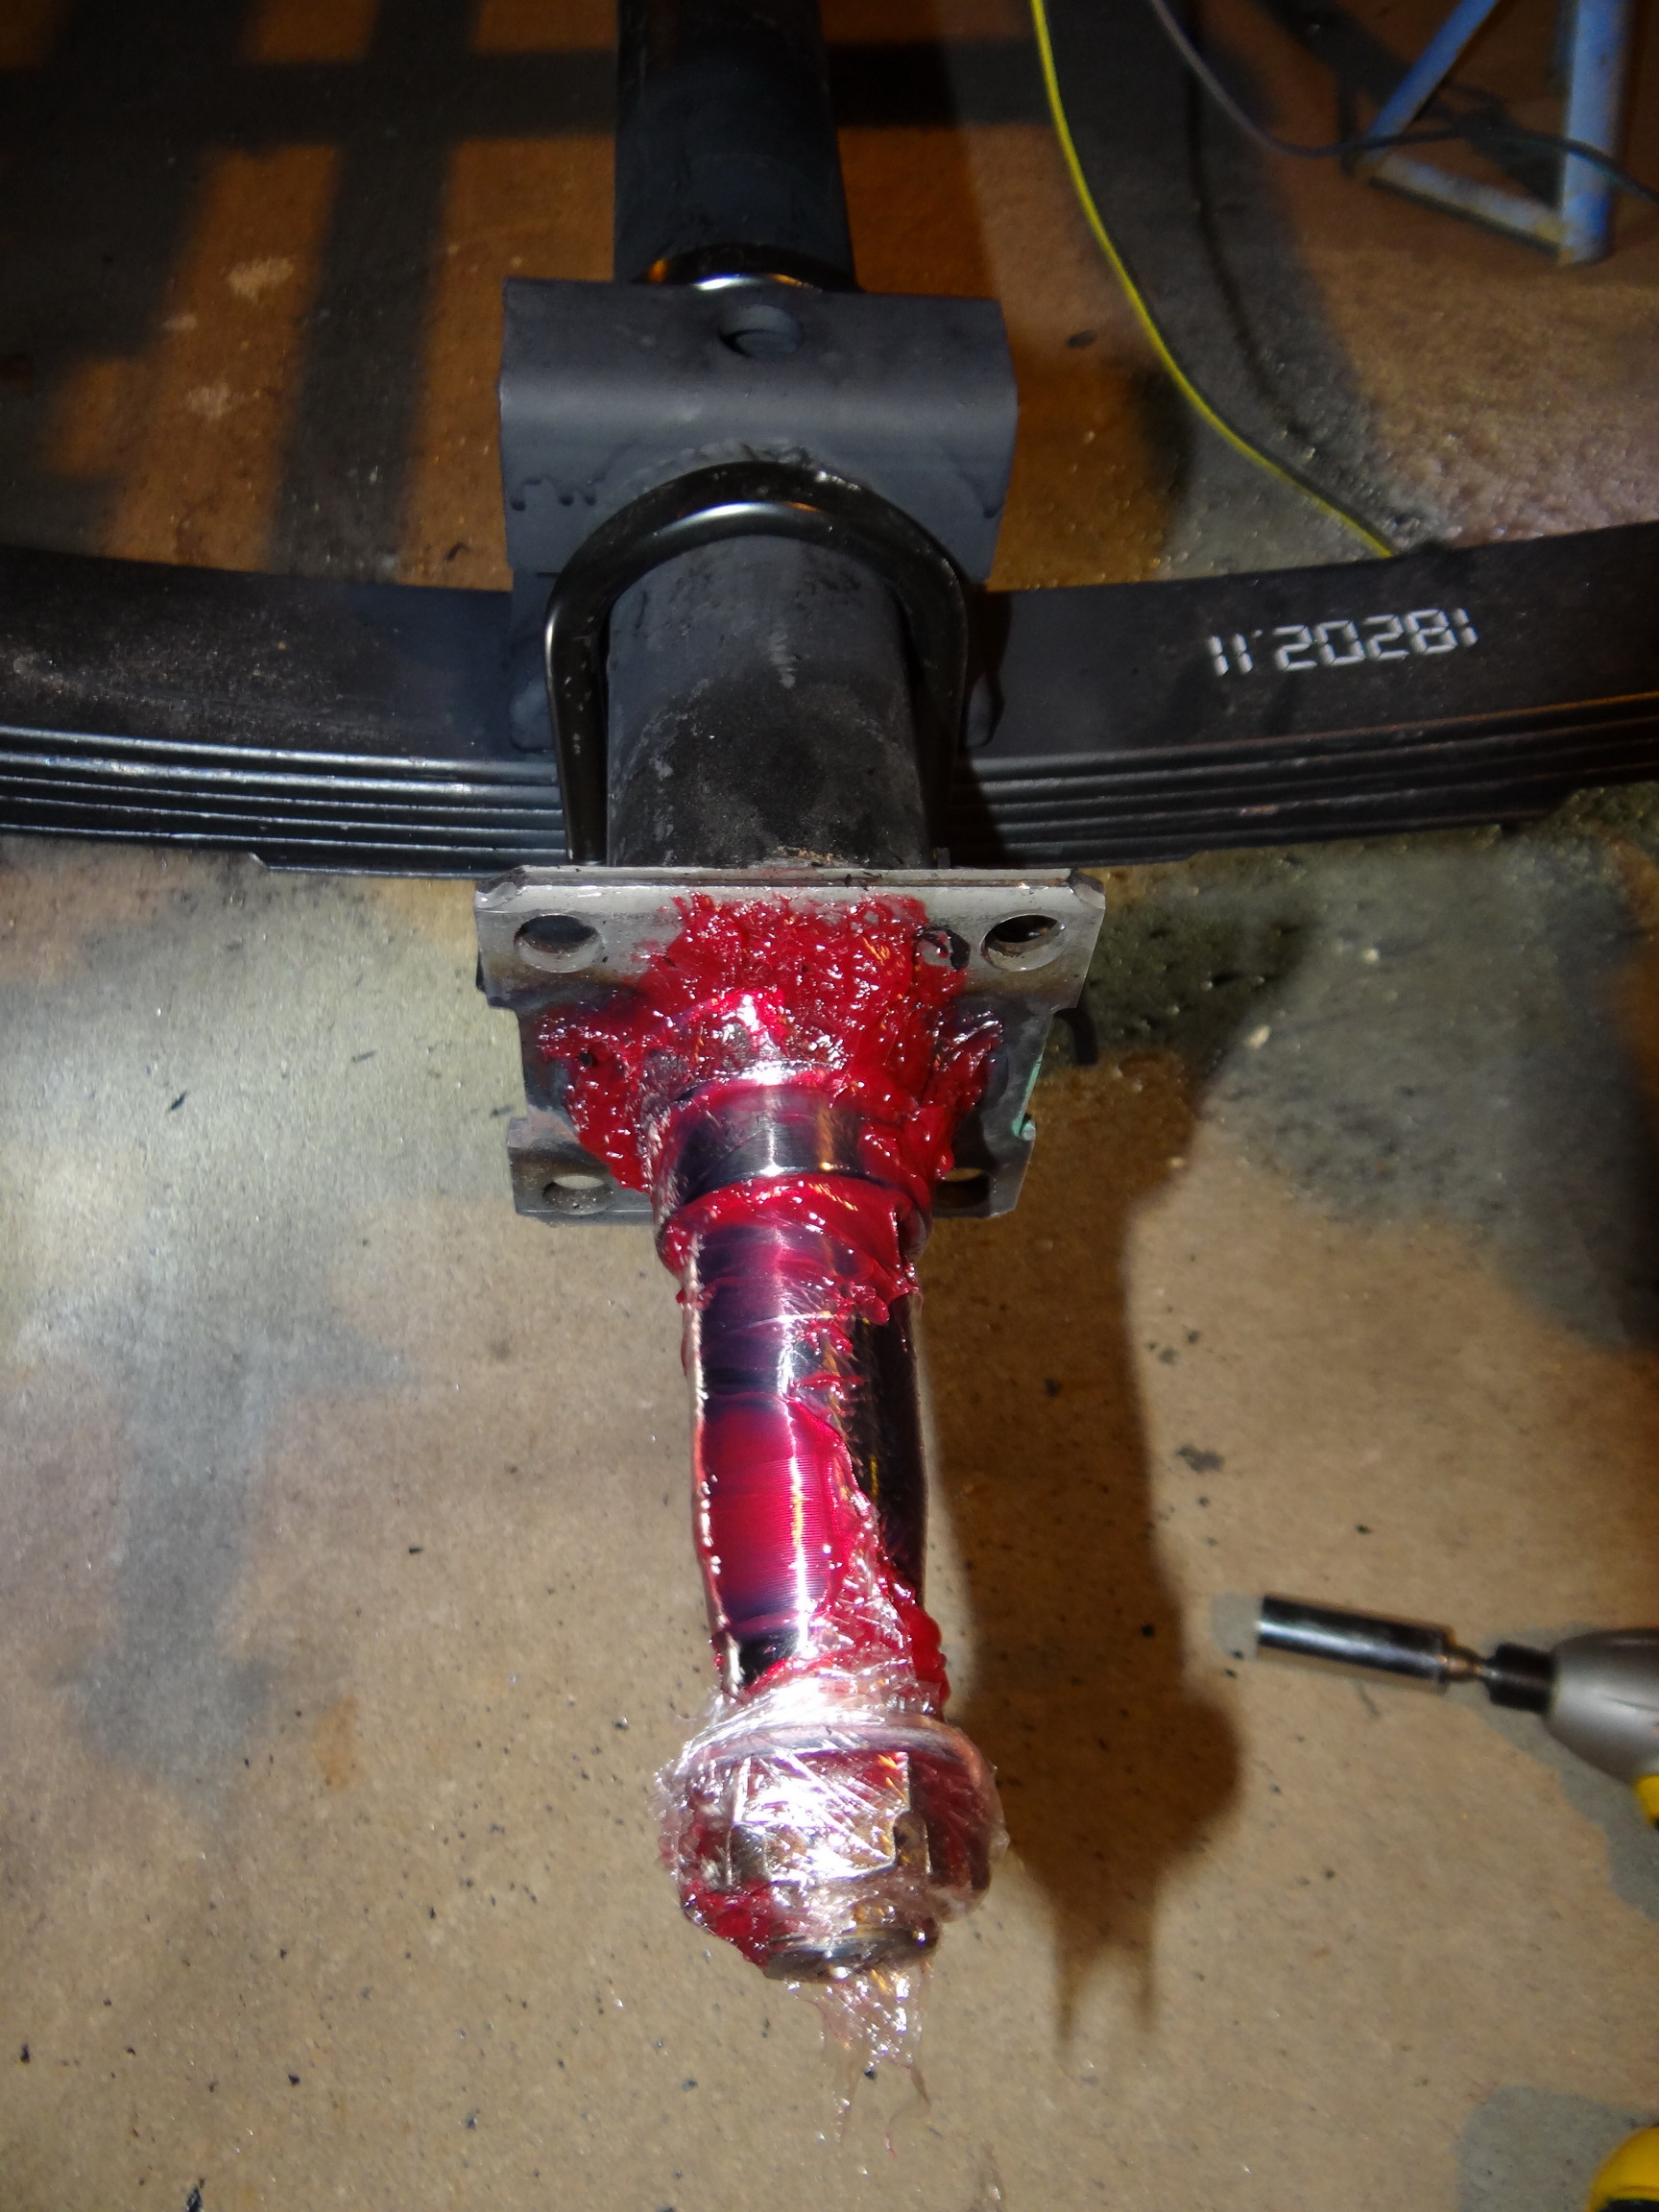
This is Saturday, Day 2 of our frame build. The suspension parts are laid out and inventoried. The poly bushings need installed in the spring eyes so we'll do that first. I'm going to mount the main eye mount at the front edge of the angle iron and setting it on the frame, it's going to fit perfect there. Half-inch holes are drilled and Grade 8 bolts are again used here. Now we move to the rear of the frame to install the front shackle mount. We do that at the very rear of the angle iron as shown in the picture. I assemble the heavy duty shackle with greaseable bolts and we are now ready to mount the spring to the frame.
Attaching Mounts for Springs:
It's time to install our springs. We are using six leaf CJ7 rear springs that we ordered from Omix-ADA. We also ordered the spring install kit from them which includes shackles, mounts, bushings and bolts. I guess we could have gone out to a junk yard and picked up some 40 year old saggy/worn out springs but how would they perform? We still would need all the brackets and bushings so it just makes sense to buy new and Omix-ADA had everything we needed in stock with a 5 year guarantee.
Mounting Springs and Comparing Kit Springs to CJ7 Springs:
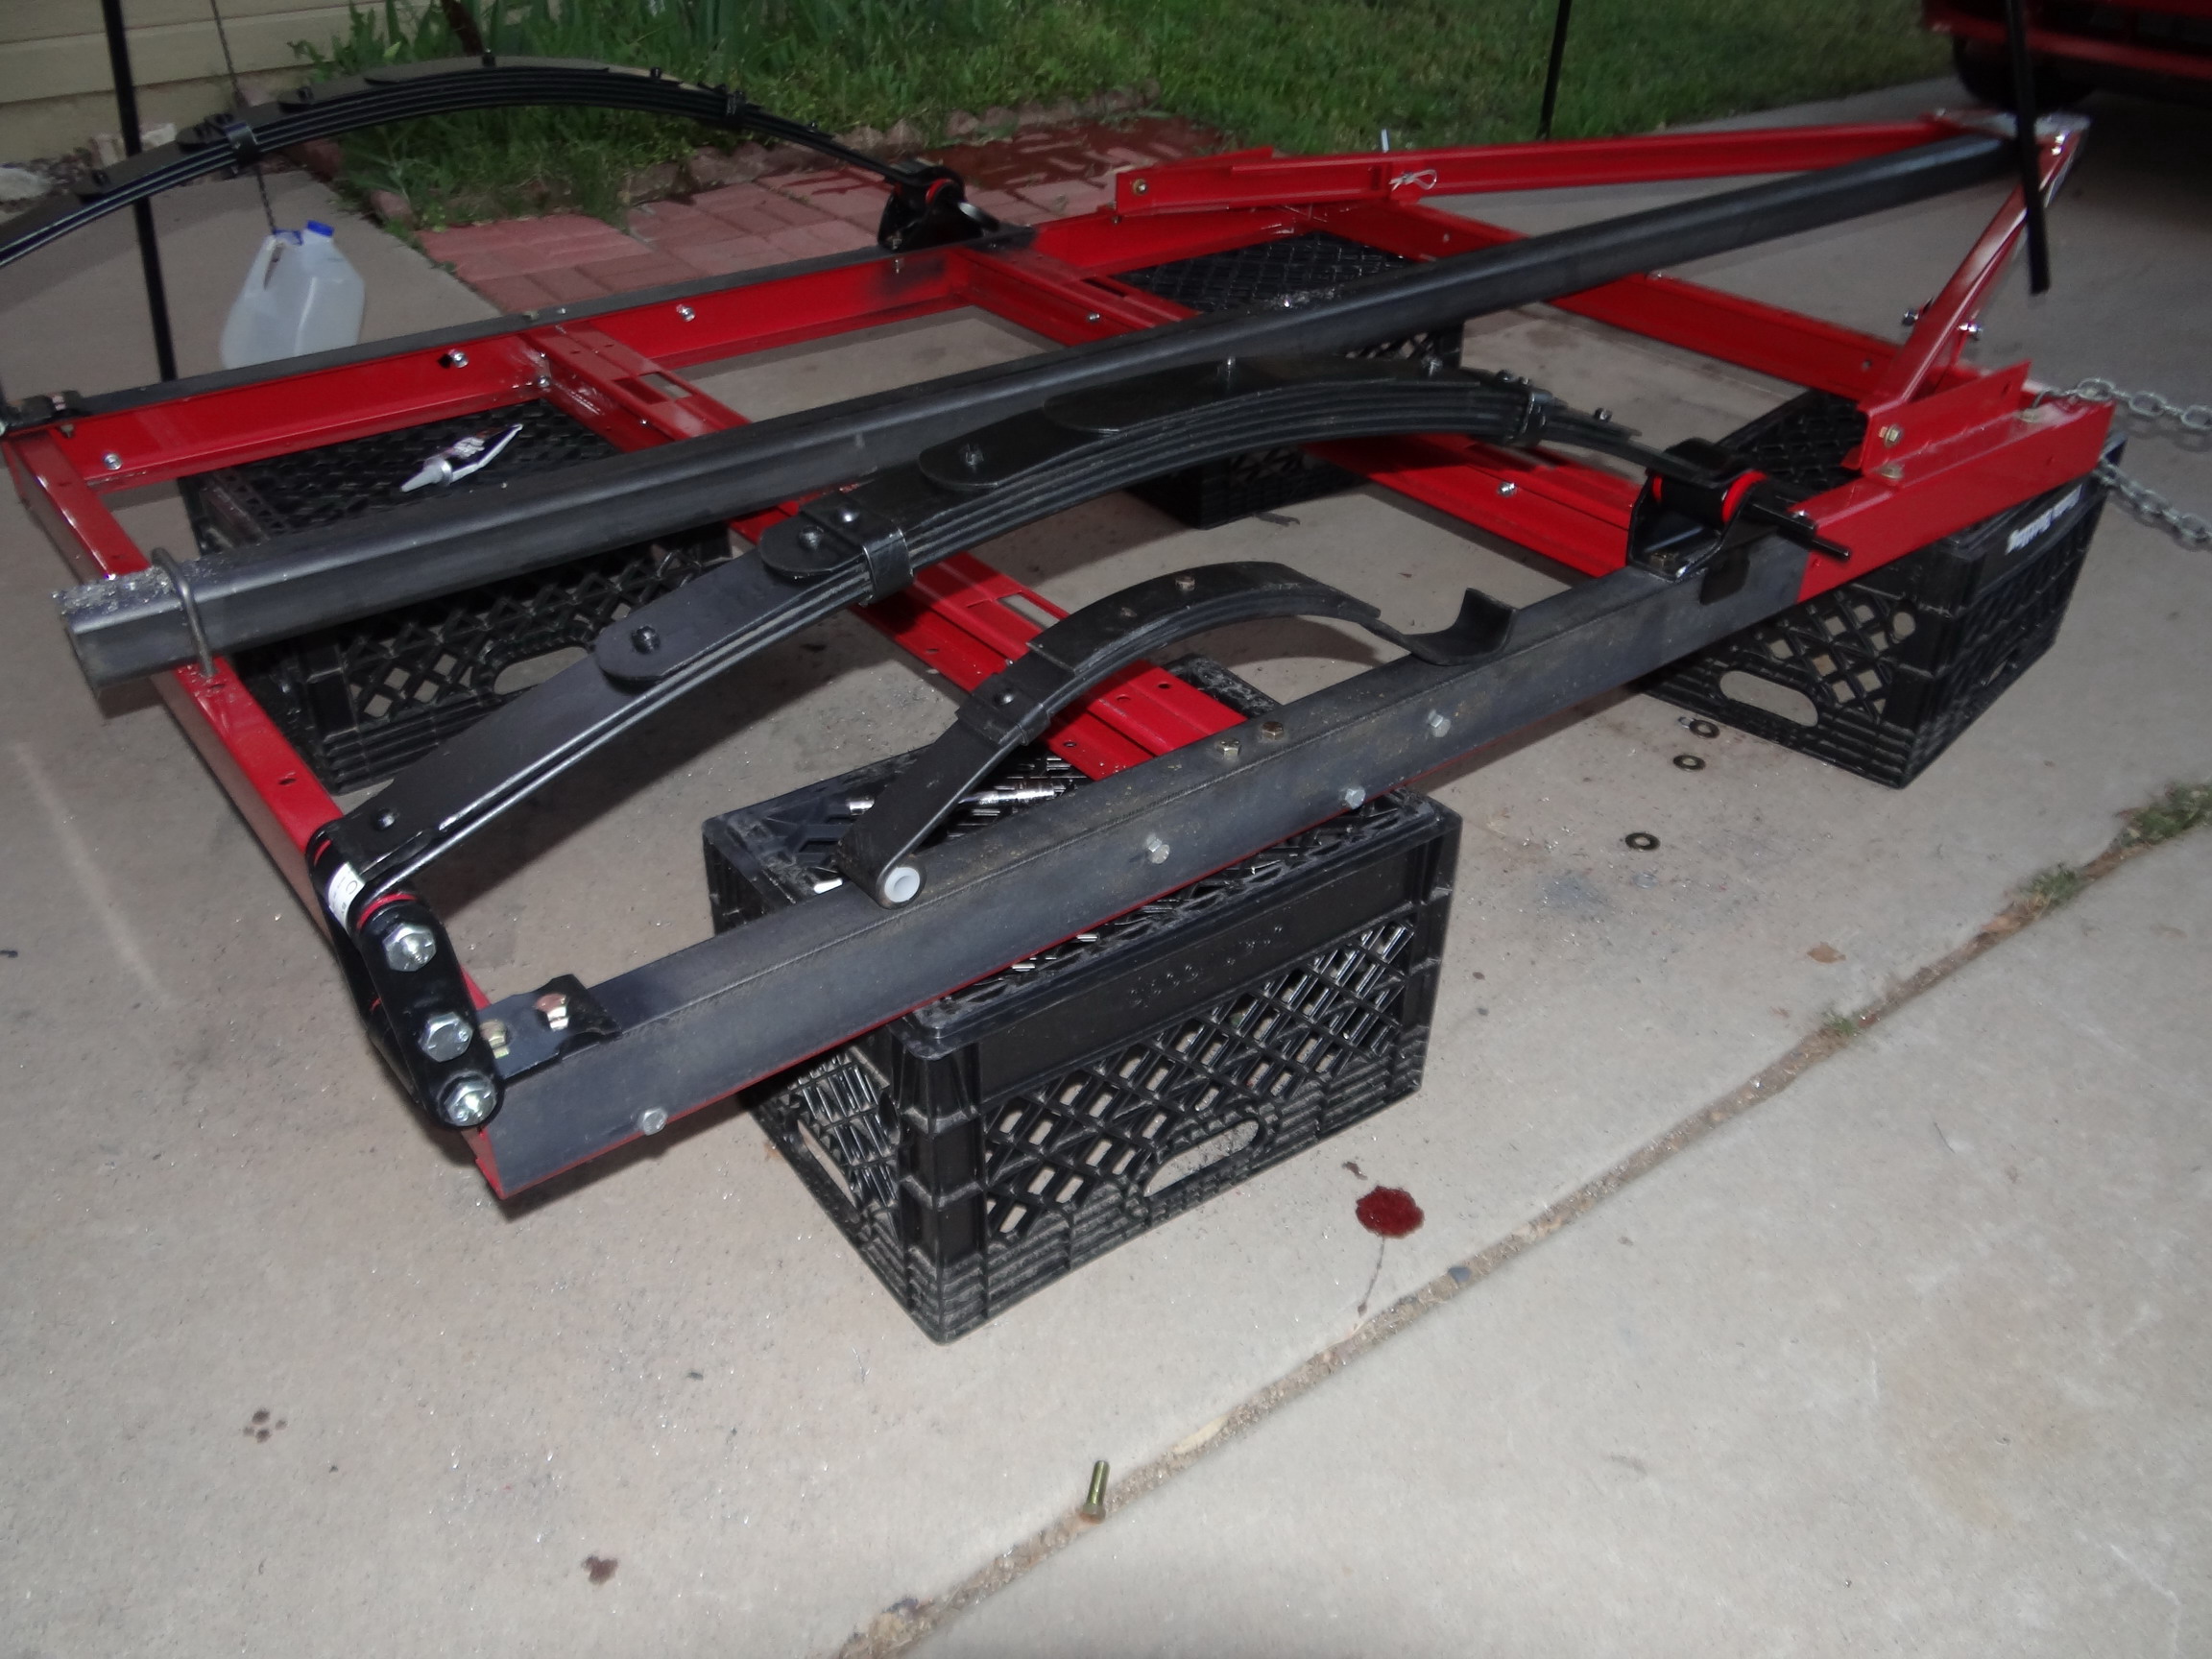

The next thing to do it to bolt the axle up. We are going to temporarily bolt on the kit axle and wheels until our 3500# axle is ready to pick up in a few days.
You have to decide if you want the axle spring over or spring under Most miltary trailers I've seen are spring under, this keeps the COG down and the trailer more
stable on and off road. I'm going to also make this one spring under when the new axle gets installed.
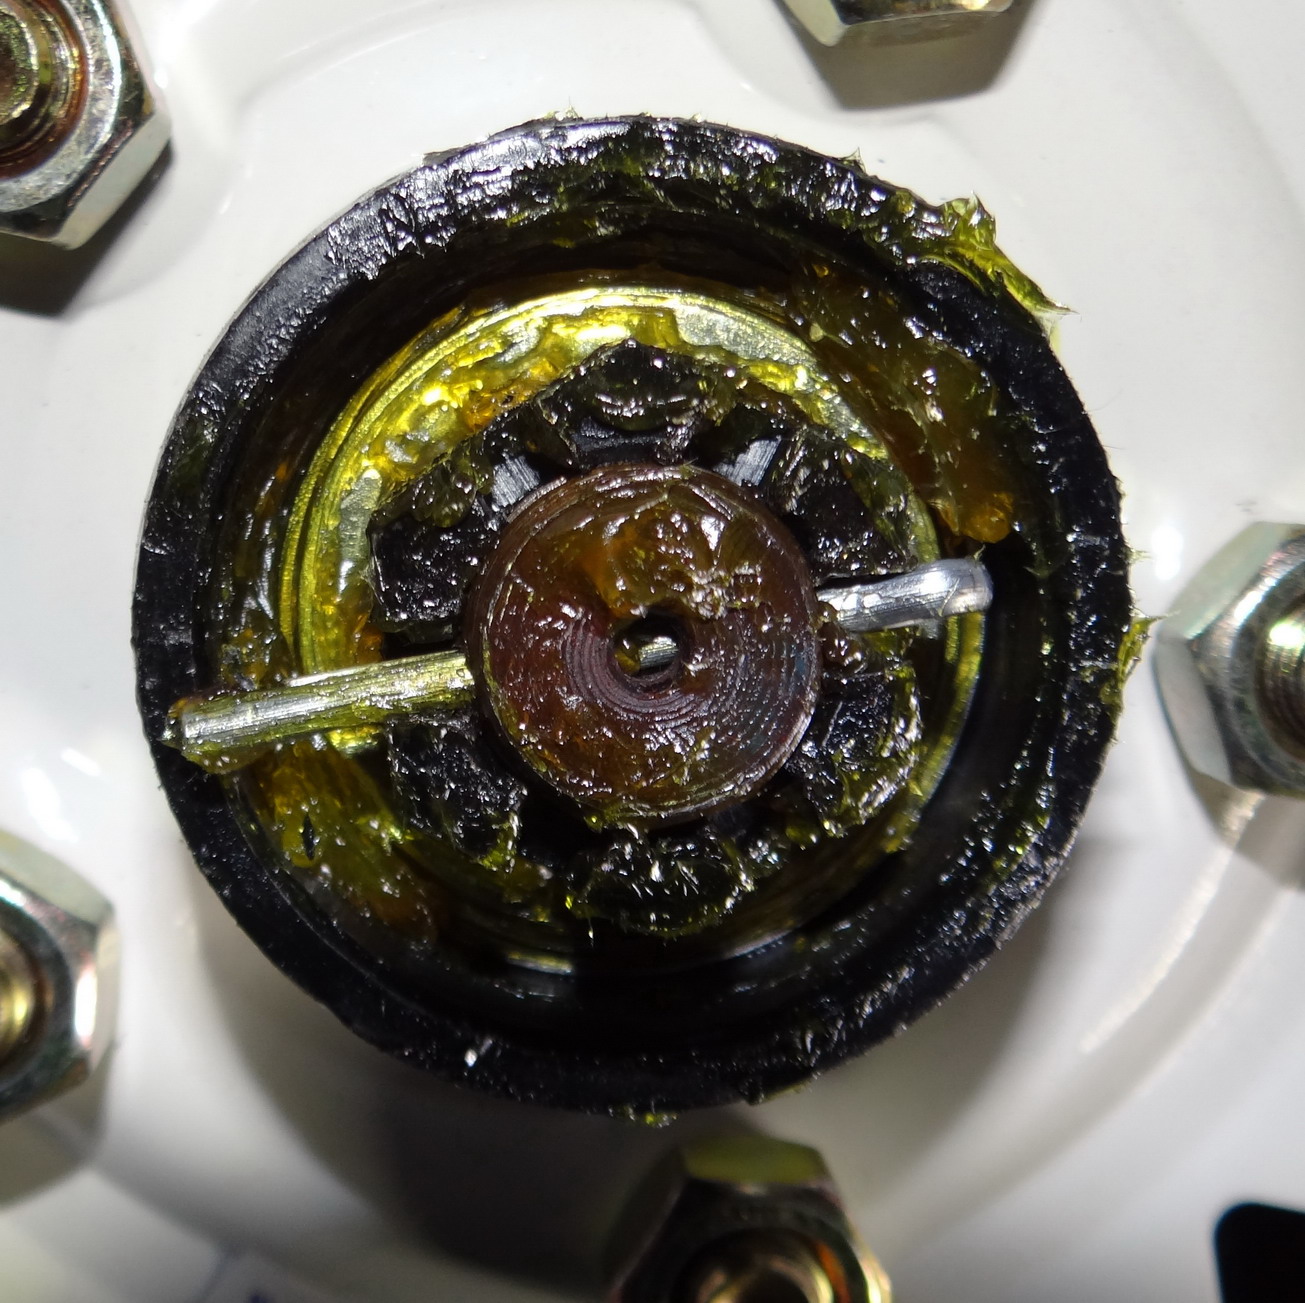
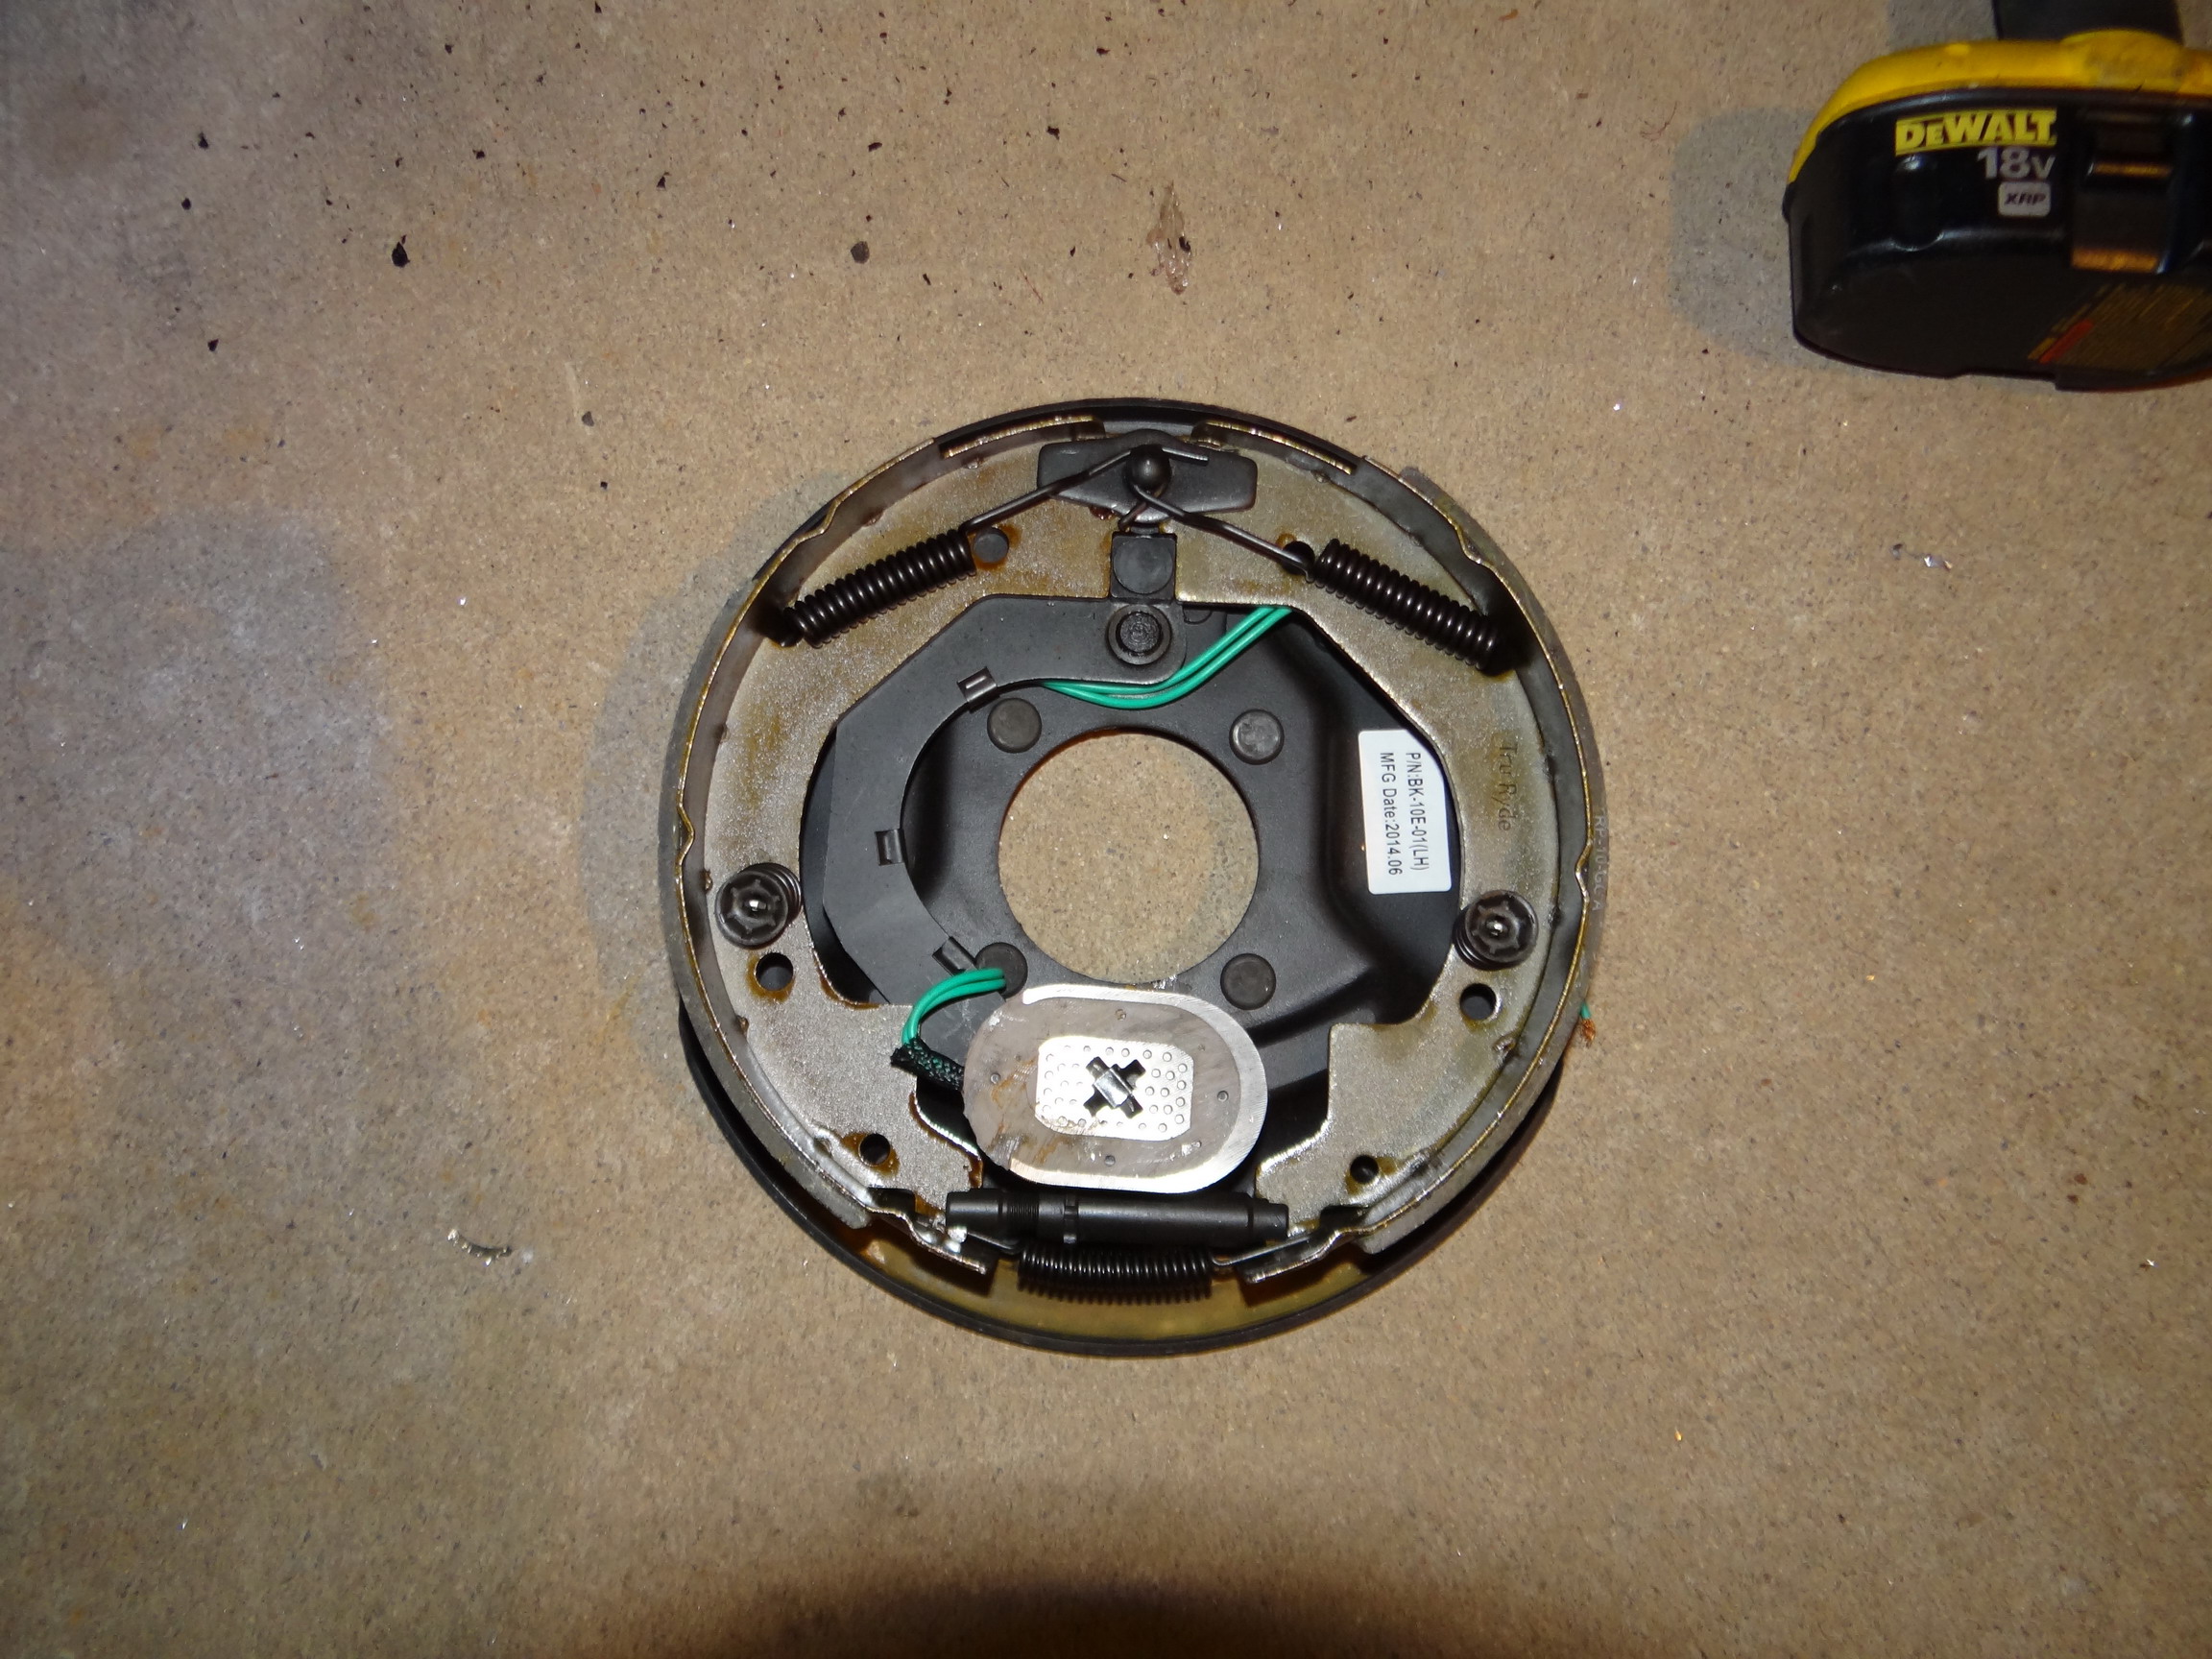
With the axle bolted to the springs with a modified bracket it's time to mount the hubs to the spindles. The kit hubs come pre-greased and attached to the wheels. We can now
with the help of a few friends roll our trailer upright. I'll be able to install the new 3500# axle in a few days using jack stands to support the frame.


I've now gotten about 8 hours time in the trailer frame with little left to do other than to attach the coupler, lights and trailer jack. In less than 9 total hours taking my time, the trailer frame is now done and ready to put the box on when it arrives later in the week. I am very pleased with how solid the trailer feels and very pleased with this project so far. Tomorrow, Sunday, I'll finish up the small stuff like wiring, lights, coupler and a trailer jack to support the tongue.
Being right on my schedule, I can get it registered and tagged at the DMV on Monday and install the new axle, tires & wheels and some appropriate fenders.
It's Monday, I spent about 45 minutes at the DMV. It went smooth with the Certificate of Origin that came with the Harbor Freight Trailer. They didn't need to see or inspect the trailer. I've now got a license plate and title and can now take it on the road.
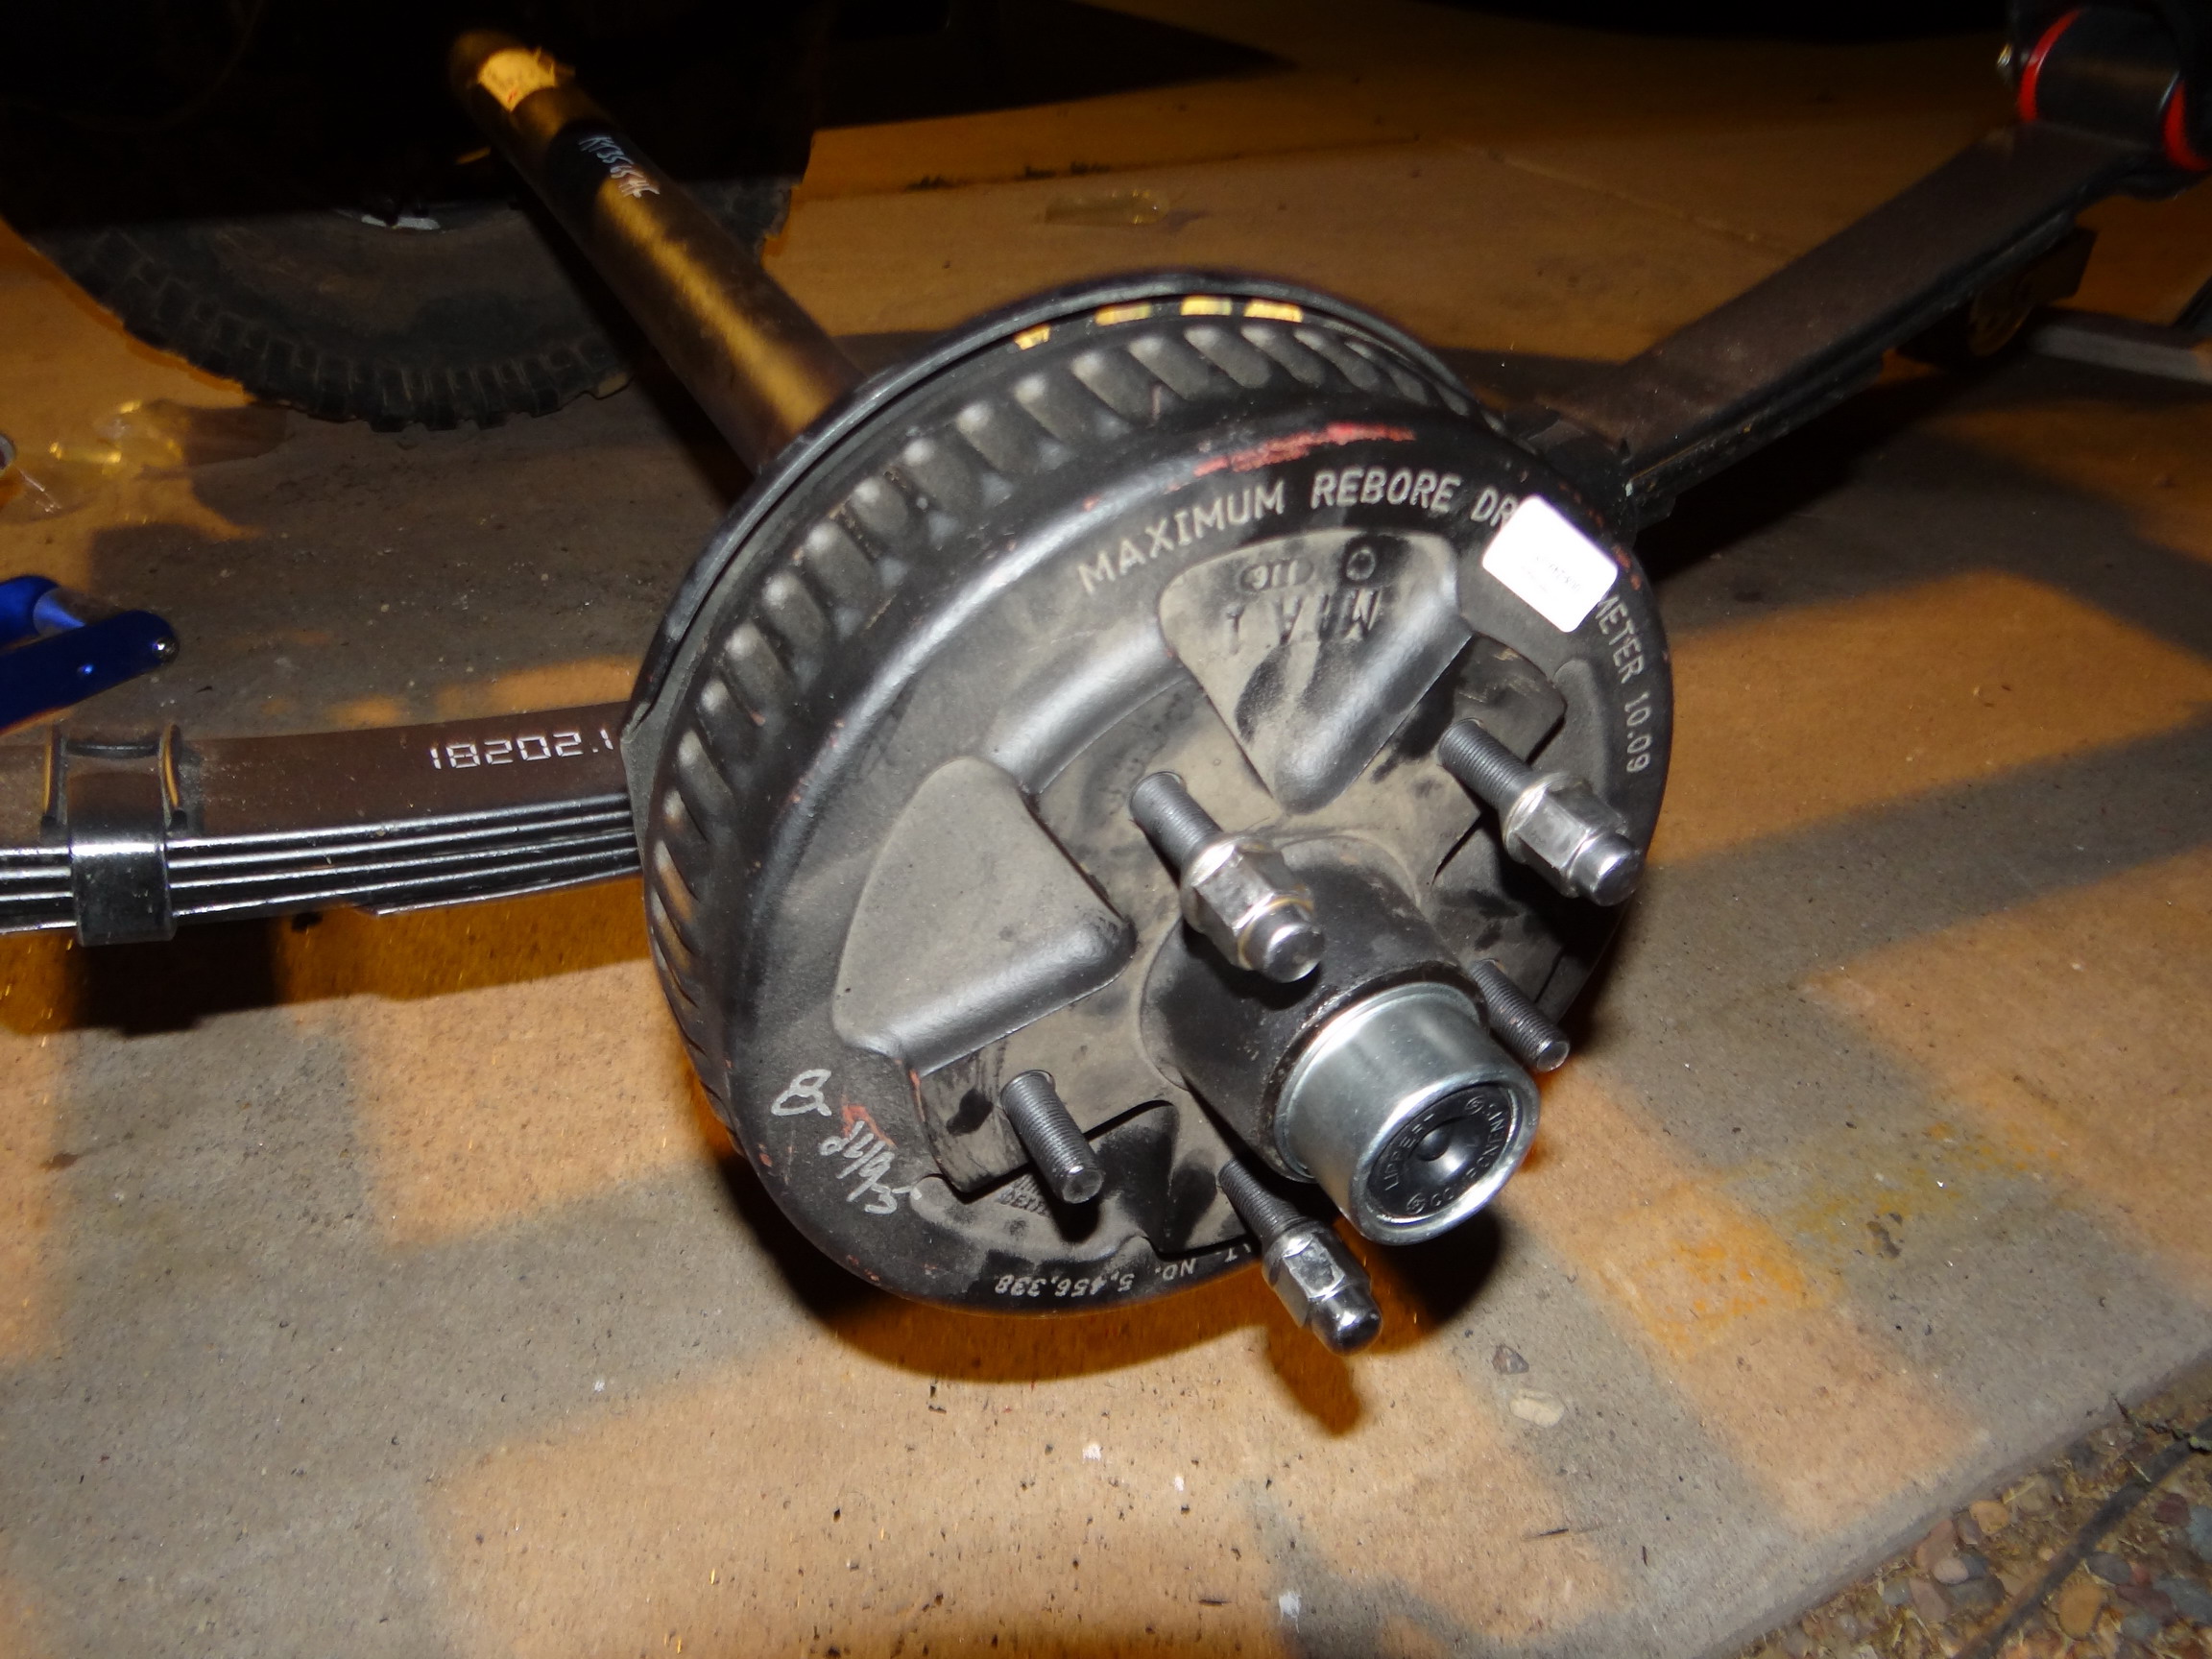
Picked up the new 3500# Dexter Axle from Auto Safety House (ASH) in Phoenix. ASH has several locations in the state and walking into their show room is like walking into a candy store for trailer parts and accessories. If it's trailer related they have it in stock. The sales manager told me that they are the #1 supplier to trailer builders in the state. While I was there I also got a nice length of 7 wire trailer harness with the standard 7 blade RV plug and an electric brake controller. I'll get the trailer switched over from the 4 pin connector to the 7 later today. All of the tow vehicles I have already are equipped with a 7 wire receptacle, including my Wrangler so this works well for me.
Now here is what I figured I would need for the axle swap.
- 1 Dexter 3500lb axle with flanges. 65" Hub Face (WMS to WMS)
- 2 Jeep Style Fenders 36" wide
- 2 Hubs for 5x5 bolt pattern
- 2 Bearing Kits
- 2 Spring Perches
However if you are going spend nearly $200 for a regular 3500# axle, you might as well spend another $100 and get one with electric brakes. The brakes are an option and not required by law for this trailer but it's just as easy to install them now than later. If you want to try the trailer out without brakes you can always add them later. As far as advantages of trailer brakes, a few years ago at the Overland Expo, Mario from Adventure Trailers did a class on driving off-road with a trailer. Their "demo" trailer had electric brakes and Mario showed us all kinds of tricks you can do with a trailer that has electric brakes on the trail. Just amazing.
The axle comes pretty much "bare". You will need to have spring perches welded on for either spring over or spring under. I will have perches welded top and bottom so I could easily change from spring under to spring over in the future, but I doubt I will. In any case it's easier to do now than later.
The spring center to spring center for welding perches on a new axle is 46 1/2". WMS to WMS on a JK is just a hair over 65 1/3", I've found that standard WMS to WMS on off the shelf axles seems to be 65" which will more than work.
Today we do the axle swap. I listed the kit axle, tires, wheels, springs, spring mounts and coupler that came with the kit on Craigslist last night and sold it in less than 24 hours for $150. That was half what the kit cost so how could I be more pleased. Now the net cost of the trailer kit was about $130 before taxes.
Installing the 3500# Axle:

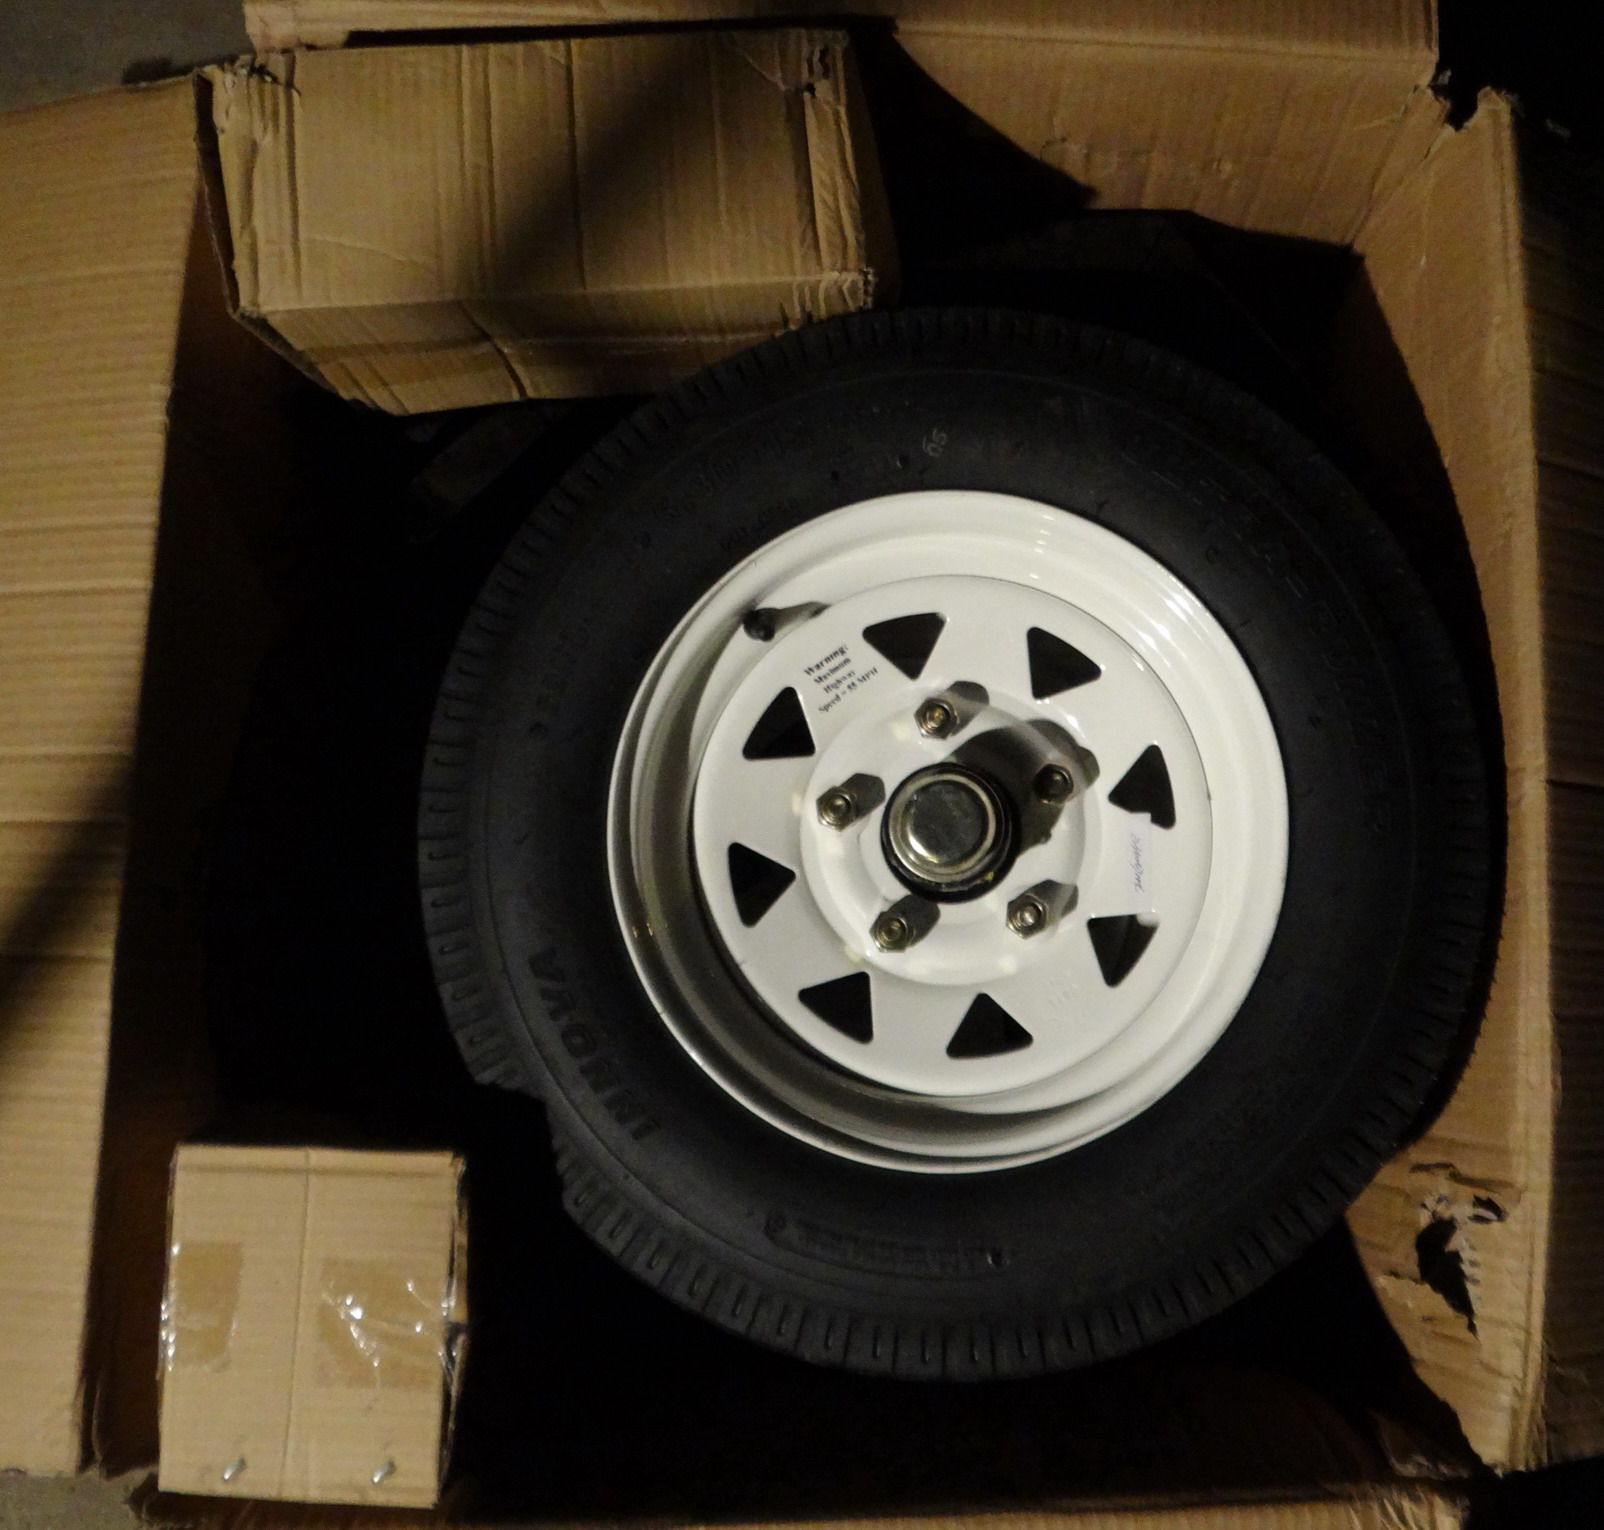
After the axle we add the fenders then the tires and wheels. We started off with a set of free white wagon wheels with some used 33" tires. Then replaced them right away when I realized I had some nice rims I had in my garage and two new Goodyear Kevar MTRs. Since they were already in my parts "inventory" why not use them and they didn't add to the cost either! I'll replace the wheels soon with JK Rubicon rims to match my Jeep.
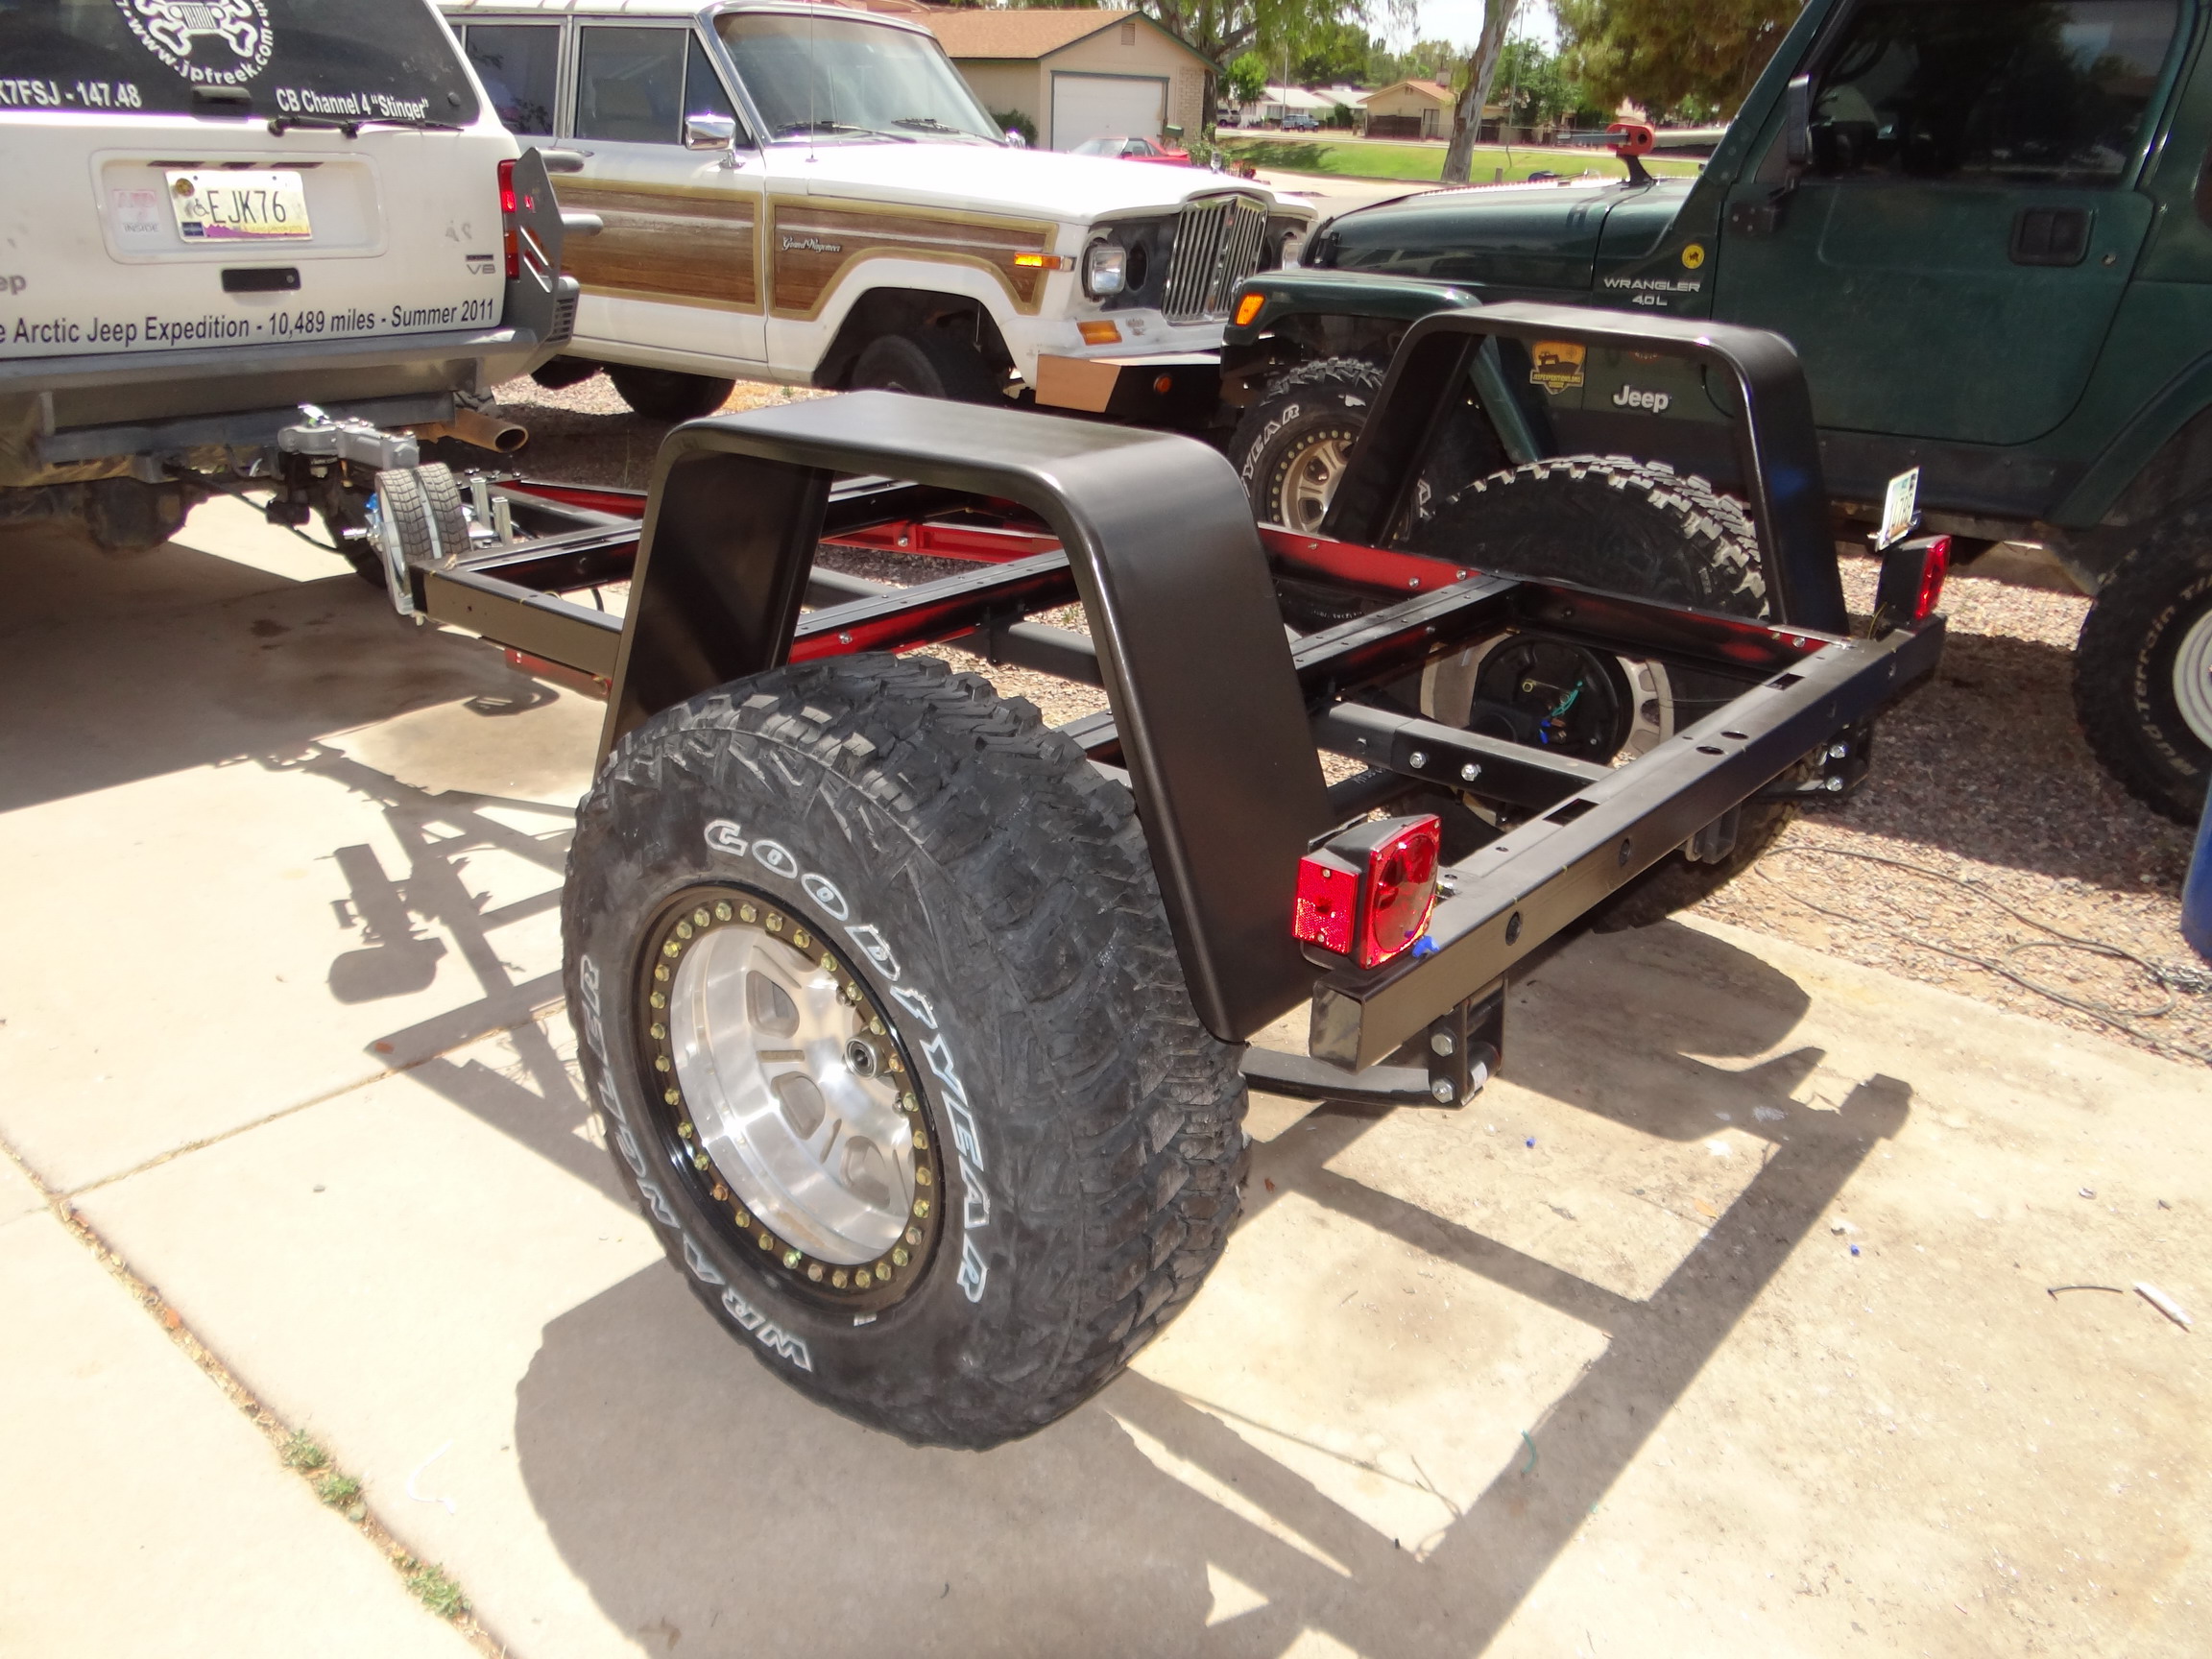

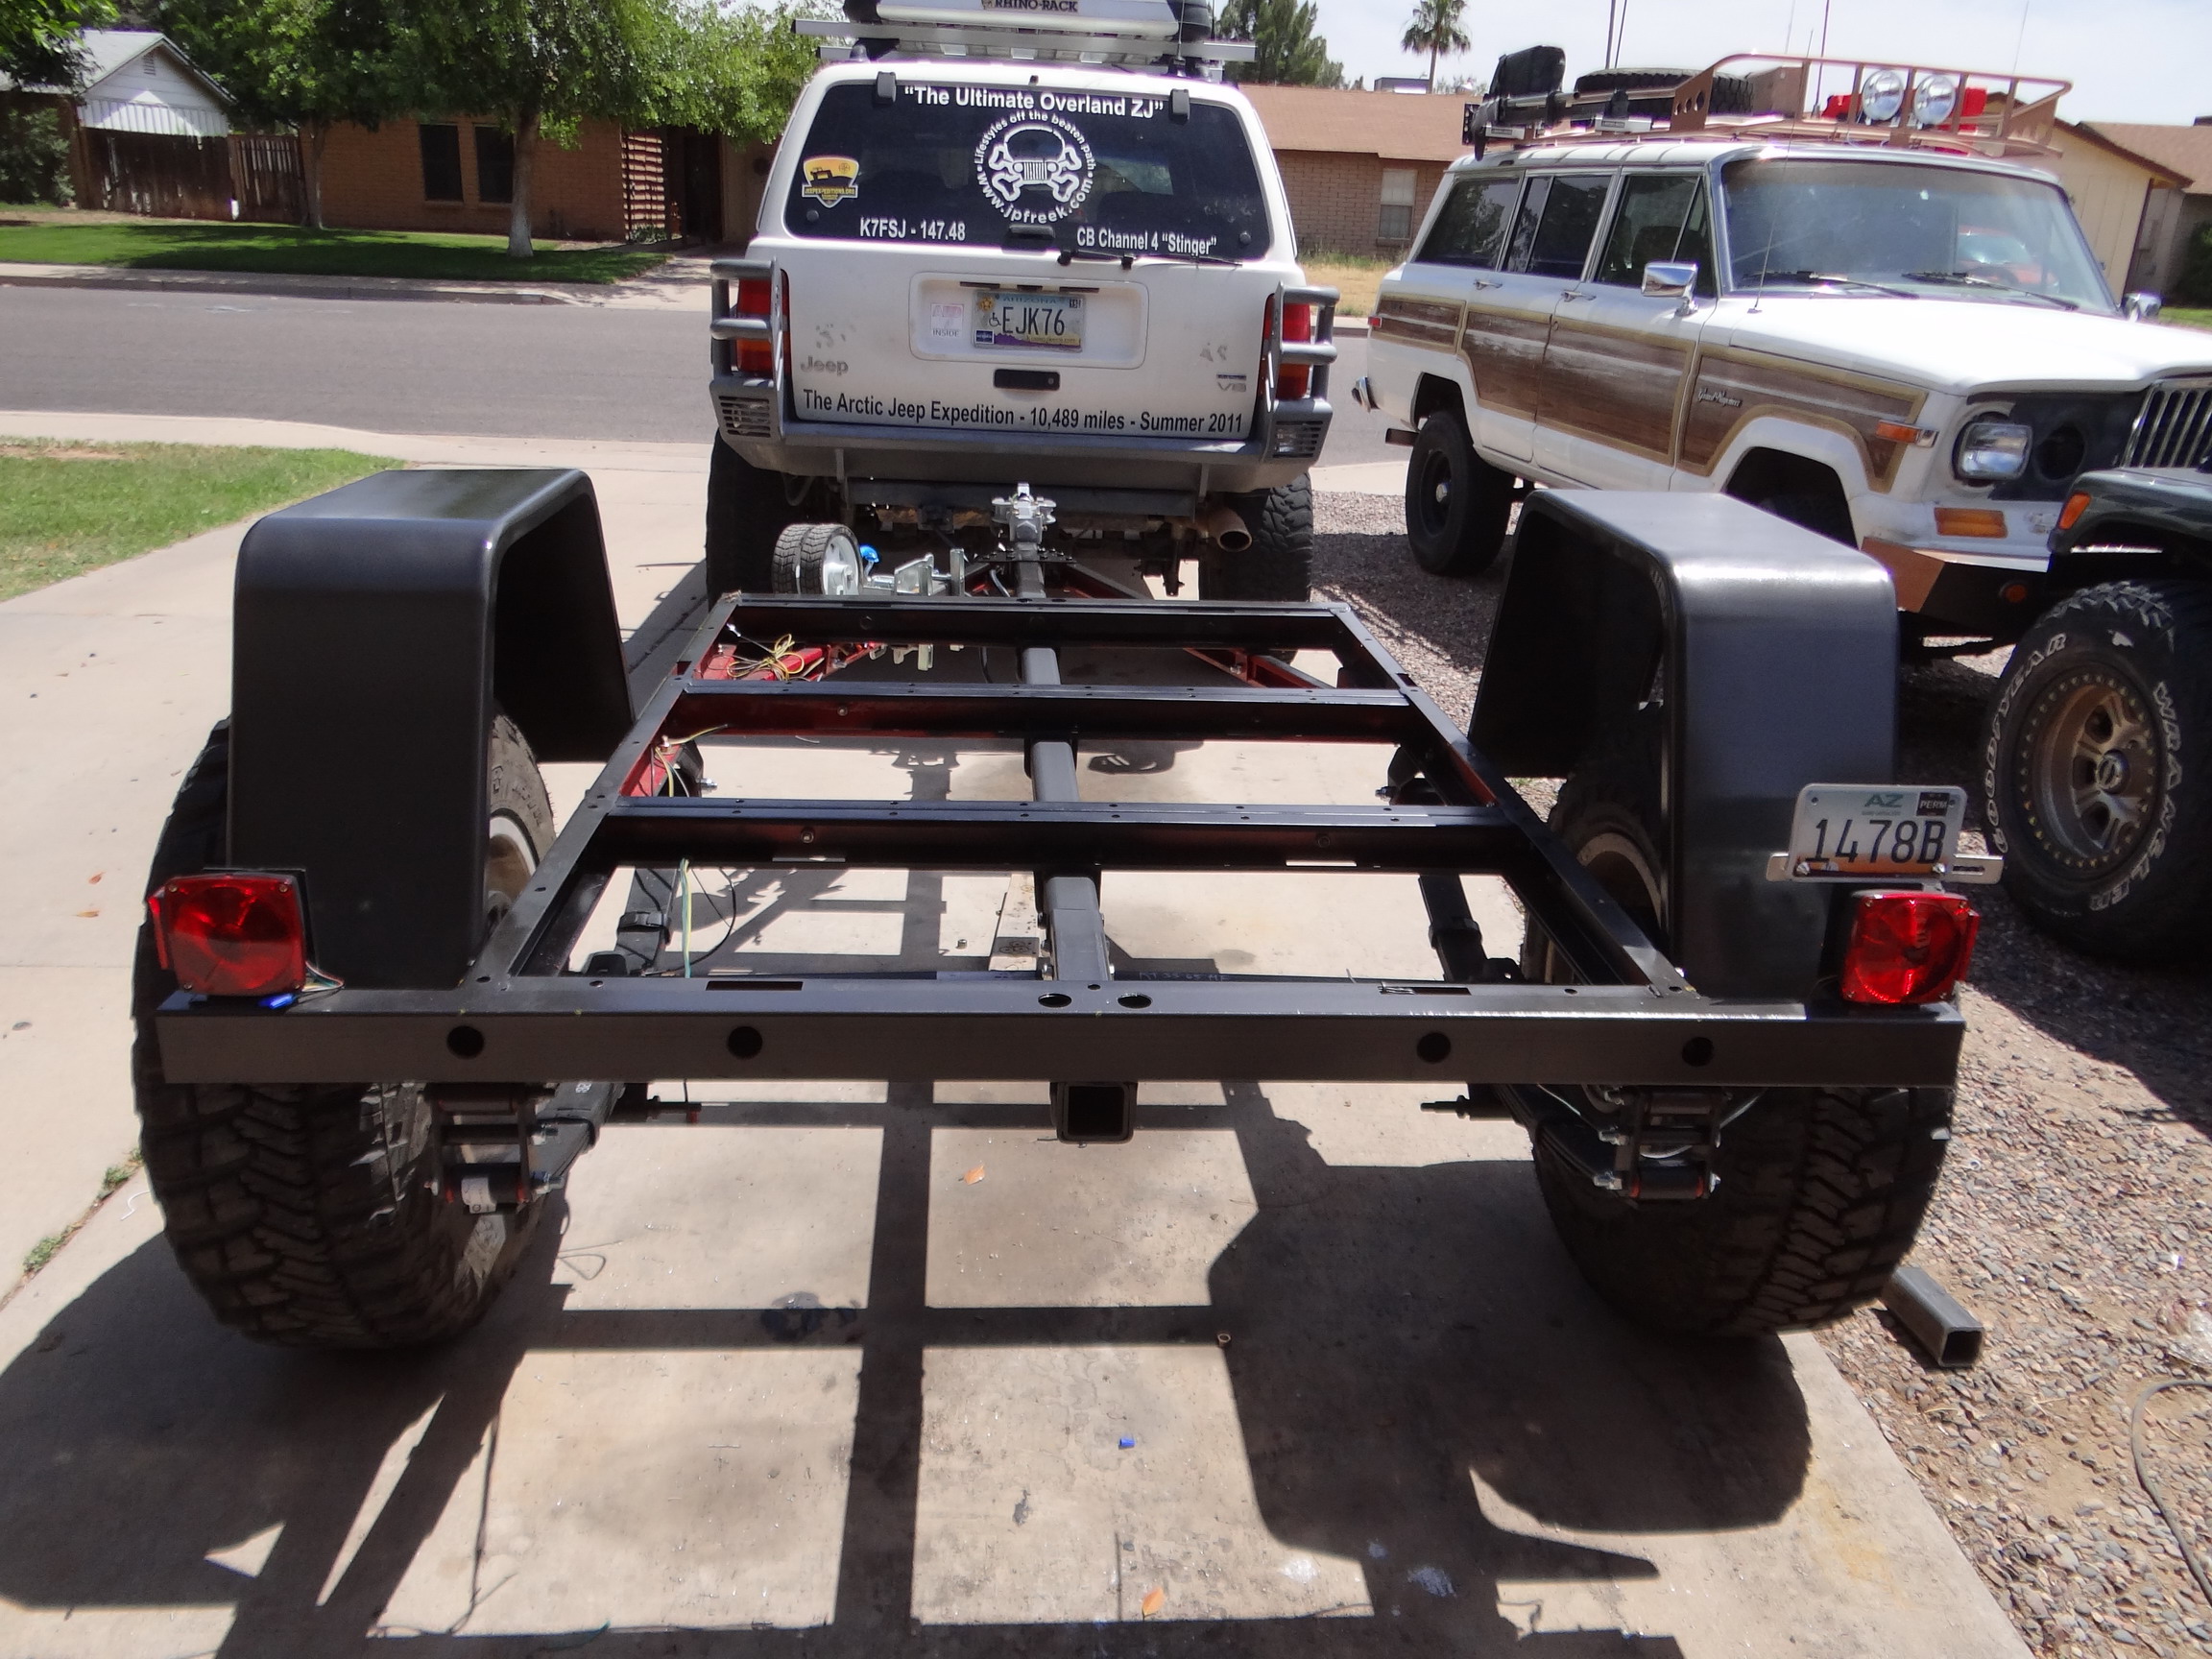
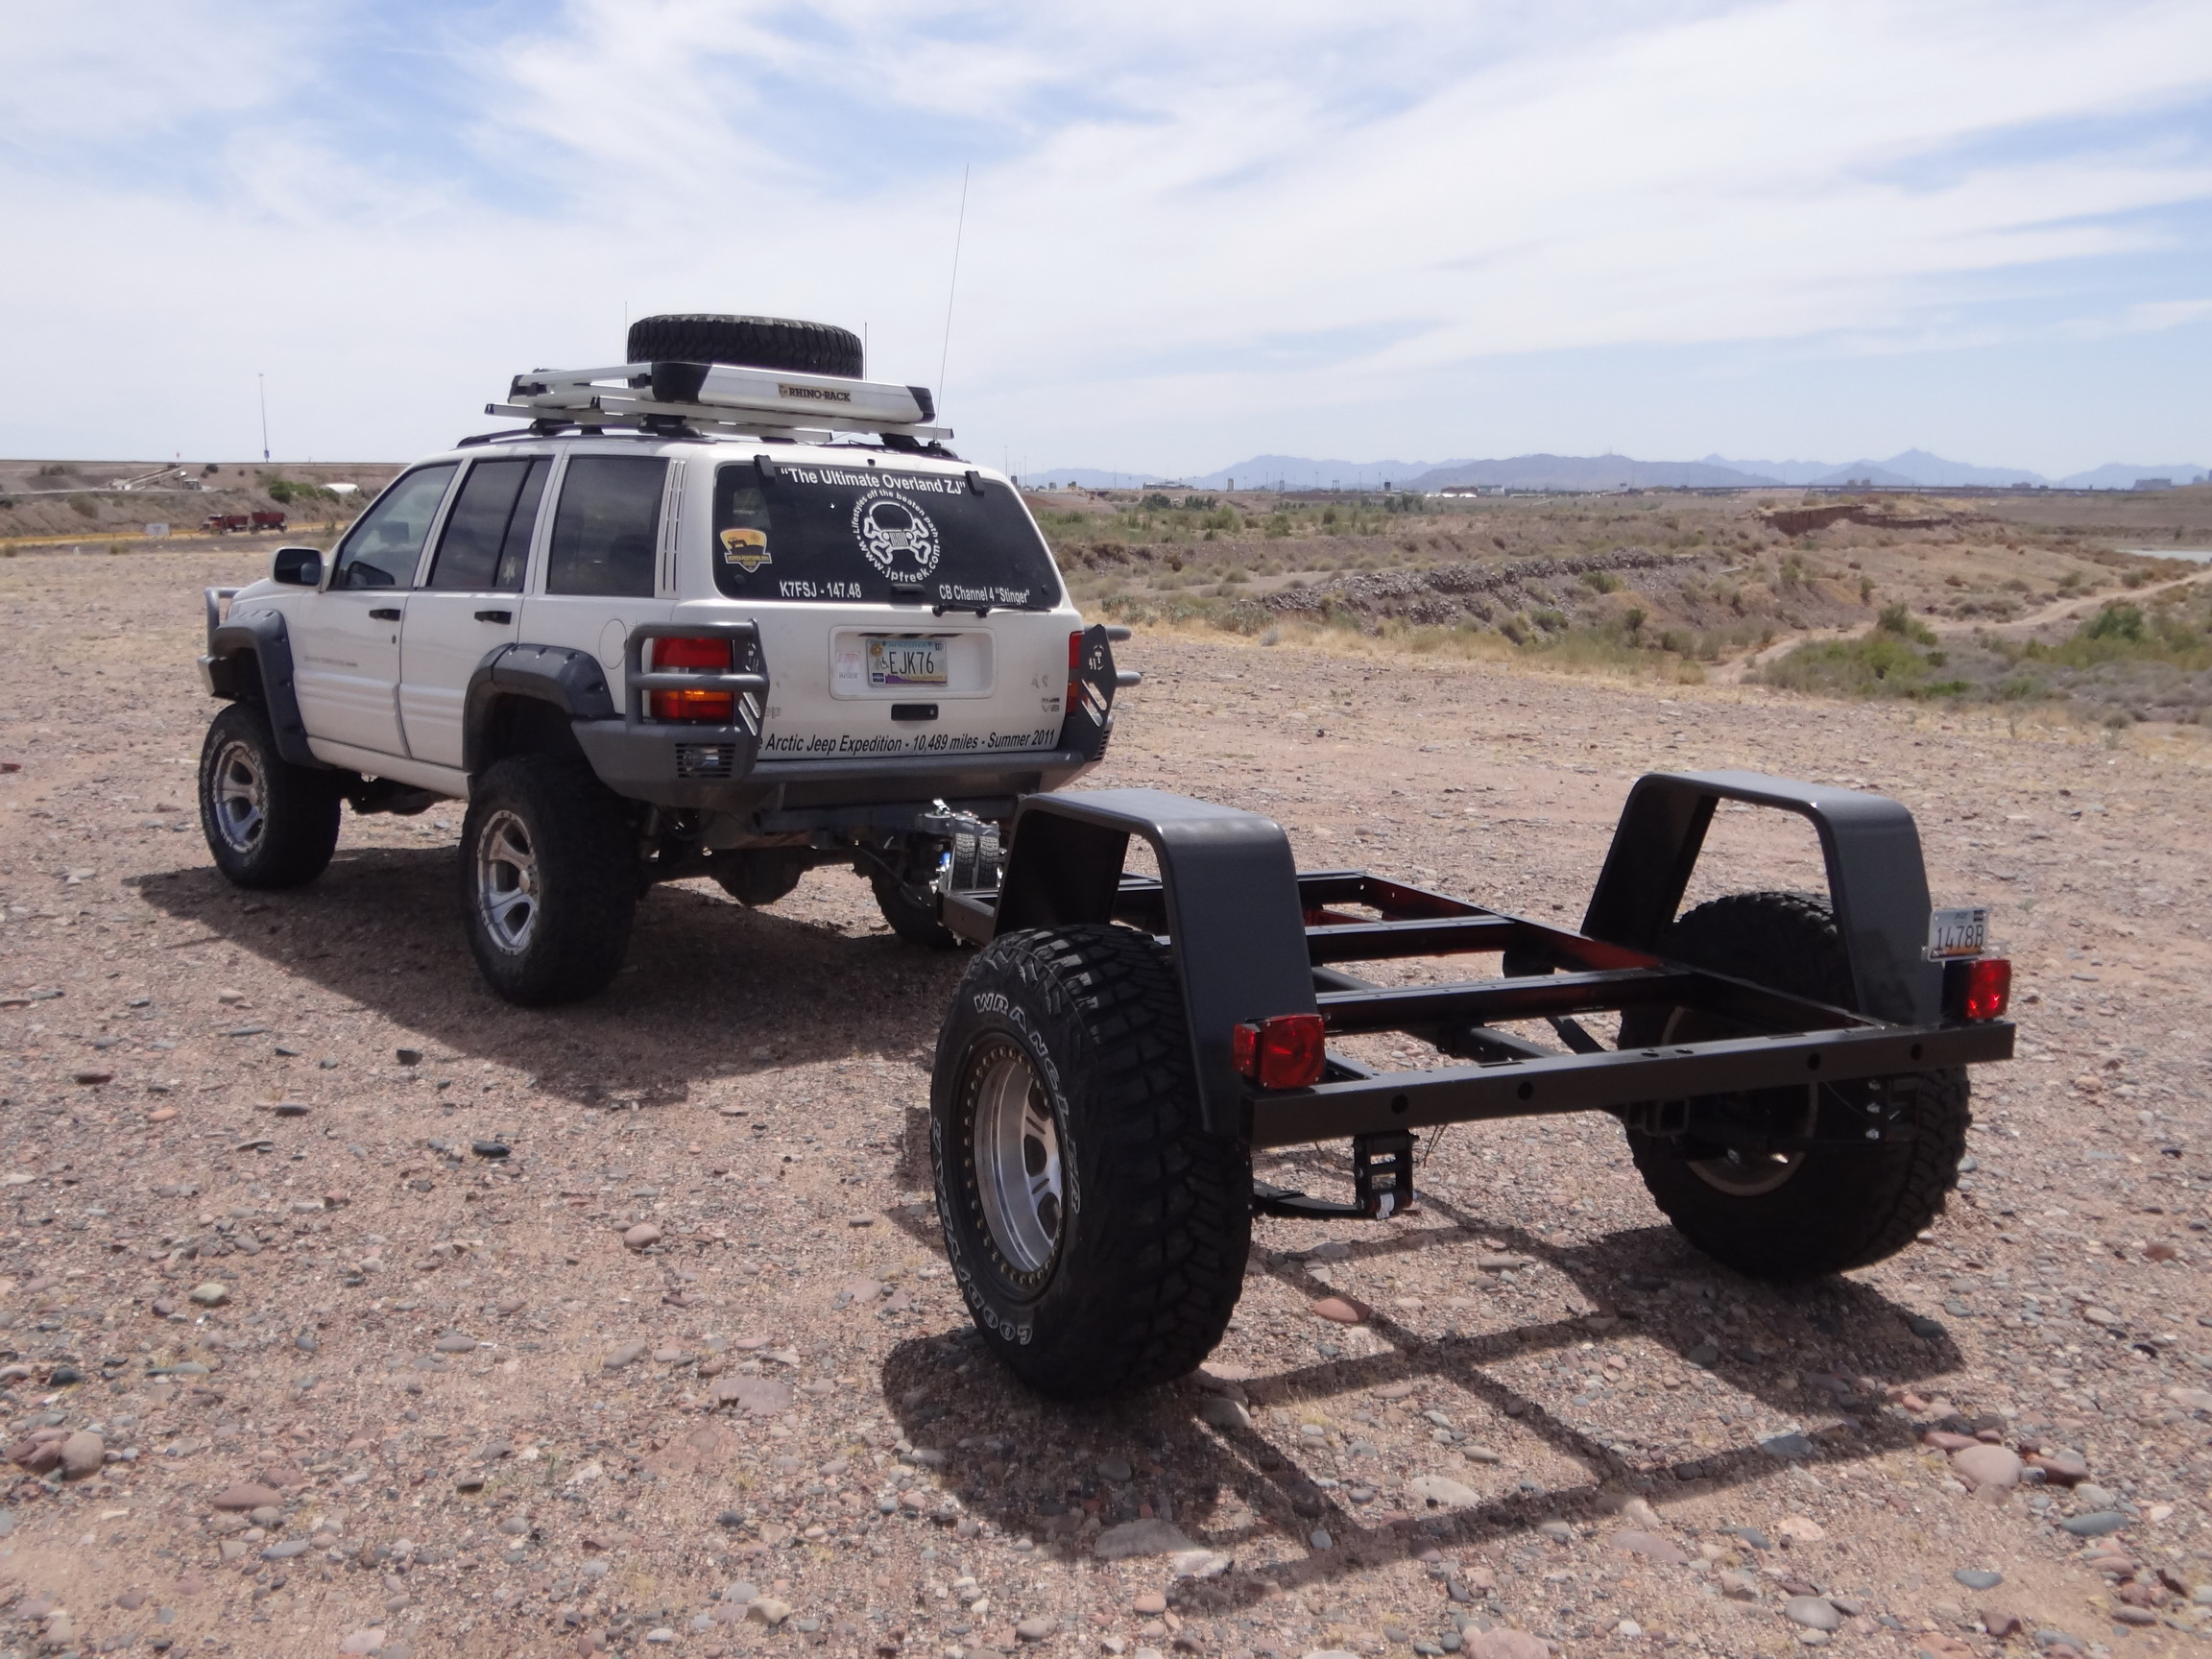
The trailer frame is essentially done and it's ready for the box.
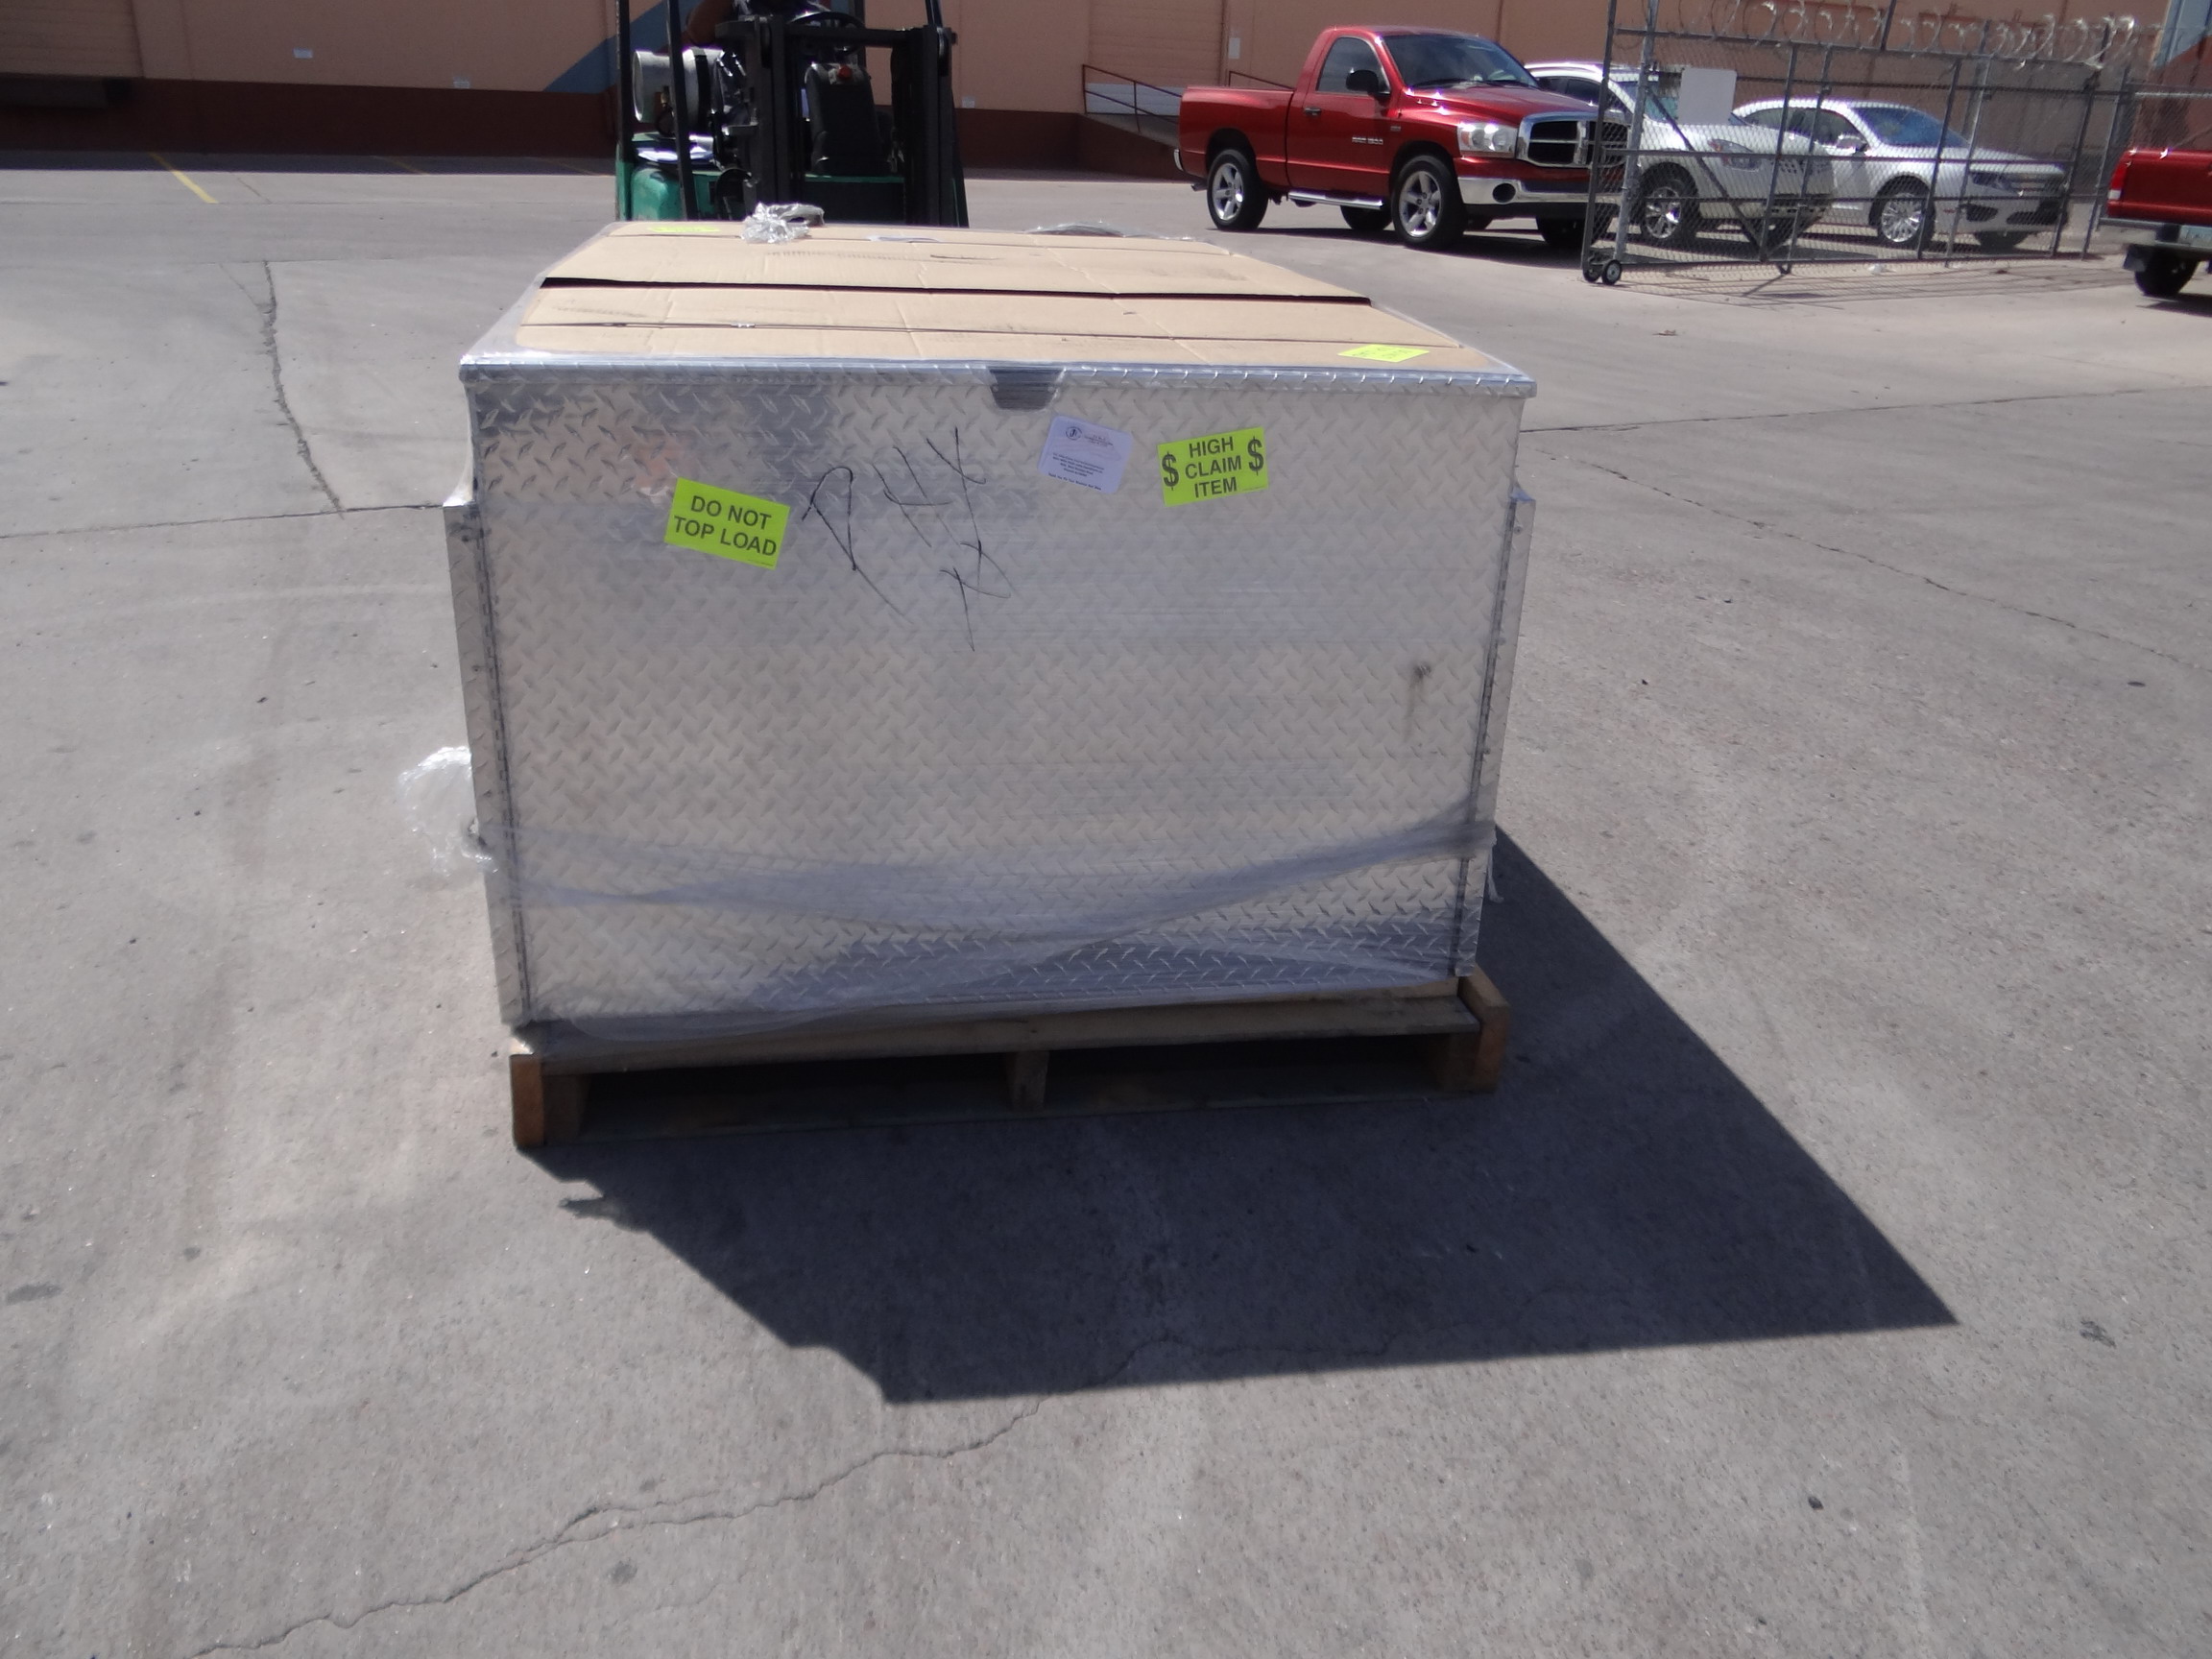
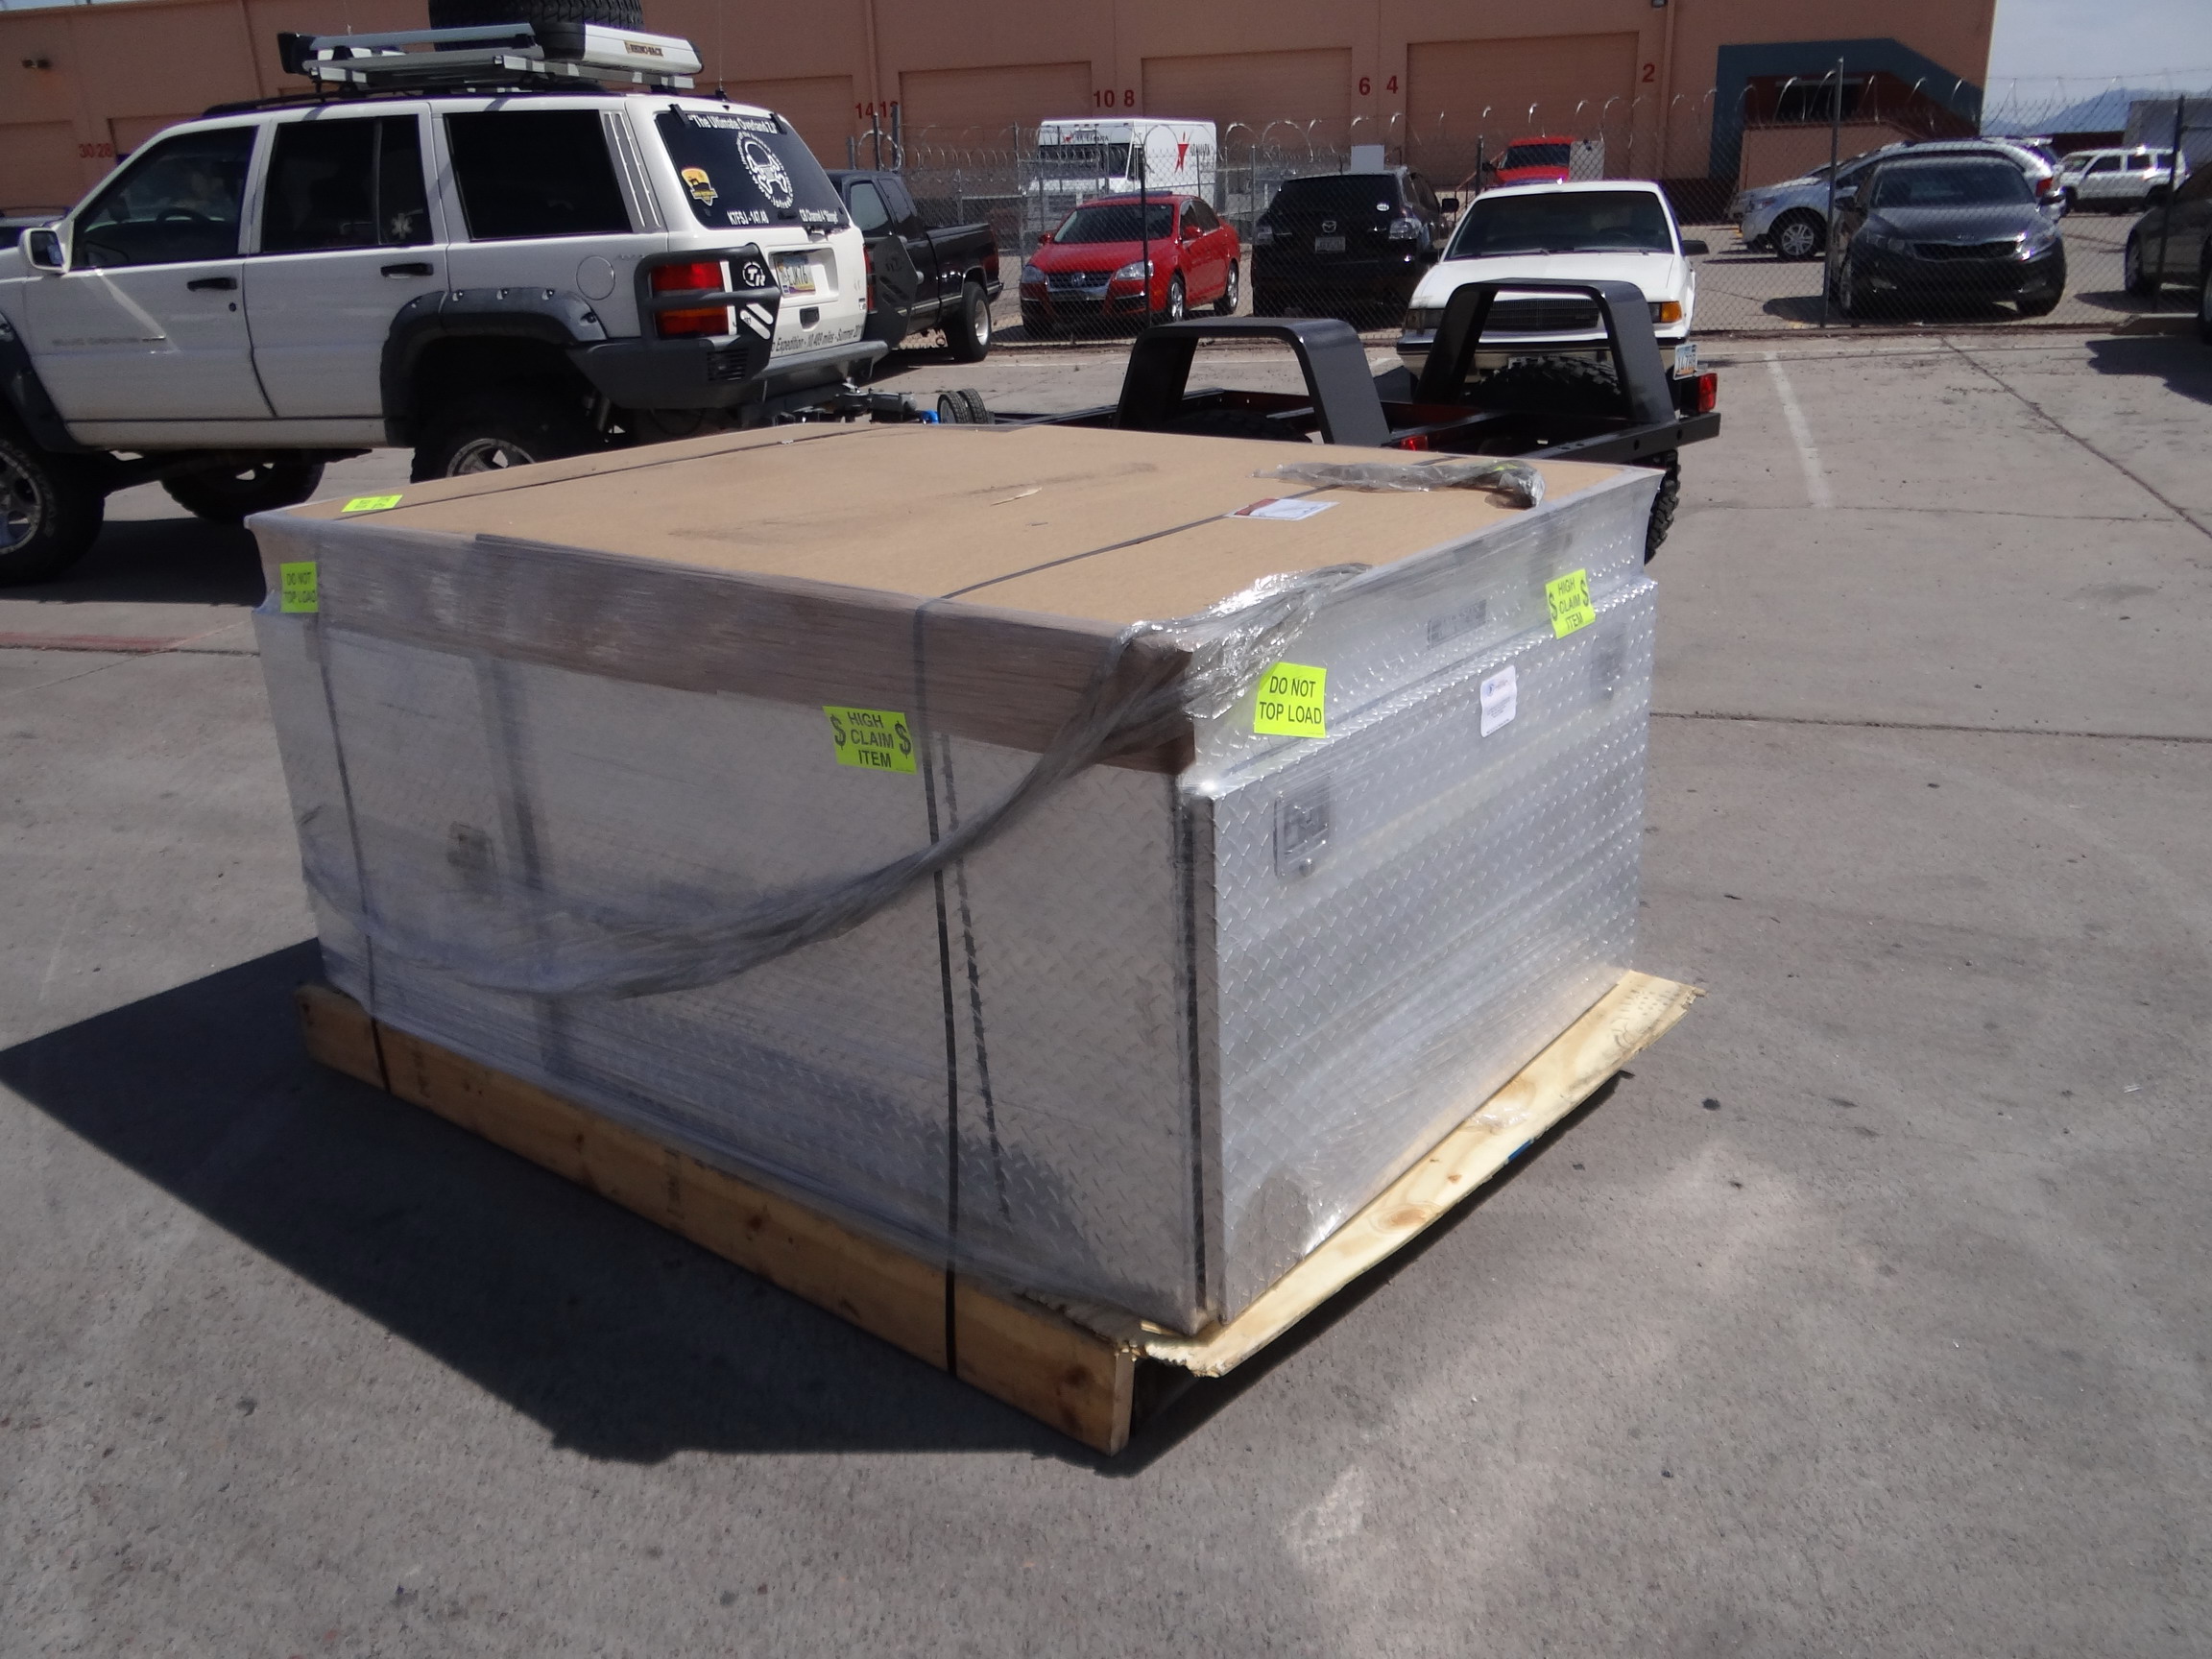
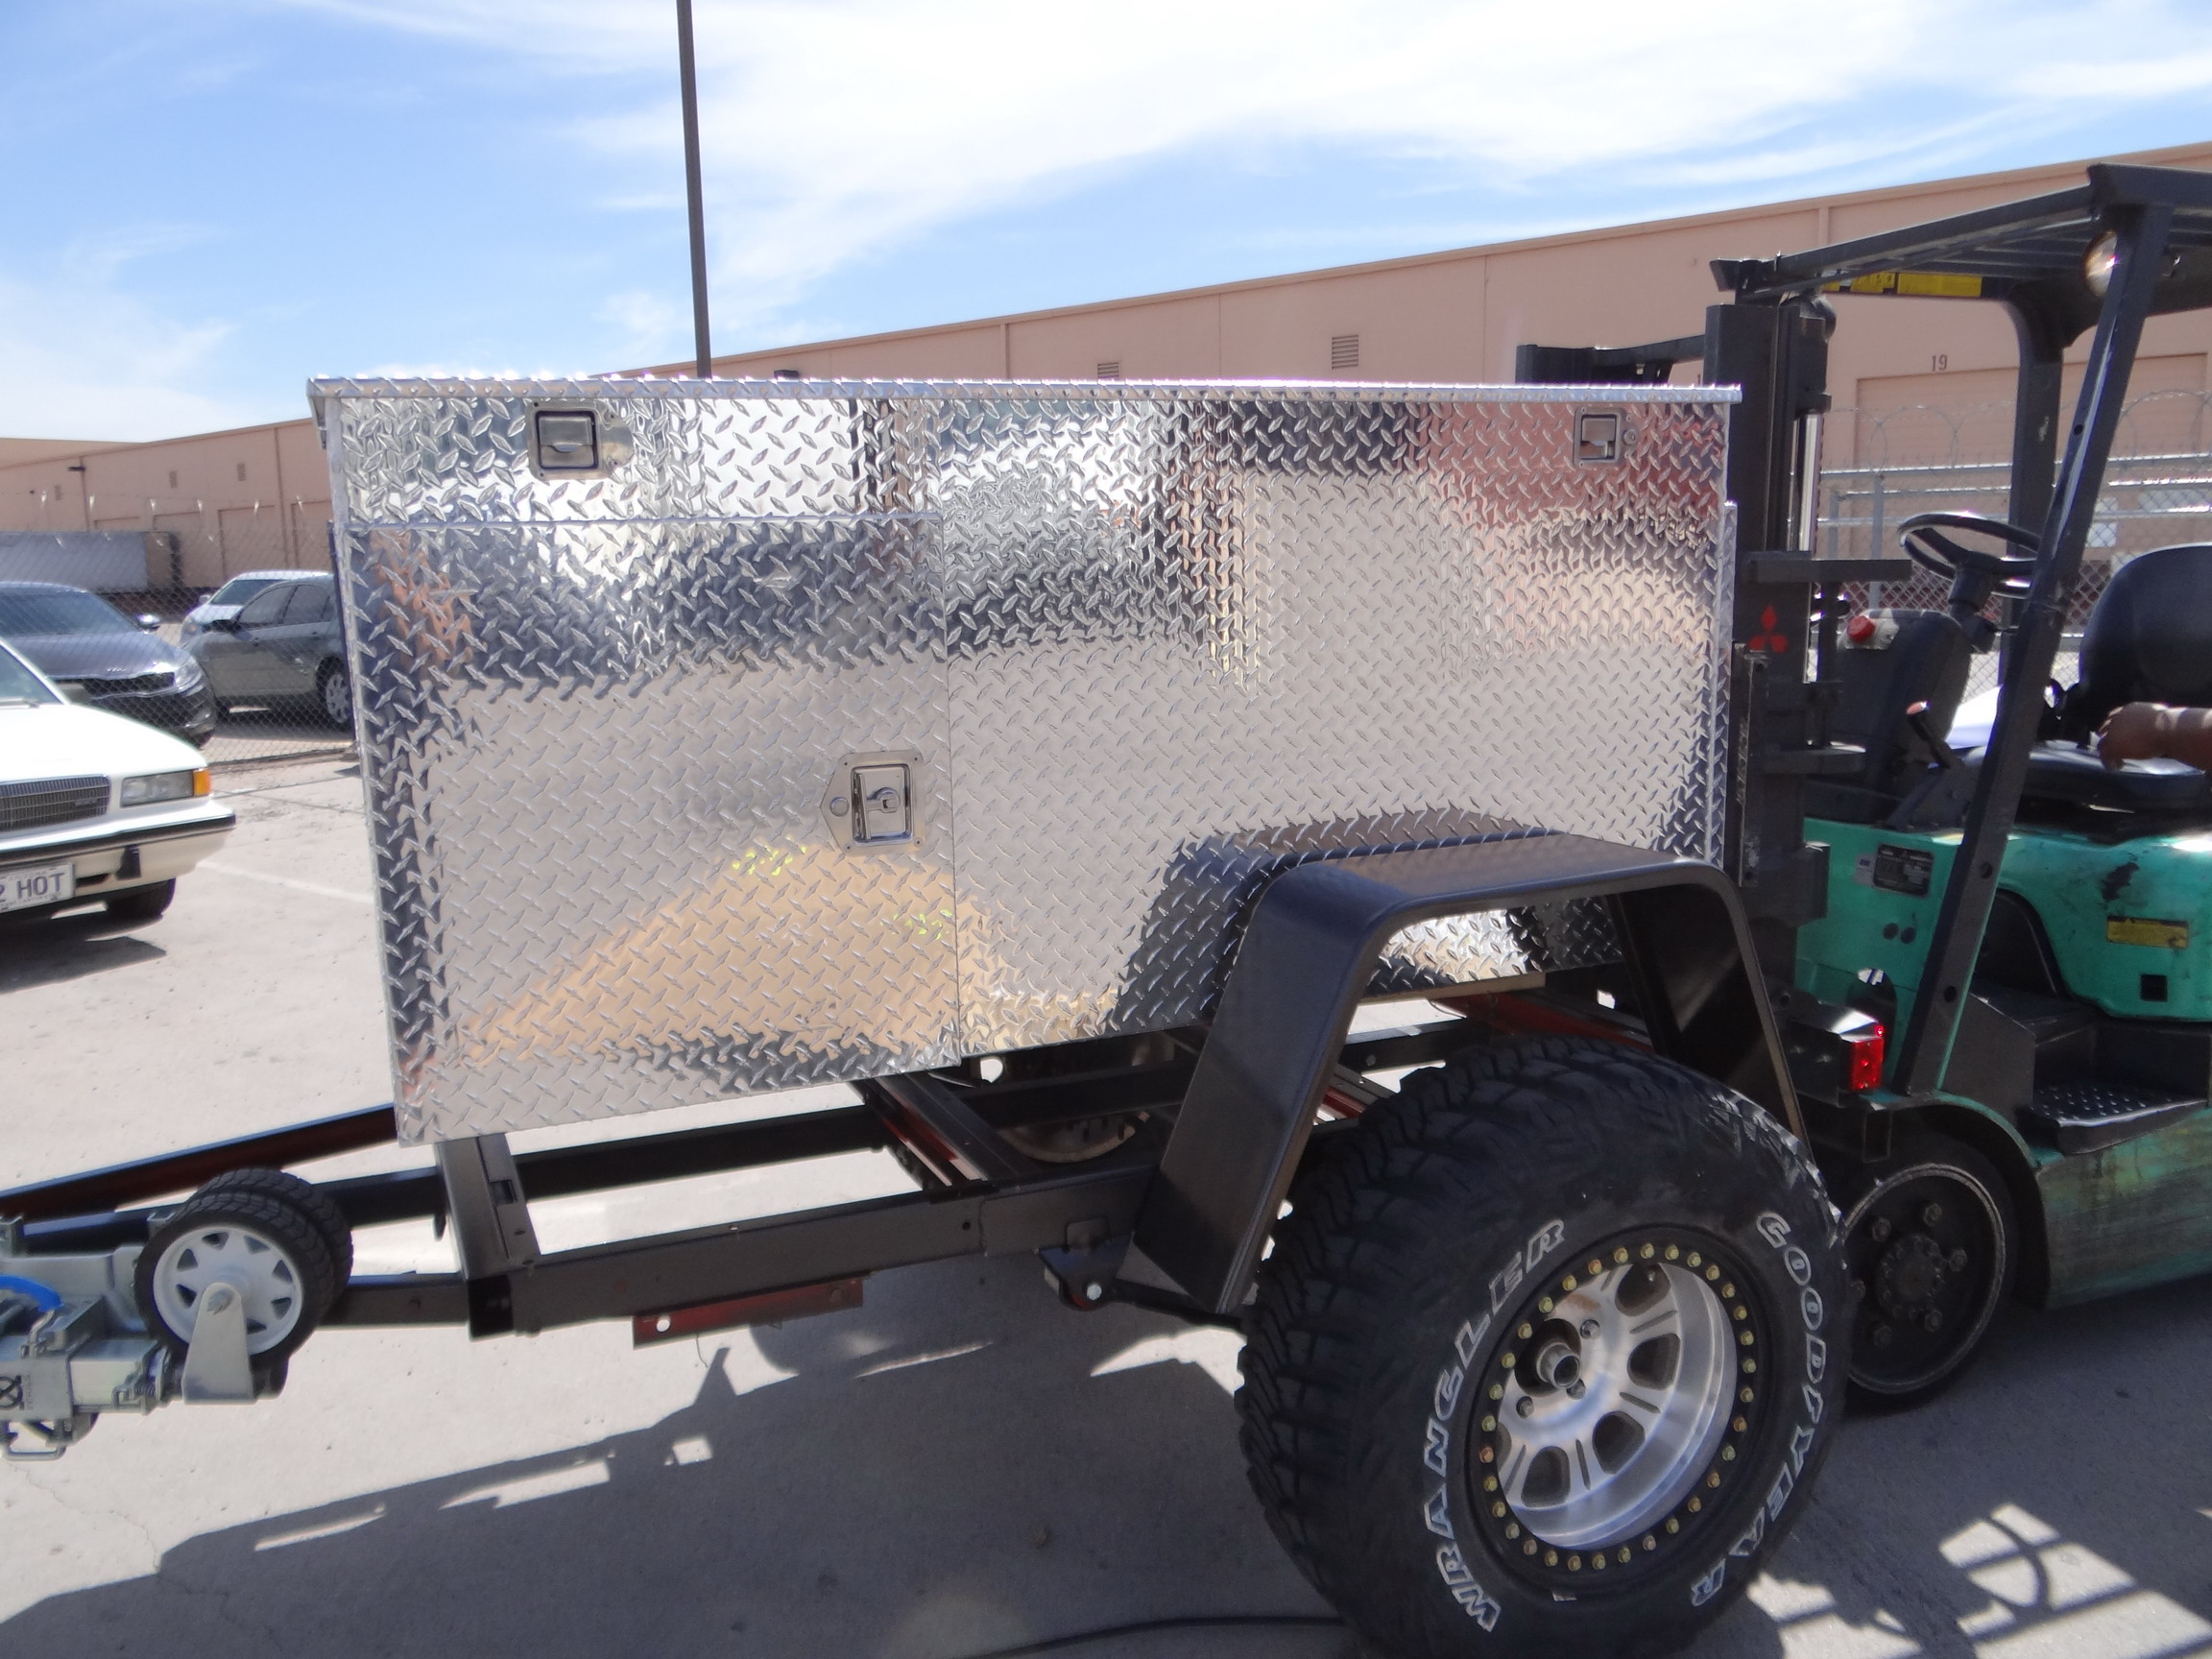
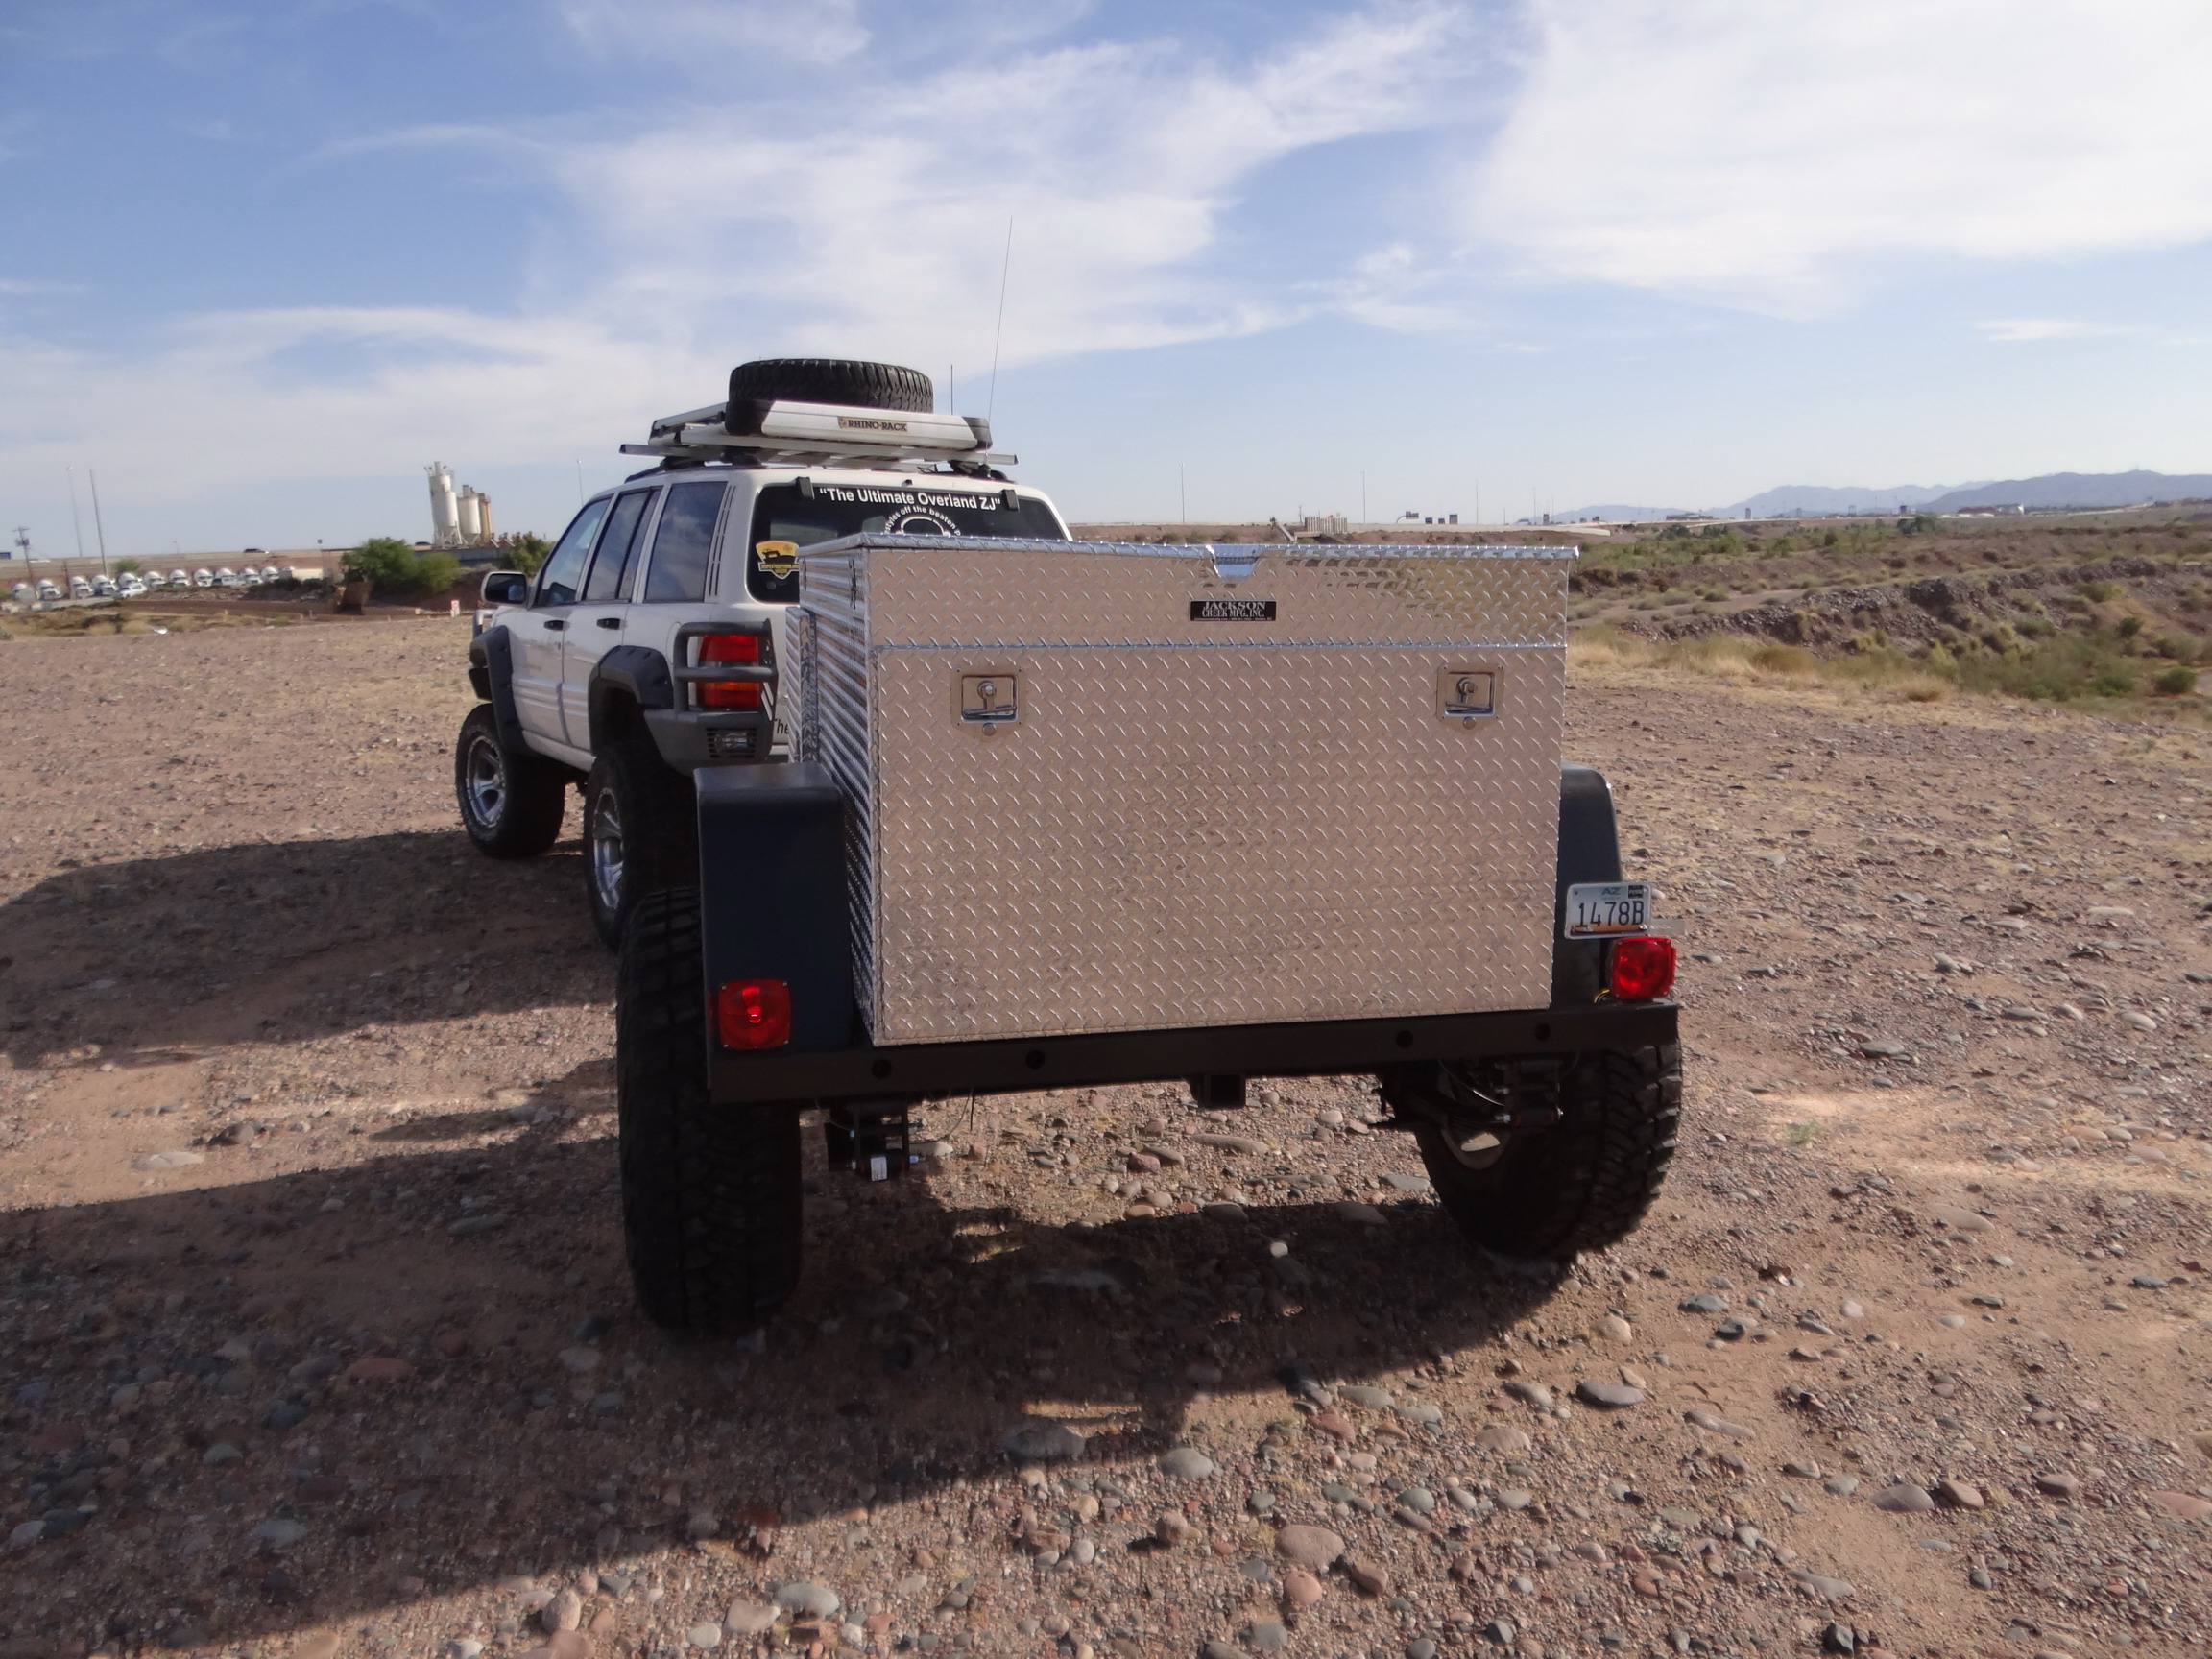
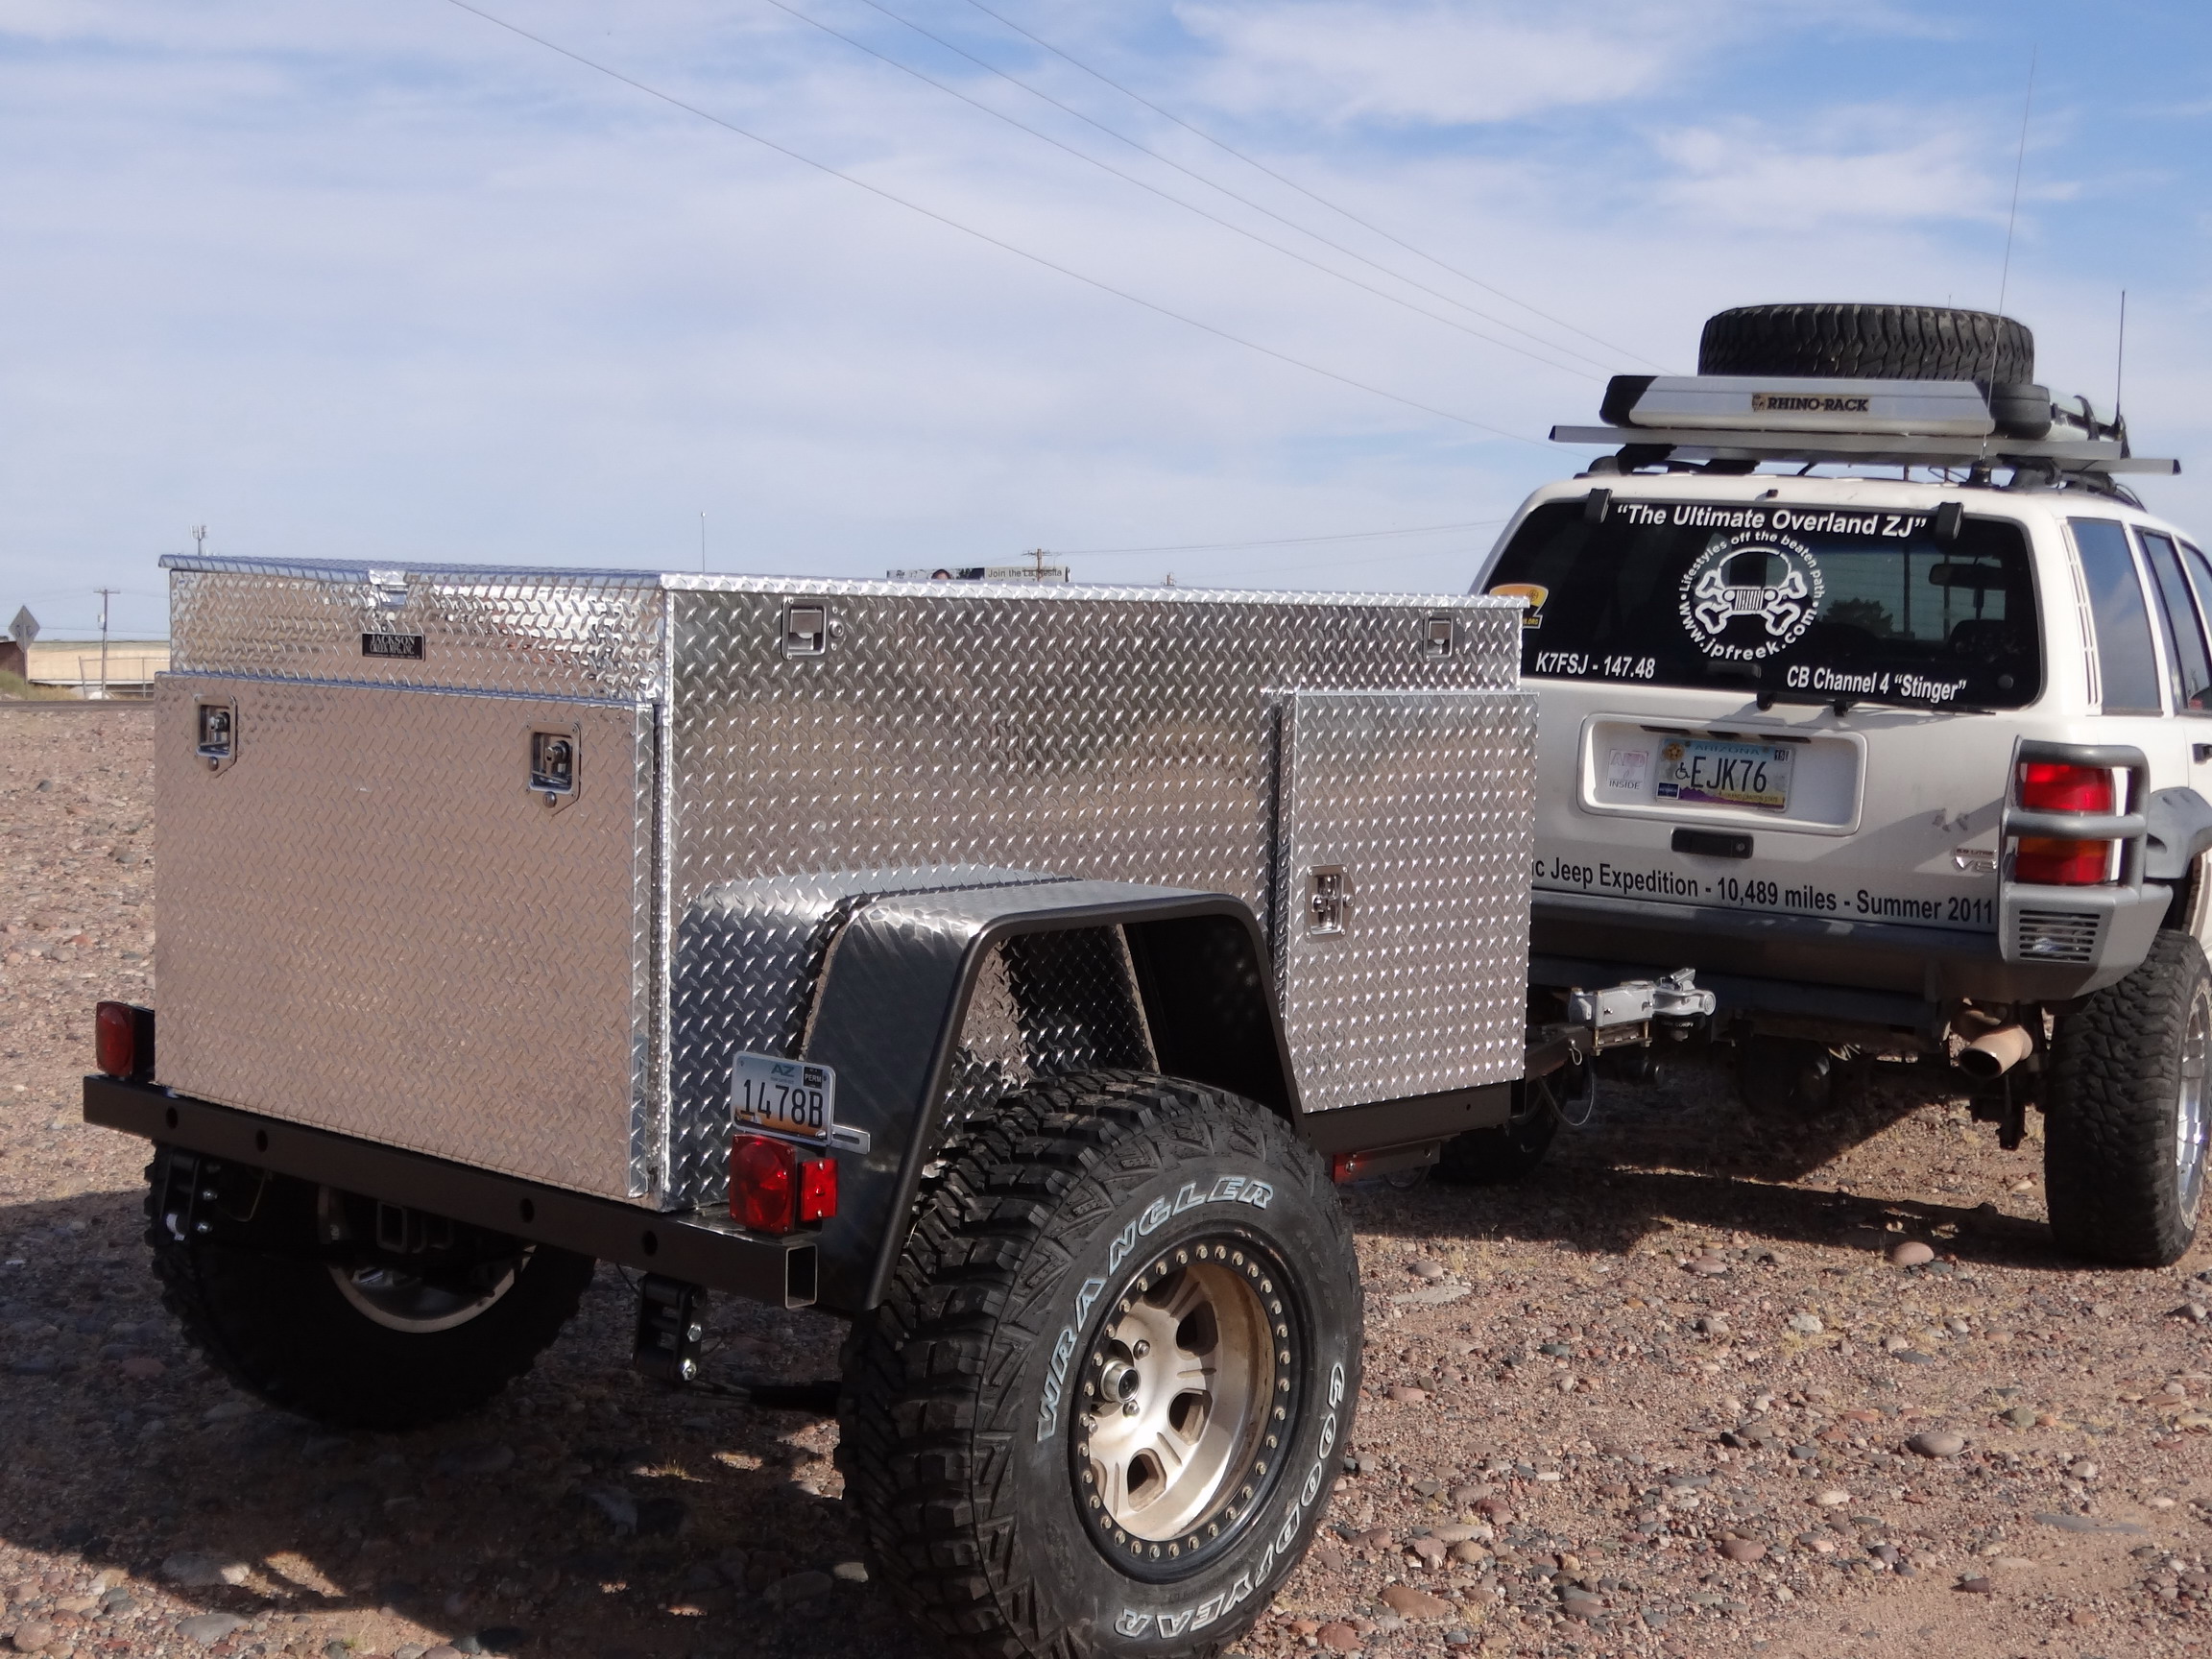
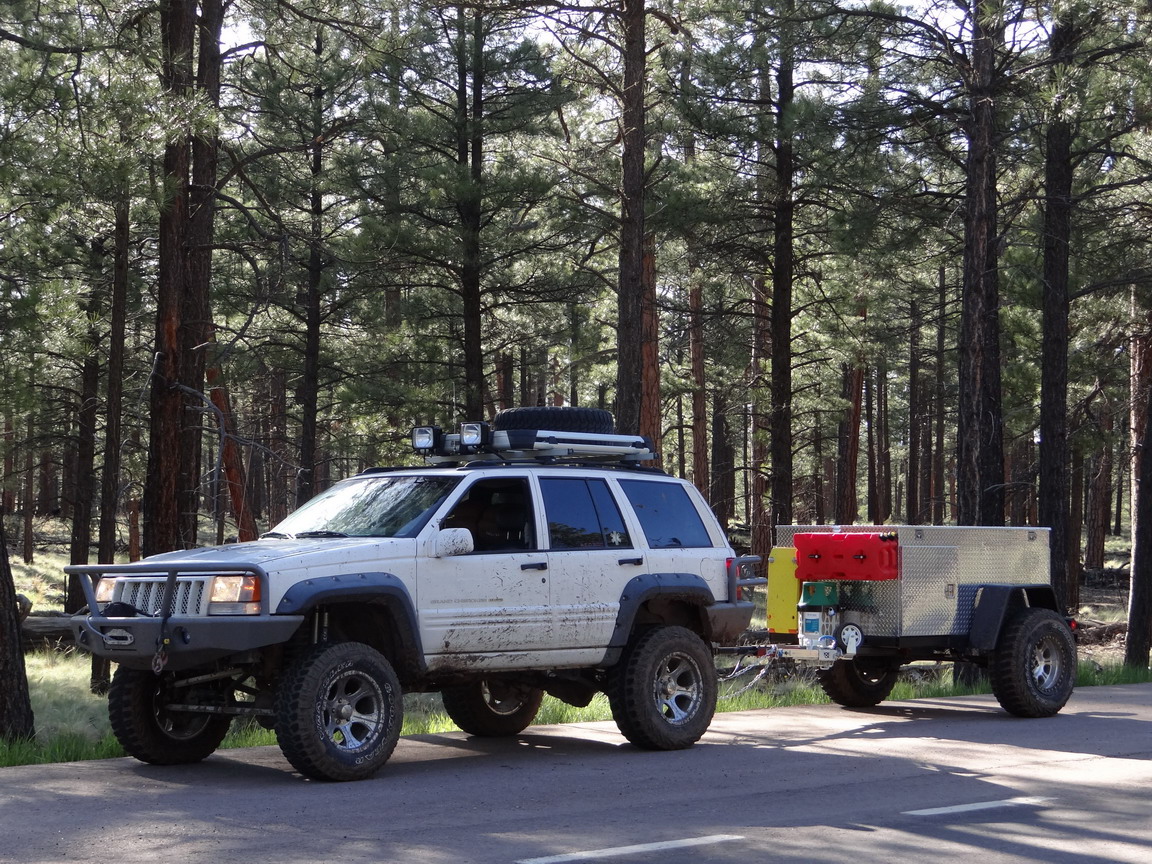
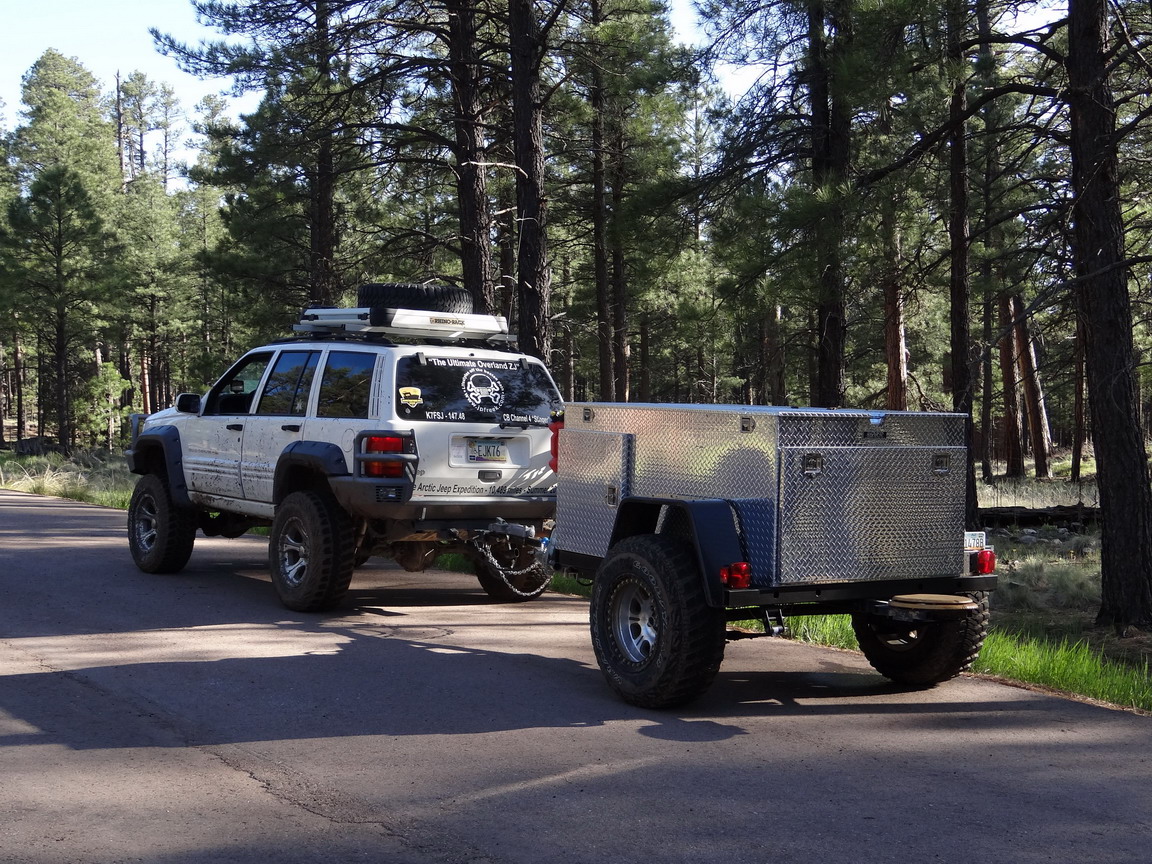
Here we are on Thursday, I get a call from the trucking company that my box is in and ready to pick up. I hitch up the trailer and head out to pick up the box at the trucking terminal, along the way I stop to take a few pictures of the "finished" product.
You'll notice the fenders here just don't work with the wheels and tires. Well be making a few changes which you will see later.
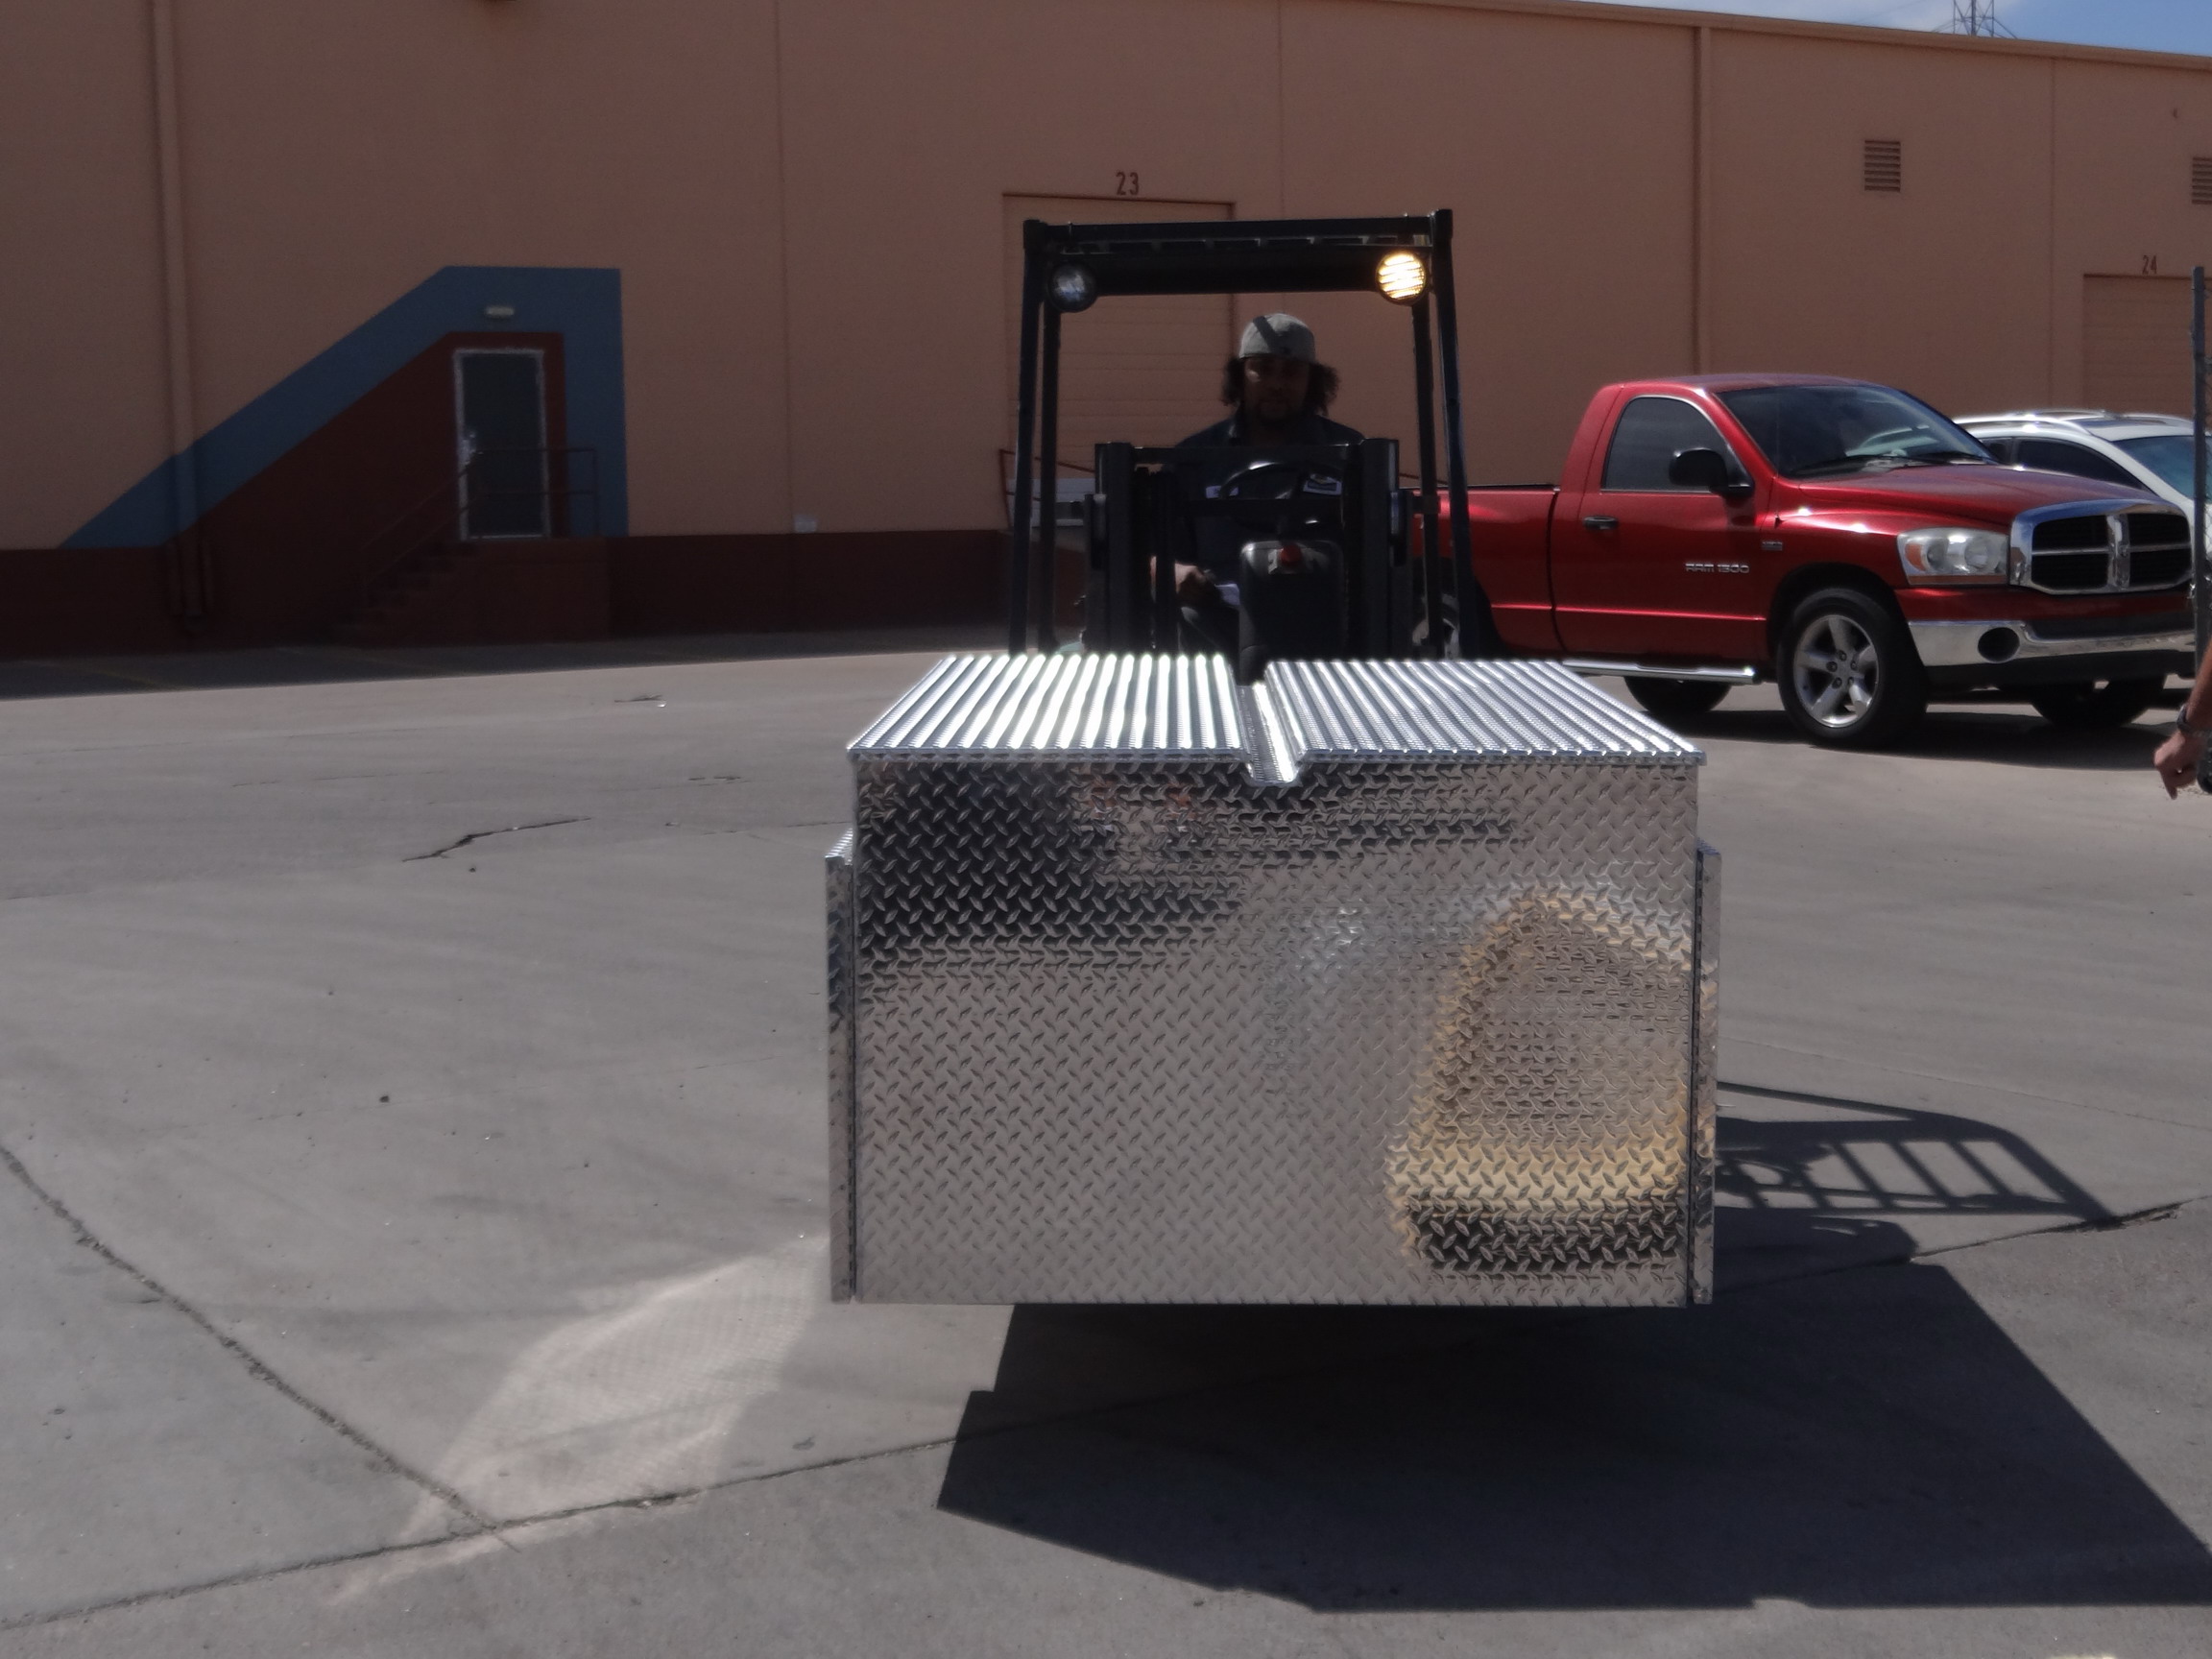
I get to the trucking company and they help me remove the protective wrap and cardboard from the pallet and use a fork lift to place it on my trailer frame. I drill holes at all four corners to install some 7/16" grade 8 bolts to hold the box to the trailer until I get back home where I will probably put another eight or so bolts thru the box into the frame.
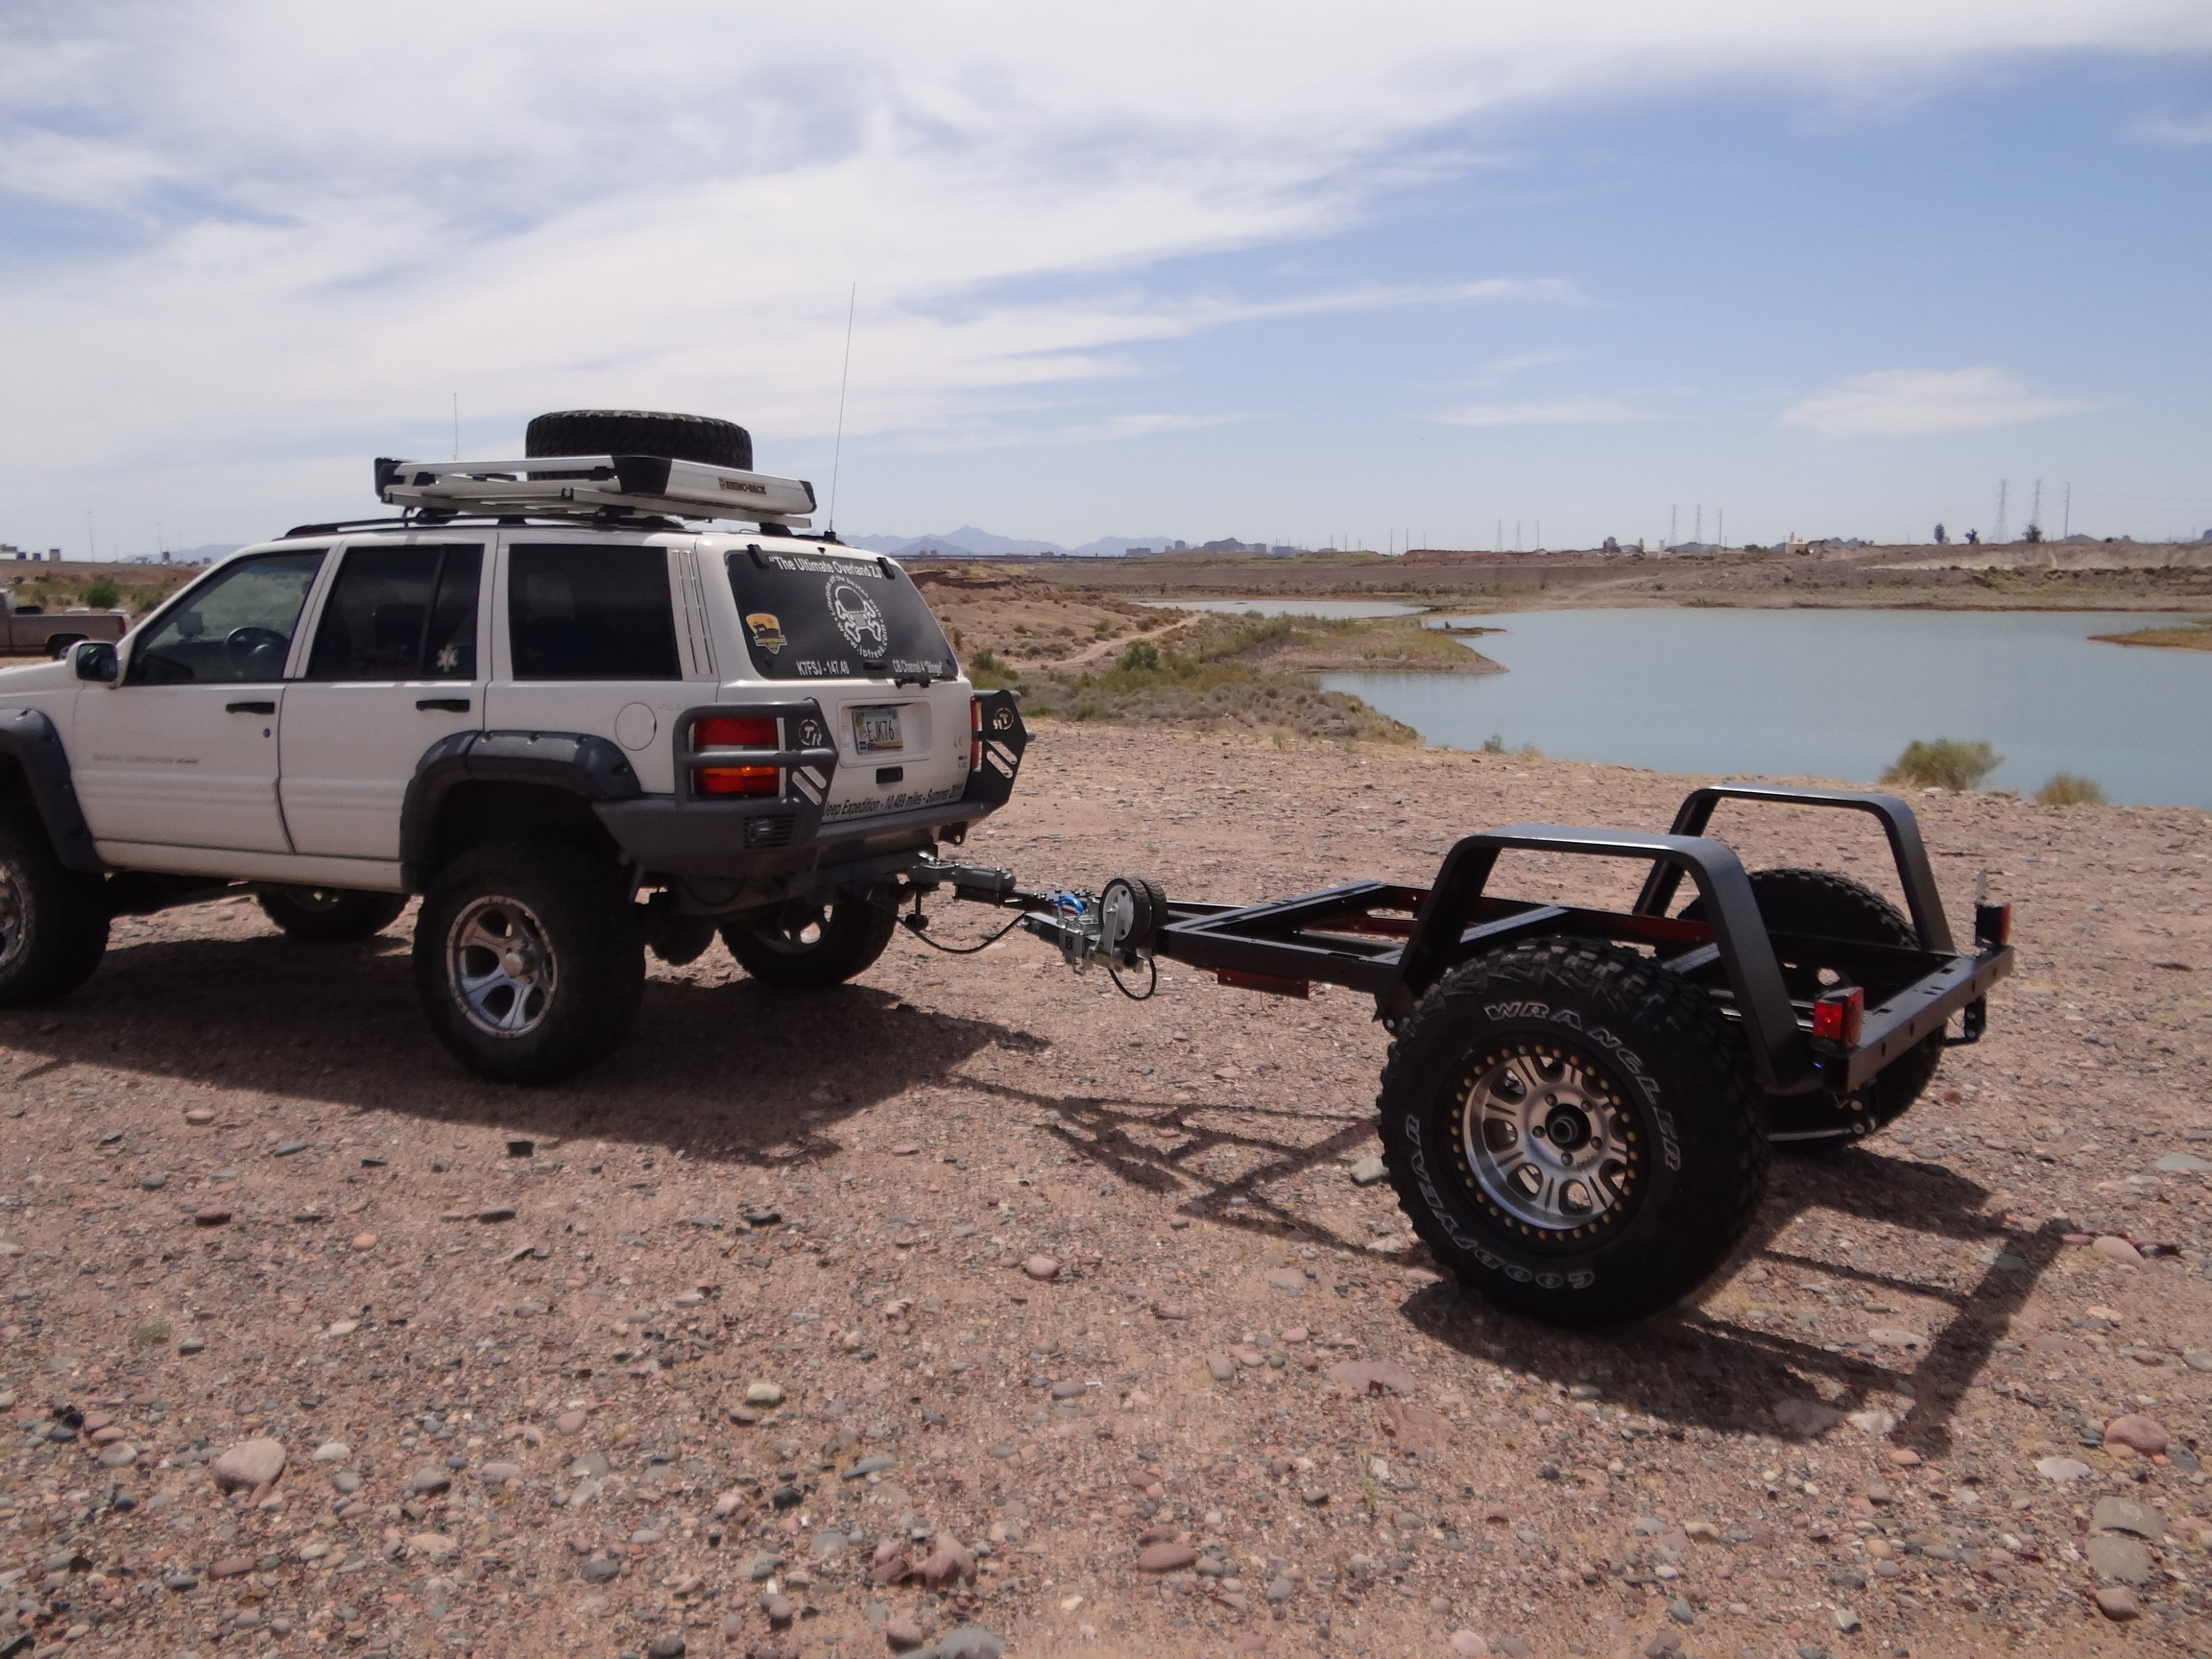
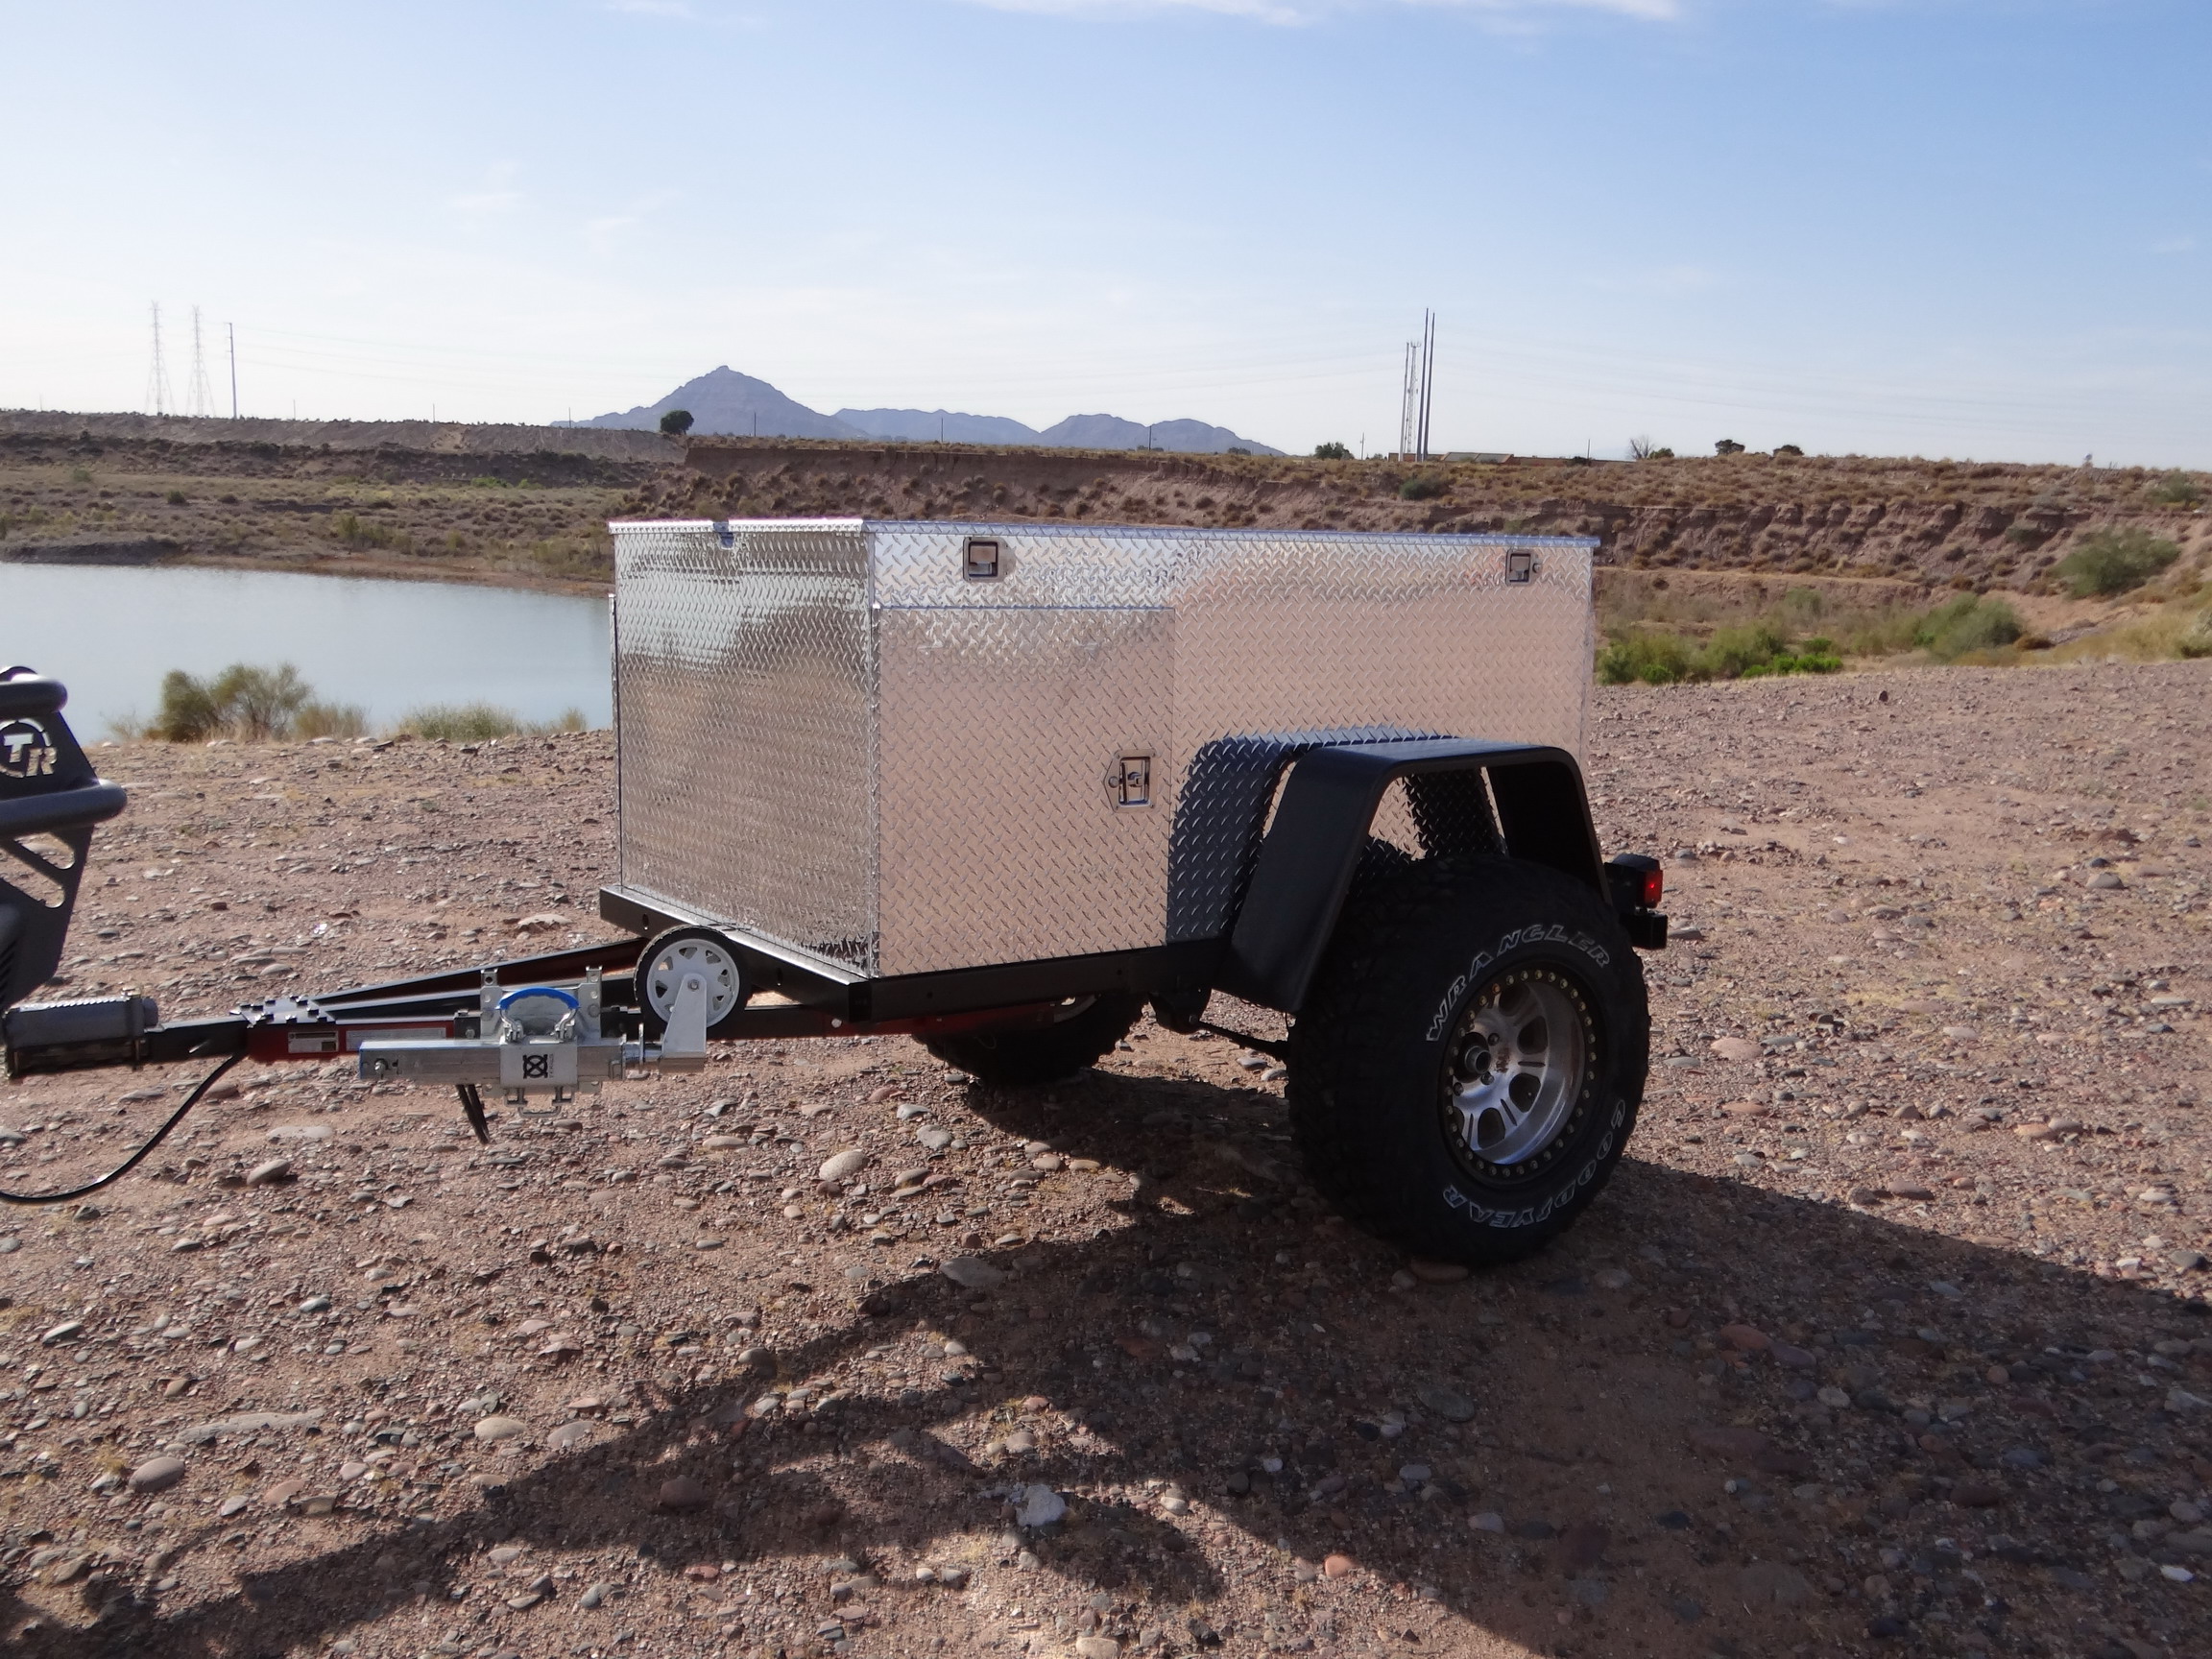
On the way home I stop at the same "Kodak Moment" spot and take some pictures of the now finished product. I like it !
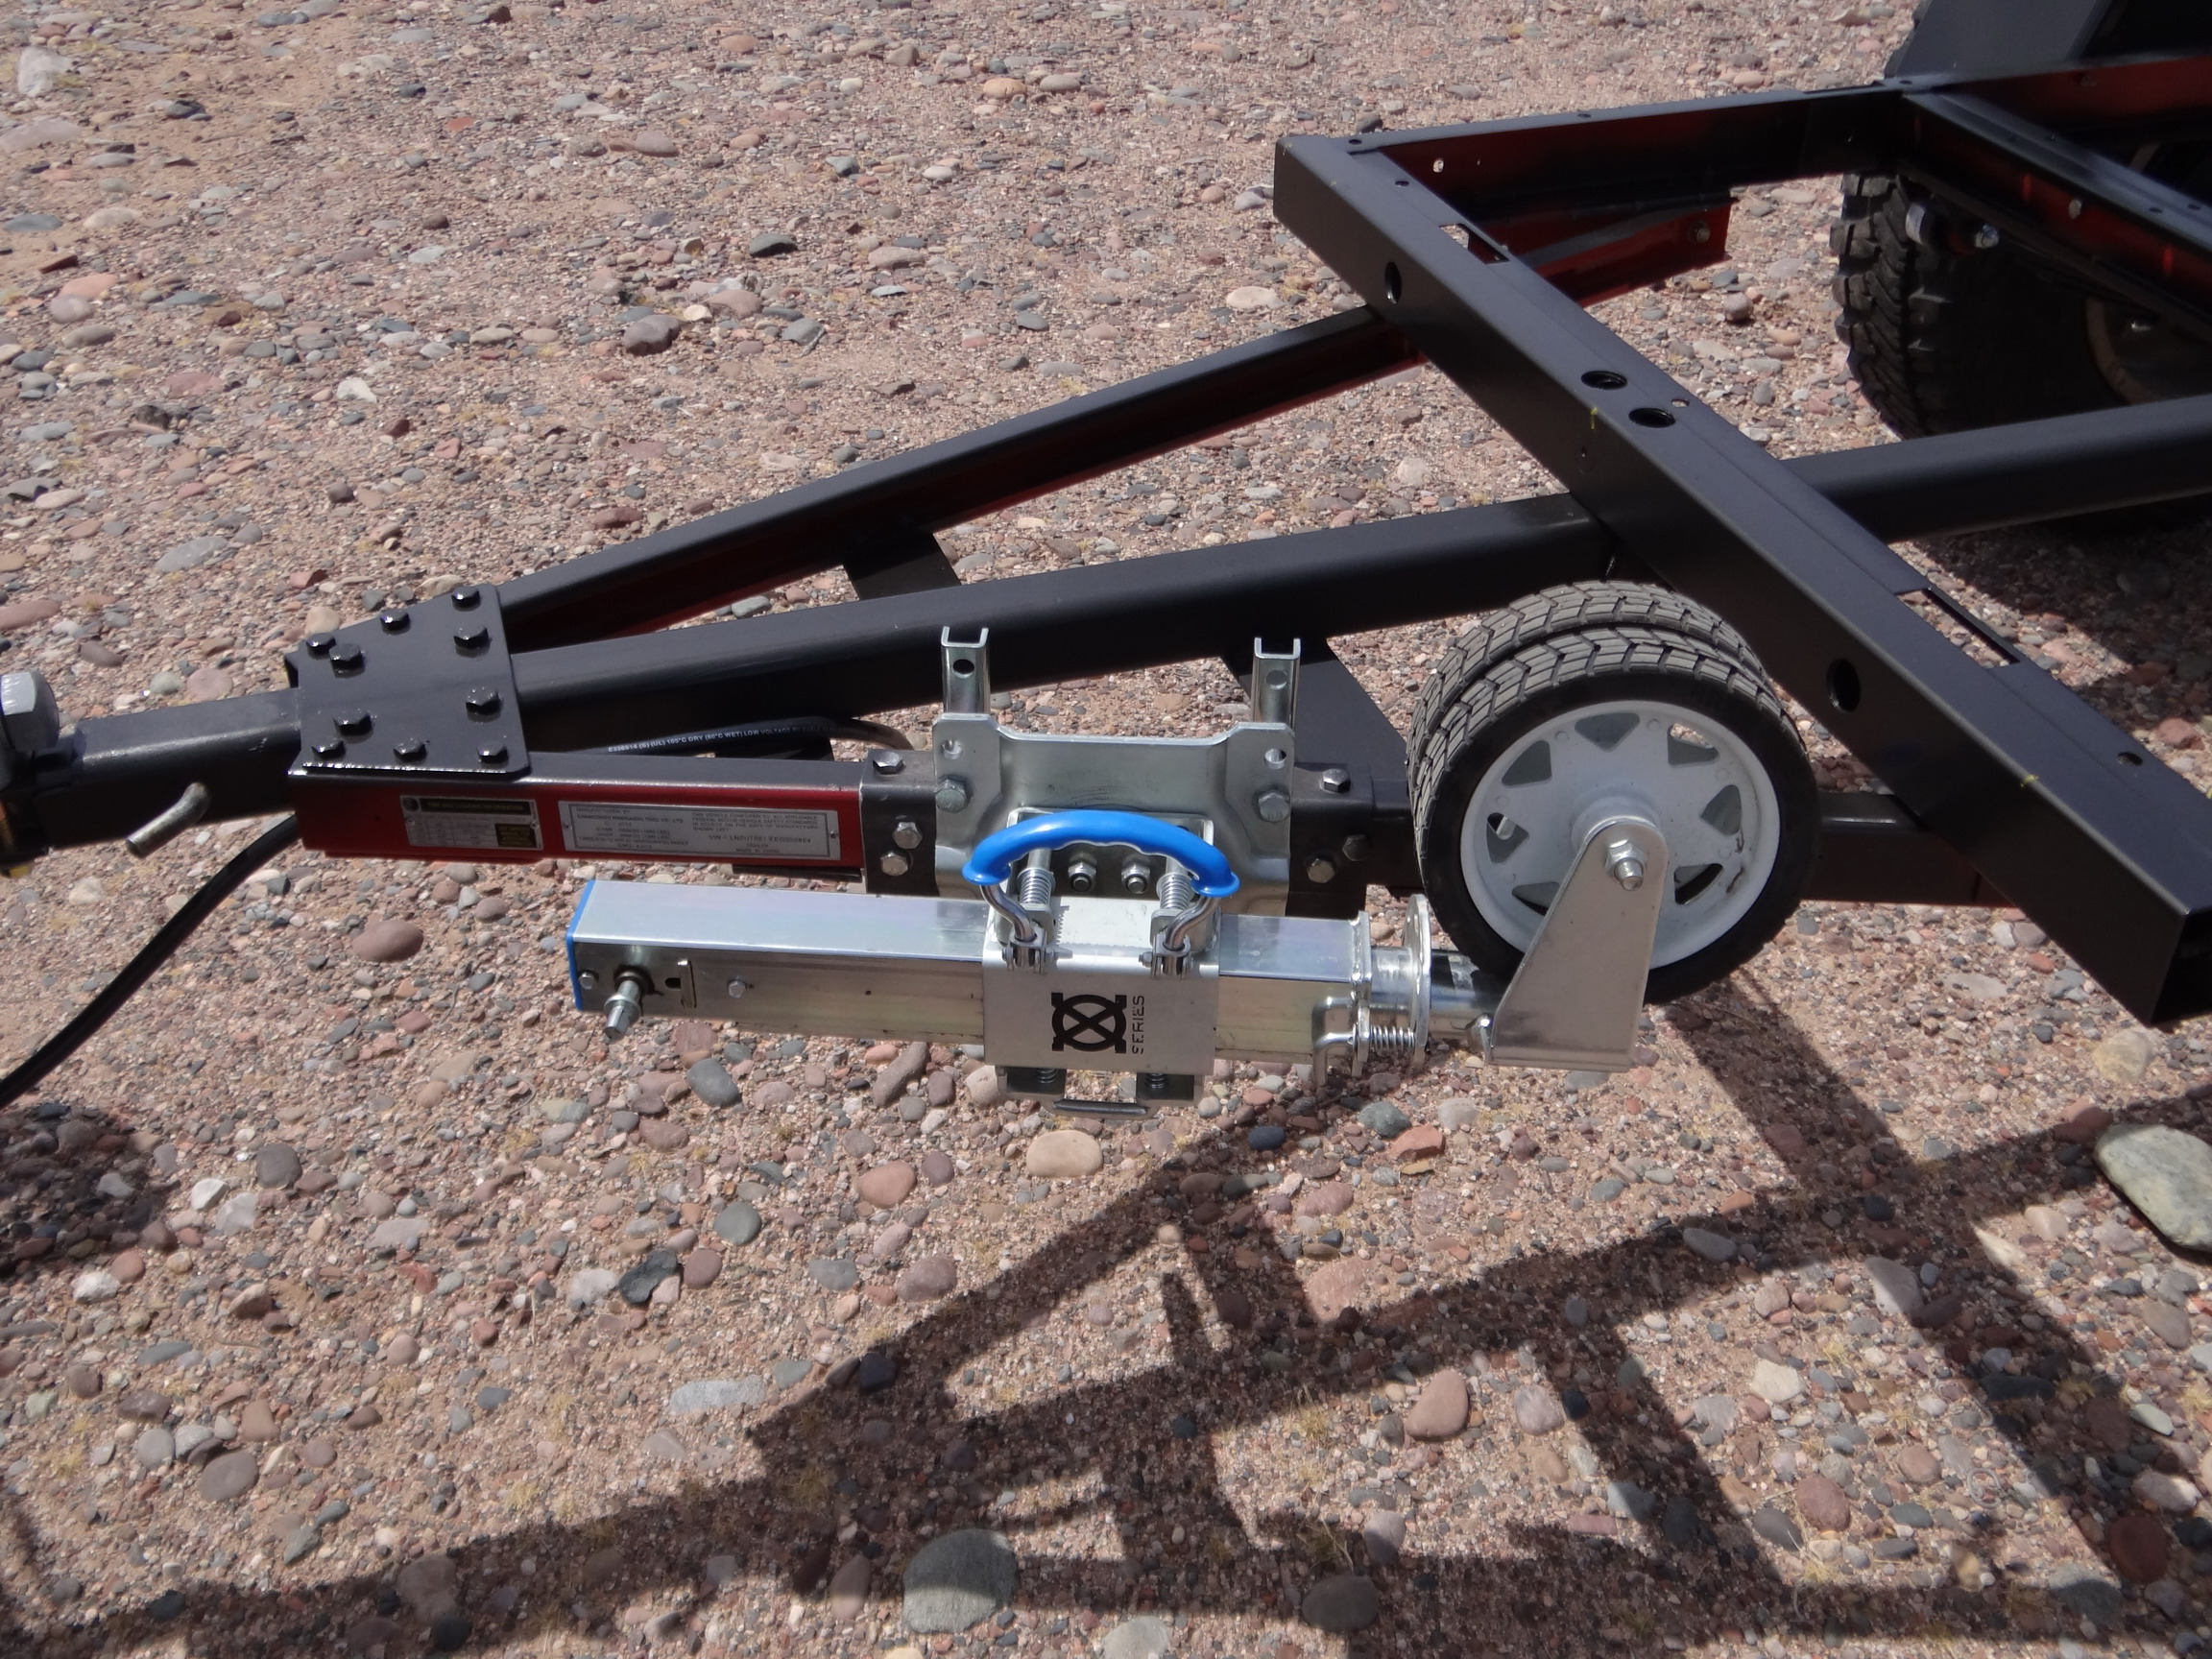
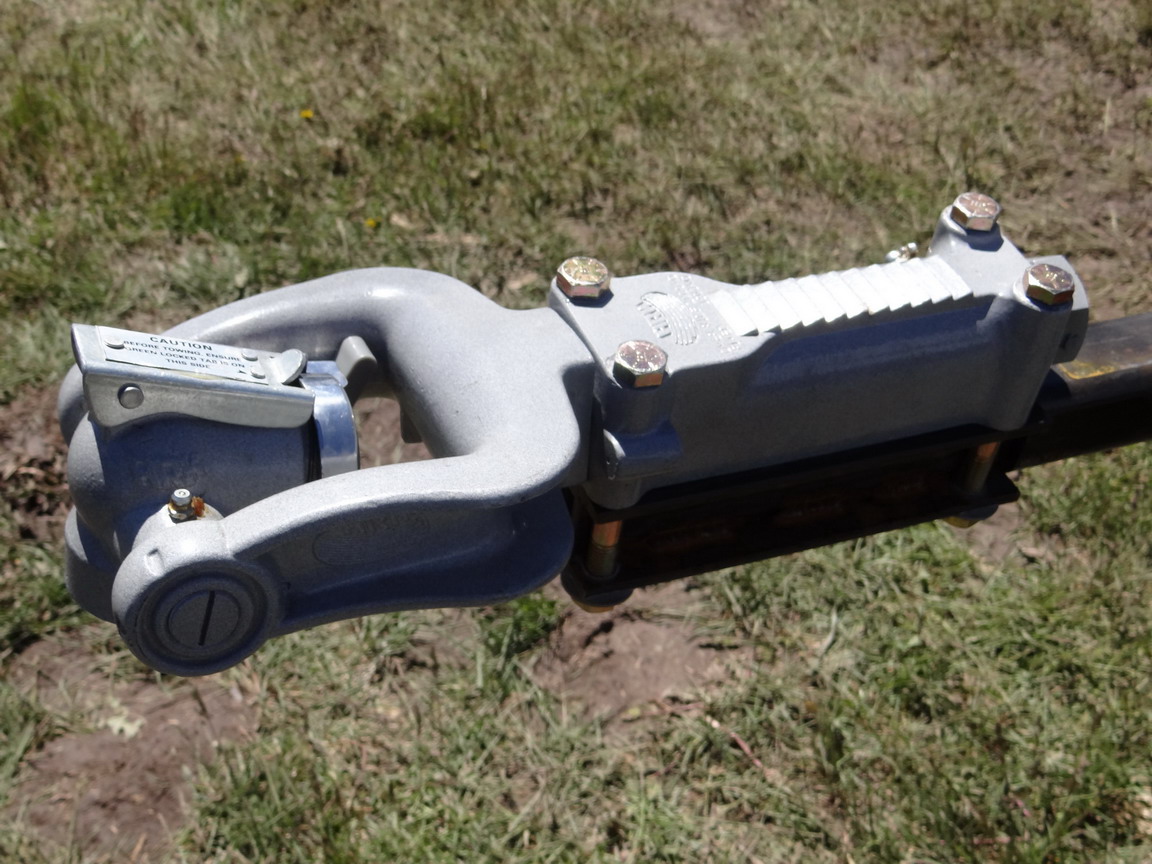
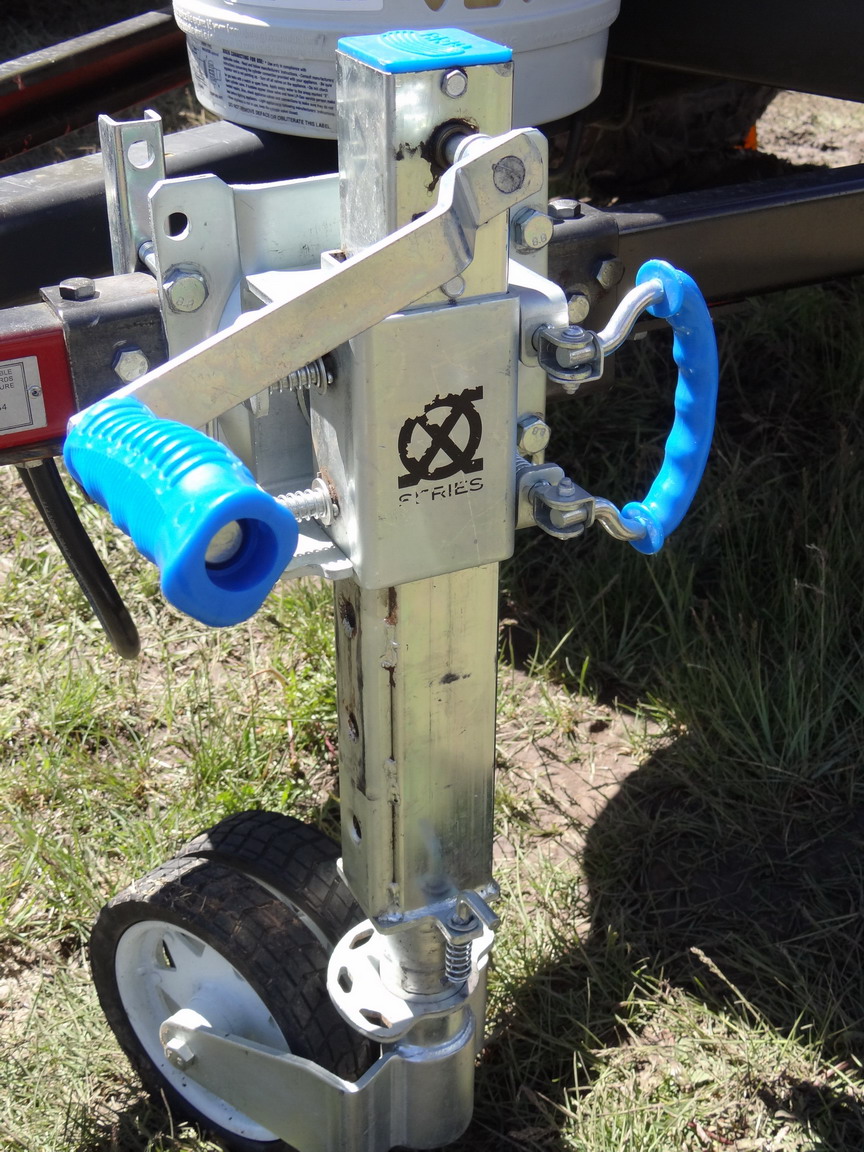
One thing not shown yet are my choices for a coupler and trailer jack. The options I chose are both from
ARK Corporation out of Austrailia. They are just starting to import the Jack and will be importing the coupler
later this yet.
 Click here for -------> ARK Corporation Off-Road Trailer Jack
Click here for -------> ARK Corporation Off-Road Fully Articulating Coupler
Click here for -------> ARK Corporation Off-Road Trailer Jack
Click here for -------> ARK Corporation Off-Road Fully Articulating Coupler
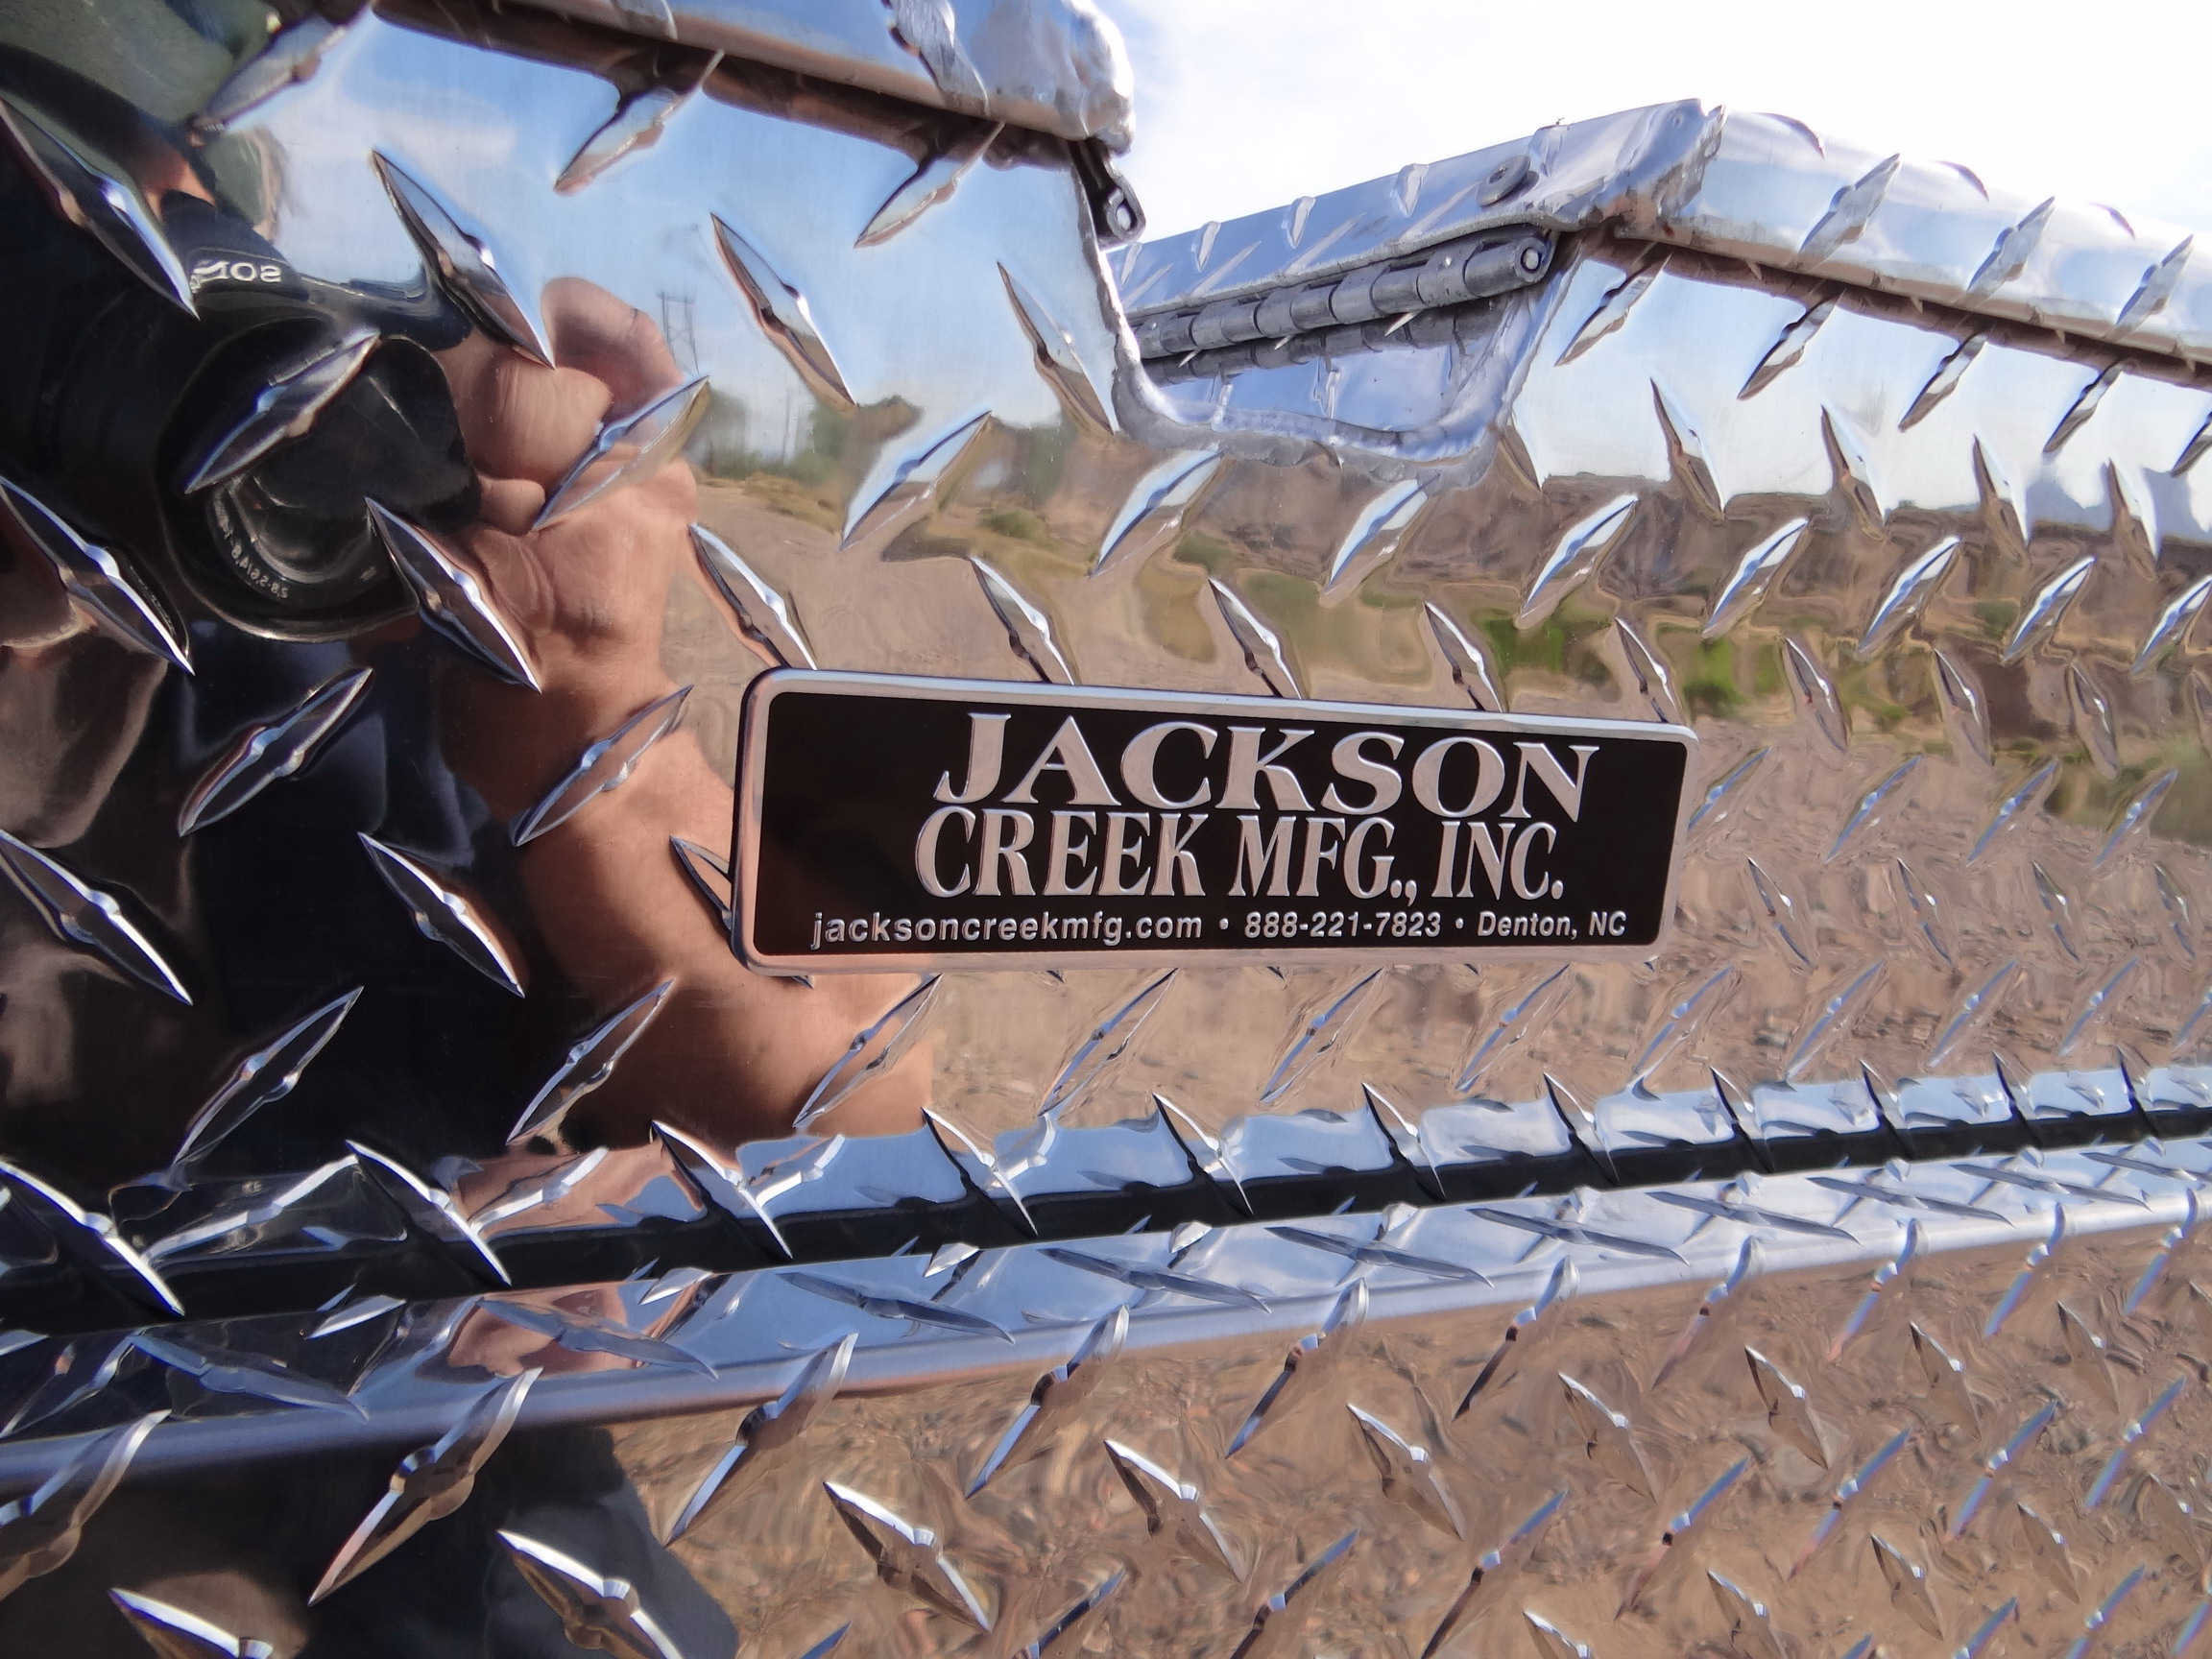
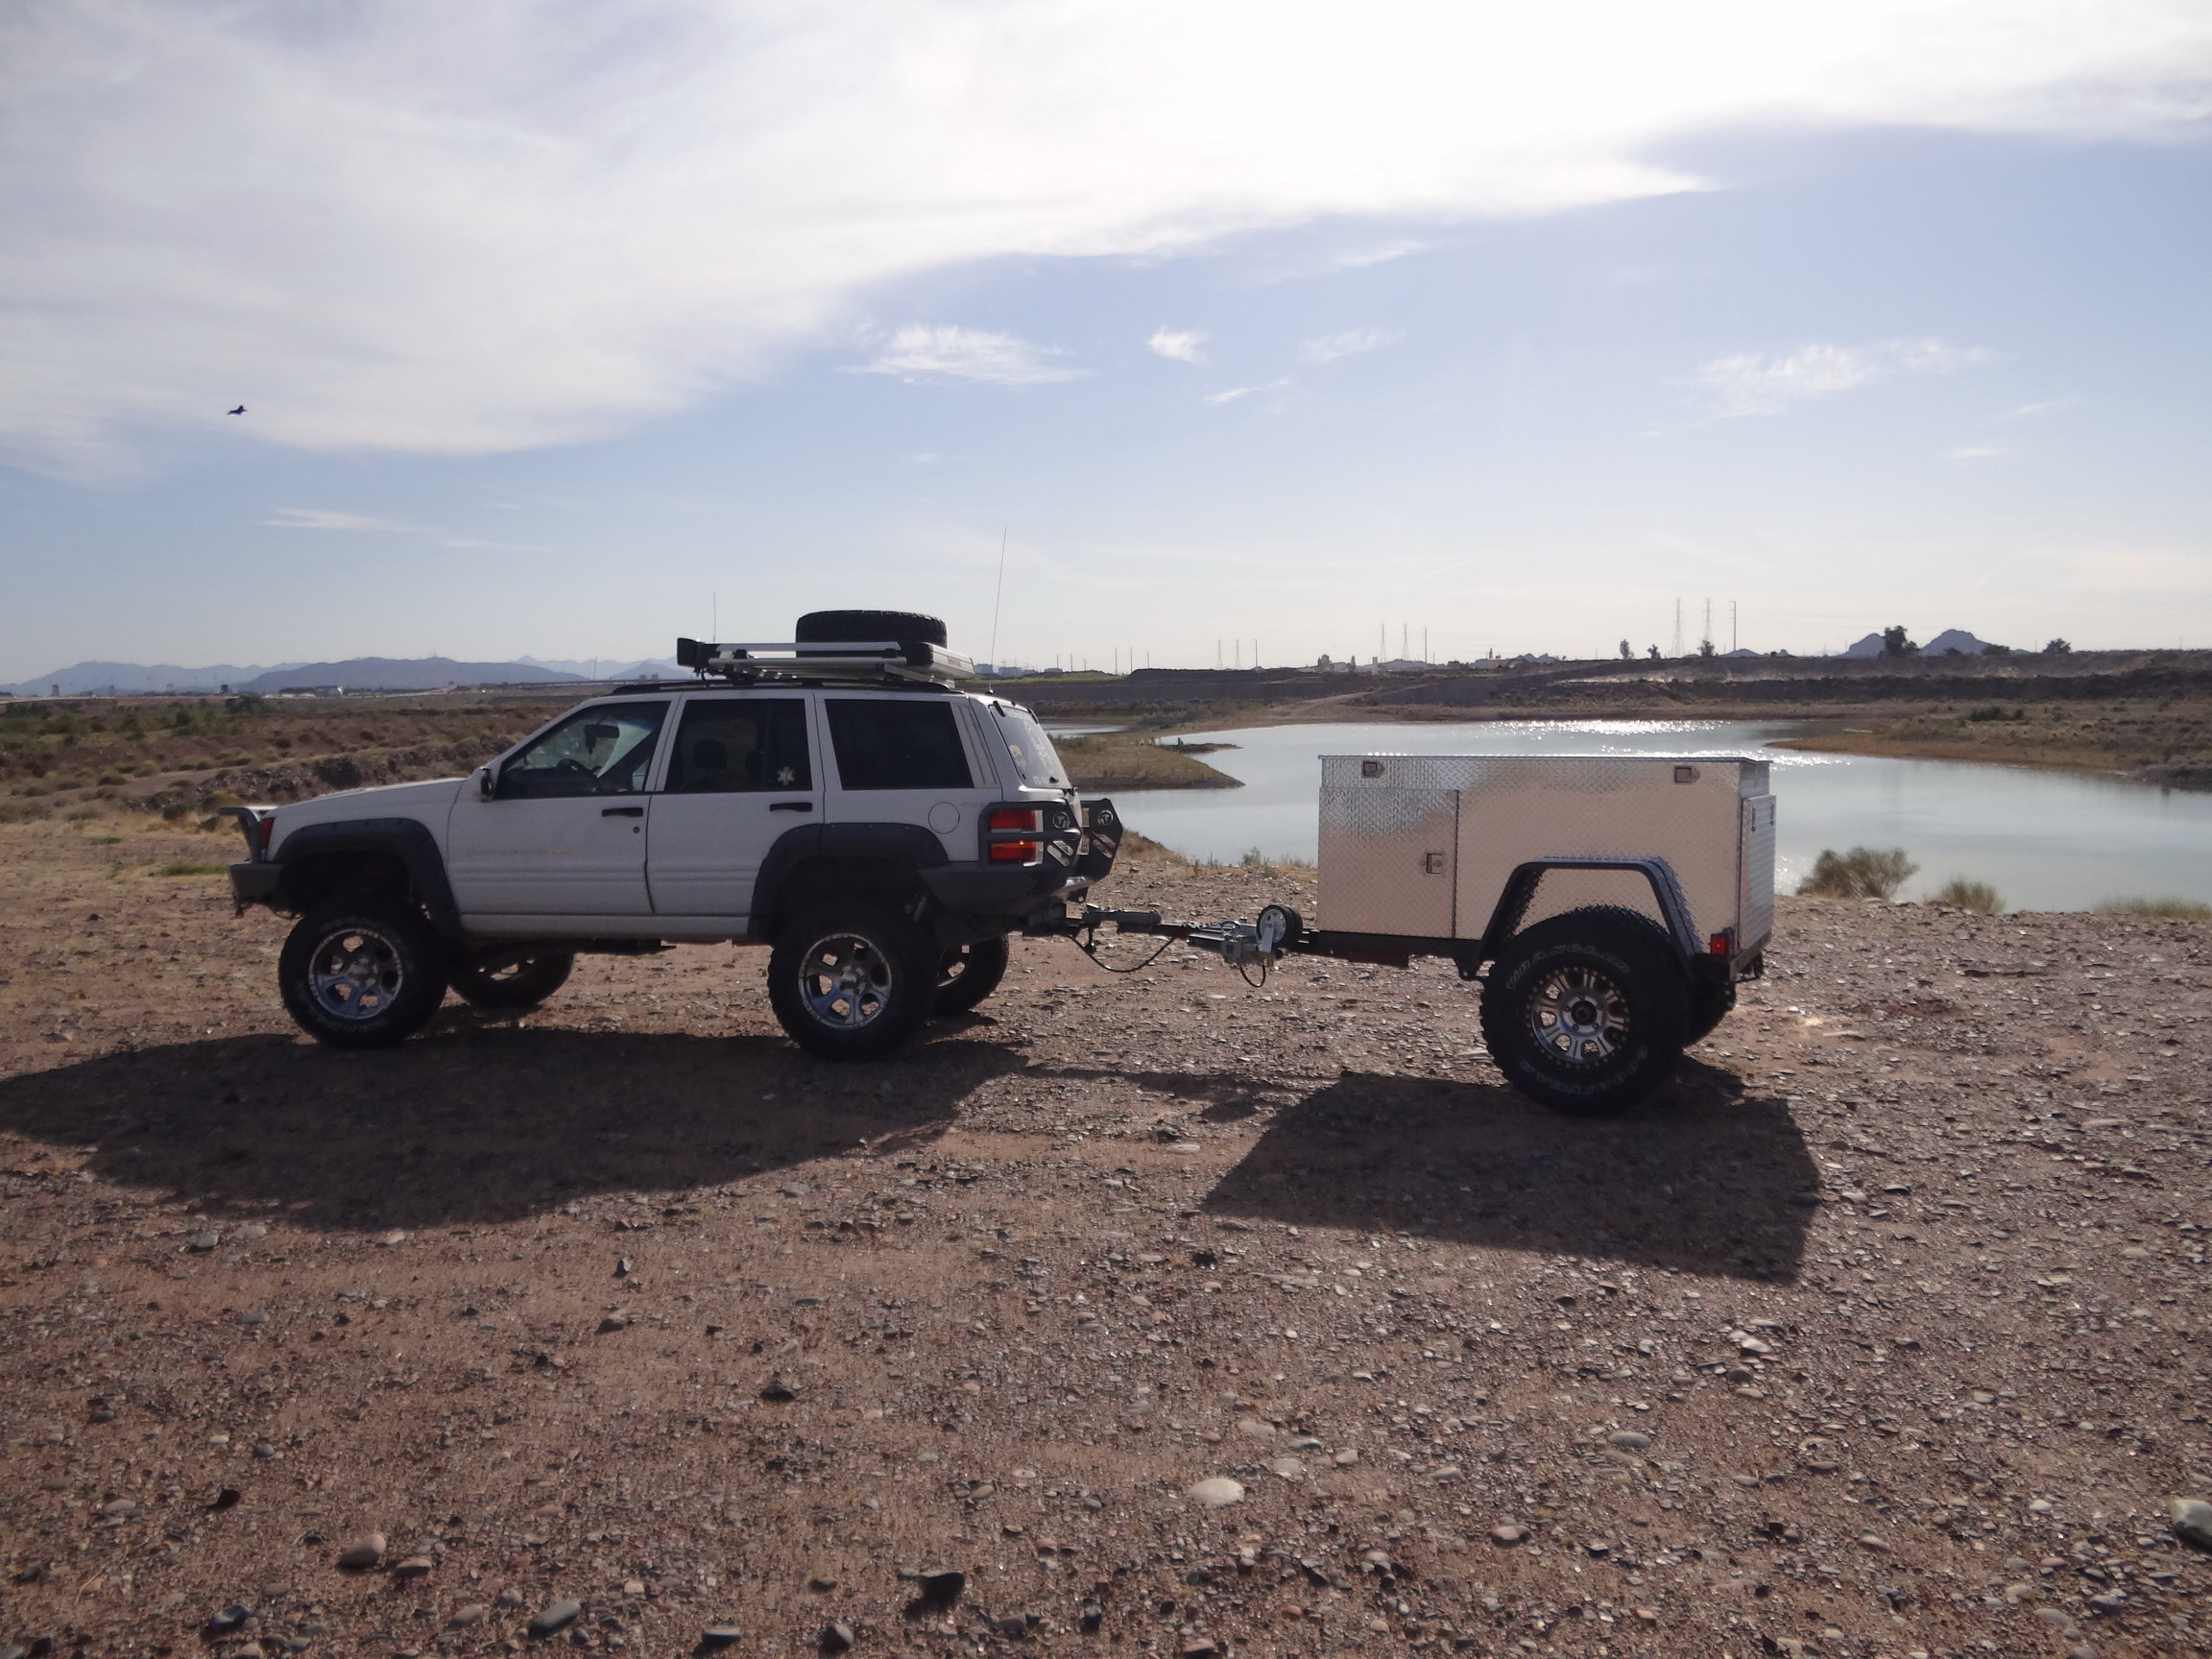
So lets talk about the box some as up to now we've been all trailer frame. The box from Diamond Deluxe/Jackson Creek Mfg. is really nice. The quality and pride of the workmanship are evident. The price you will find is very reasonable. The design is based on what I wanted from an off-road trailer. It can be adapted in different ways to meet what you might want such as one big lid instead of the two separate ones like I chose and one side door or none.
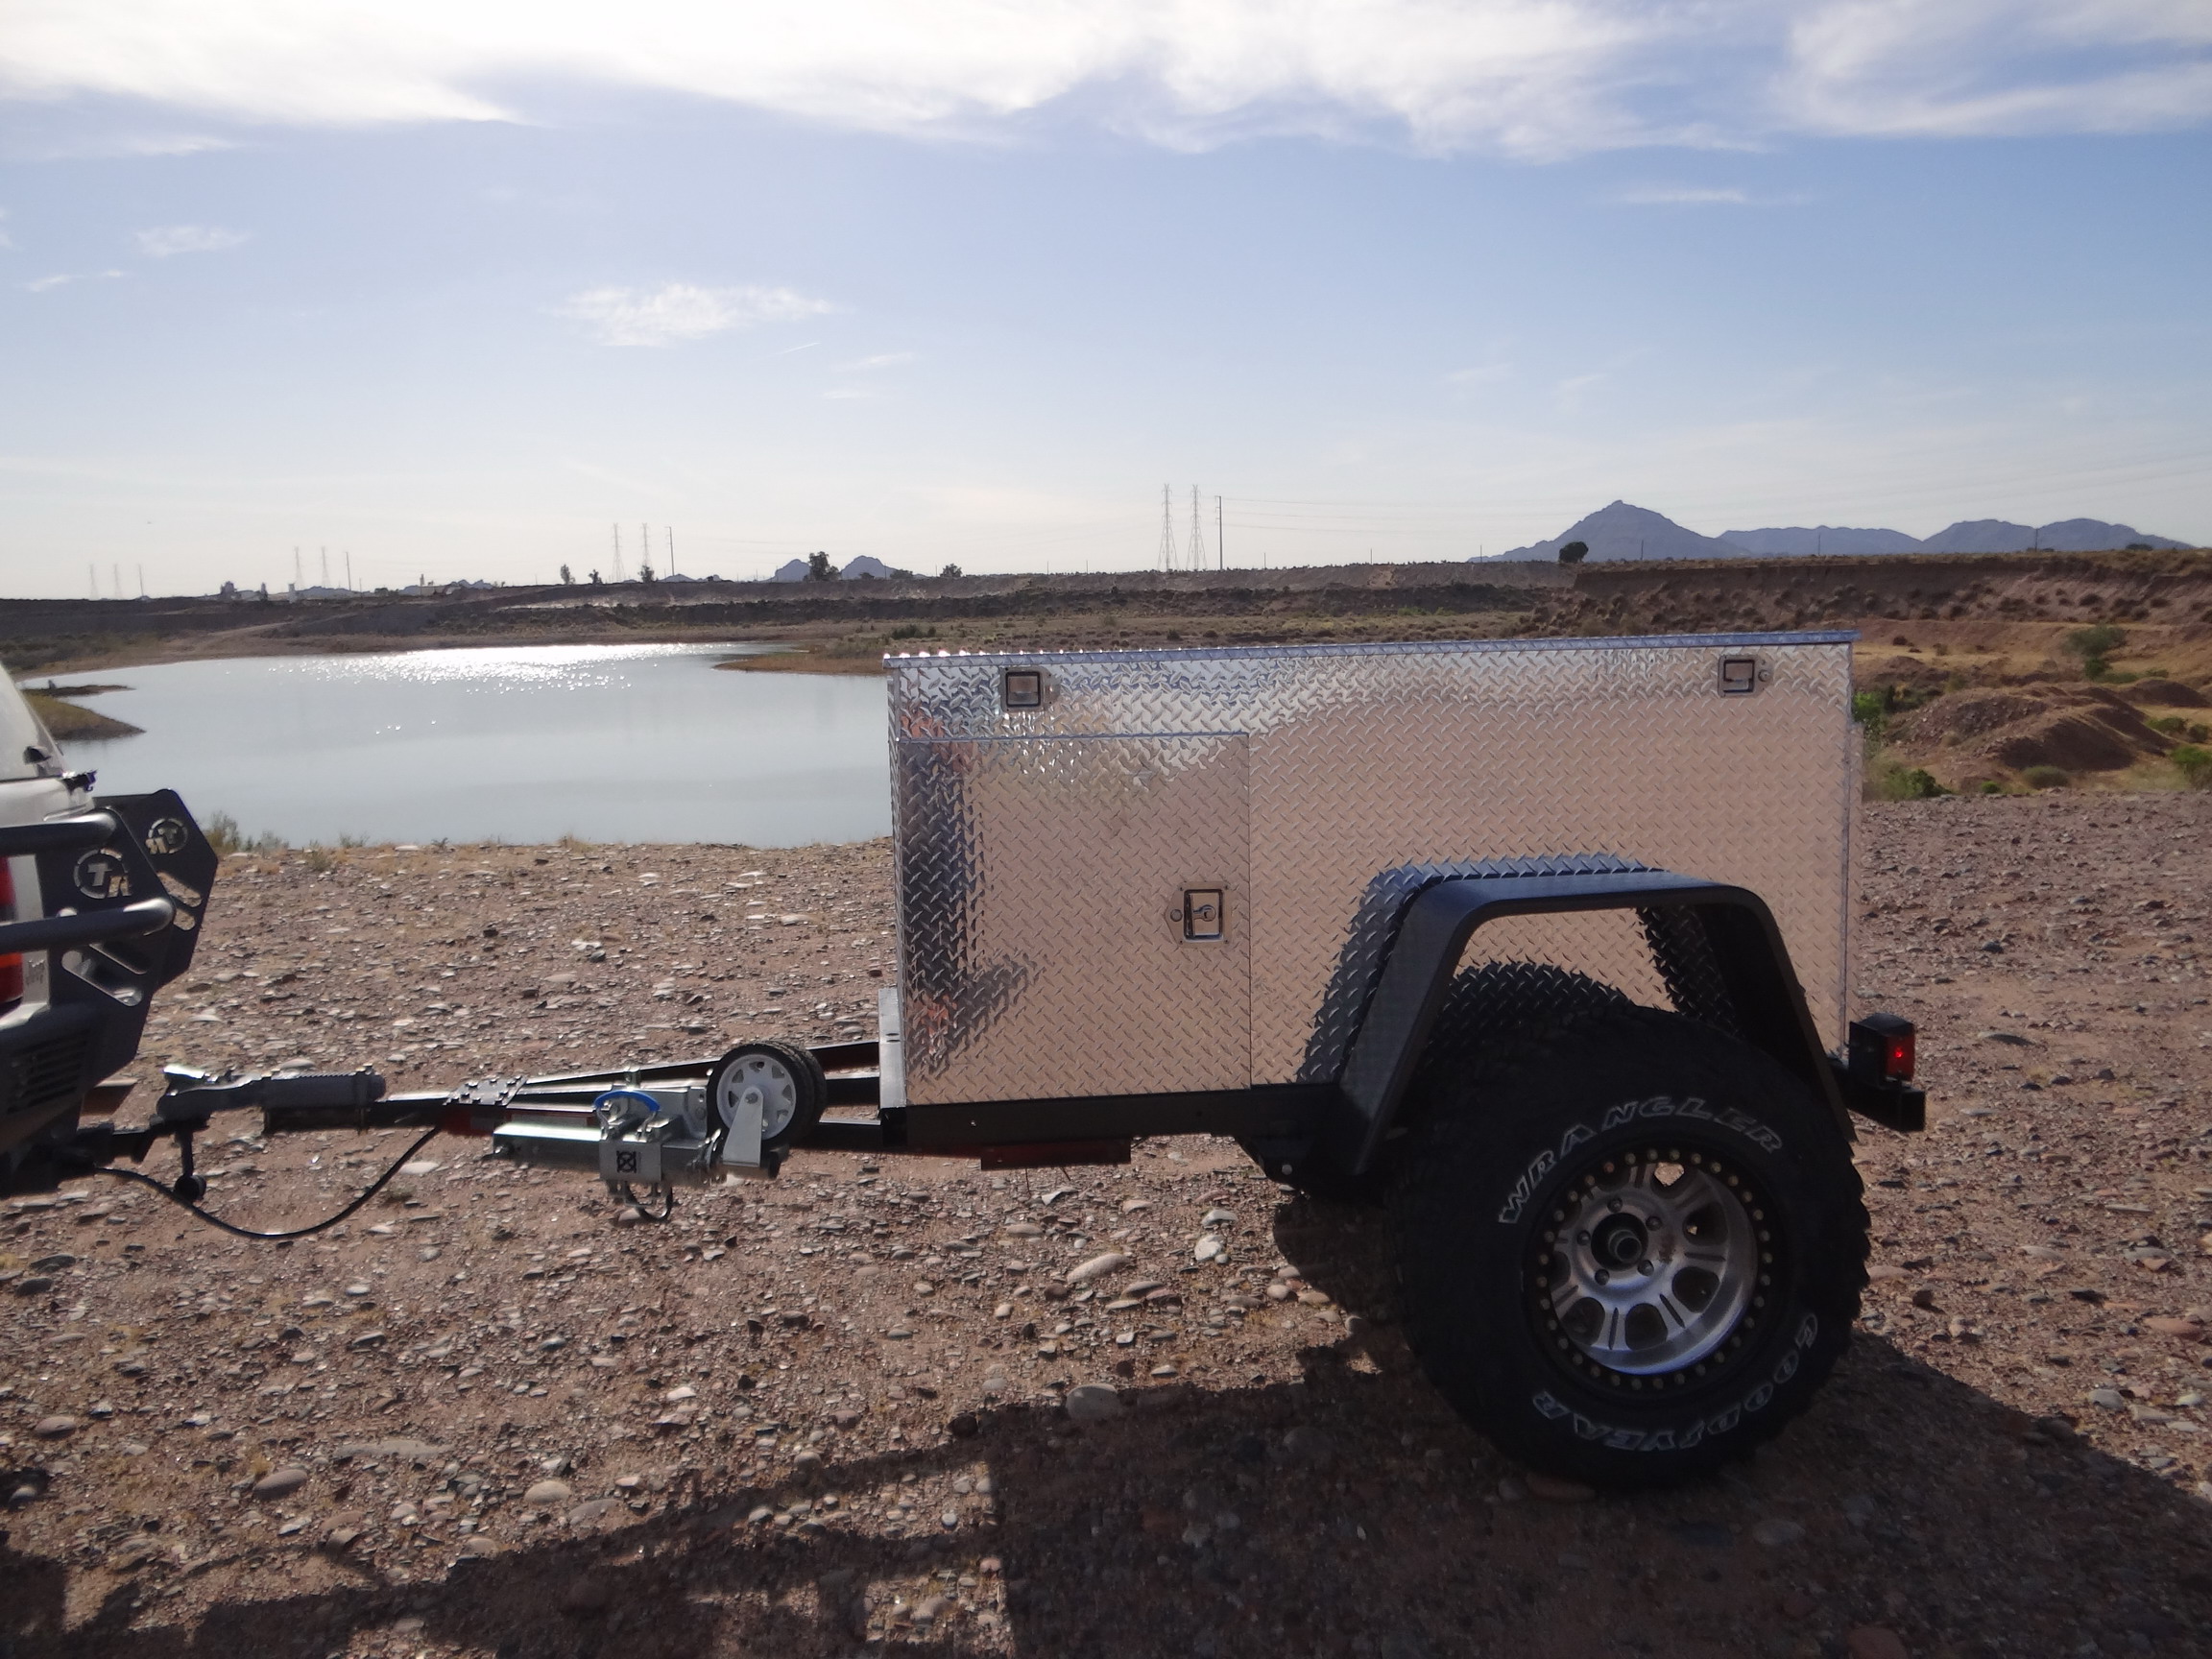
I wanted to have the box built to closely resemble the dimensions of my M101/M416 1/4 ton Military Trailer whose box size is 4ft X 6ft. My custom box is the same dimensions. The Military trailers cargo area is about 24" high, my main cargo area is 26" high. I added 6" of upper cargo space which makes the total height of the custom box 32" high, or about the same height as my Military trailer with the lid I had custom made for it. The ground clearance with the spring under axle set up is 24" with the 33" tires or the same amount of clearance as my military trailer with similar sized tires. My hitch coupler slides into the front 2" receiver and can be adjusted up to 18" longer to make up for different weight distributions in the trailer.
All in all, I am very pleased with how Phase 1 of our trailer turned out. It is much more versitle in my opinion than my Military trailer, actually weighs about 100 lbs less due to the all aluminum box and gives me much greater access to cargo. I am thinking that a commercially built trailer similar to this one would run you around $7500 so the approximate cost of $2500 for our project trailer is about 1/3 of the cost of something close to it.
Here is how it breaks down in cost for the basic trailer:
Basic Custom Aluminum Box: $1500
Trailer Kit (net cost after sale of parts not used) $130
Steel for frame rails and center hitch stock: $70
3500# axle with hubs, bearings, perches: $180
Fenders: $42
Complete Spring Mounting Kit from OmixADA: $241
Grade 8 Hardware : $105
CJ7, YJ or other similar sized springs: Used take offs maybe free. New ones: $149 ea.
Wheels and tires: Depends on if you have access to some at no or little cost. Used tires and rims
can be bought for $50 to $100 each. I already had so no cost to me.
Options: All depends on what options you want to or need to add.
The whole idea behind this project was to build an affordable trailer that would give you good long term service for moderate off-roading. Since most if not all of the trips and trails that Jeep Expeditions plans are stock Wrangler friendly, this trailer build will be perfect for our guys from Mohave to Moab, Canyon De Chelly to Death Valley and everywhere in between. Keep in mind that this trailer can be built in your driveway in just a few days with tools you already have. No welding is necessary or needed. But if you want to really stiffen things up, a few strategic weld beads will make things really solid. Remember when you bolt the box to the frame you are essentially going to make the box a part of the frame which will stiffen it all the more.
Using a kit is the perfect option for the driveway mechanic who doesn't have or want to spend $5000 on a trailer.
Isn't building something from scratch fun? The more I build the more ideas I get on how to improve on it. You'll see what I mean once you start building yours.
What's in store for our trailer going forward?
I plan on adding some options to the trailer. Since options end up costing more money, these can be done over a period of time as you find that you want or need some of these options and as your budget allows. After all, when members of Jeep Expeditions bought 36 surplus Canadian M101 trailers about 8 years ago, they were just simple trailers. Some of the guys still use them as they were stock with a tarp over the top to protect what's inside from dust and the elements. Most have spent a few hundred and added a hinged lid. Some have mounted roof top tents and most have changed the bolt pattern of the hubs to match their Jeep along with tires to match their Jeep. All of those trailers started basic and the owners optioned them out over time.
In the next issue or two, I'll be adding a number of options based on my preferences, needs and tastes. One of these options will be a roof top tent and just wait to see how we do that. I think we also need a swing out spare tire carrier. Part #2 of our trailer build, it's something you won't want to miss !
CHECK BACK AGAIN LATER THIS SUMMER FOR MORE UPDATES AND PICTURE UPLOADS OF PHASE 2 OF THE BUILD PROCESS !
So what do others think about our new trailer ?
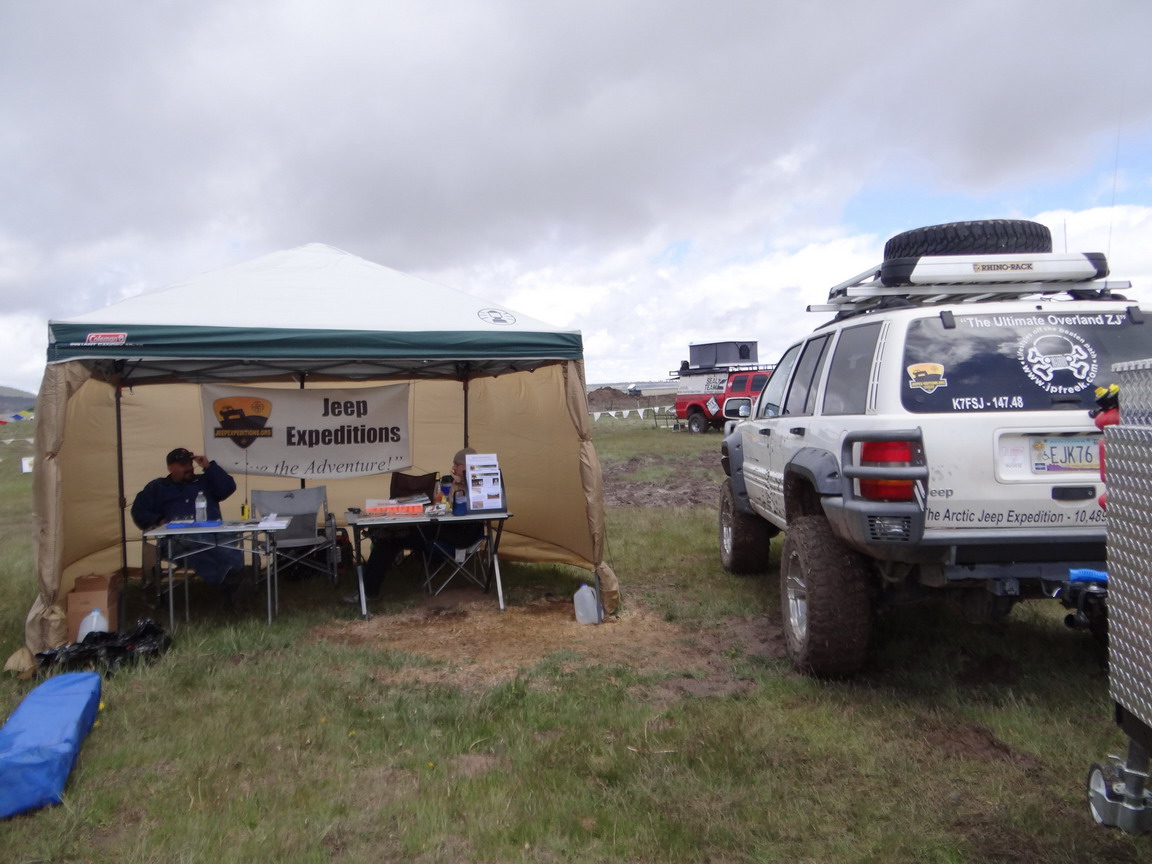
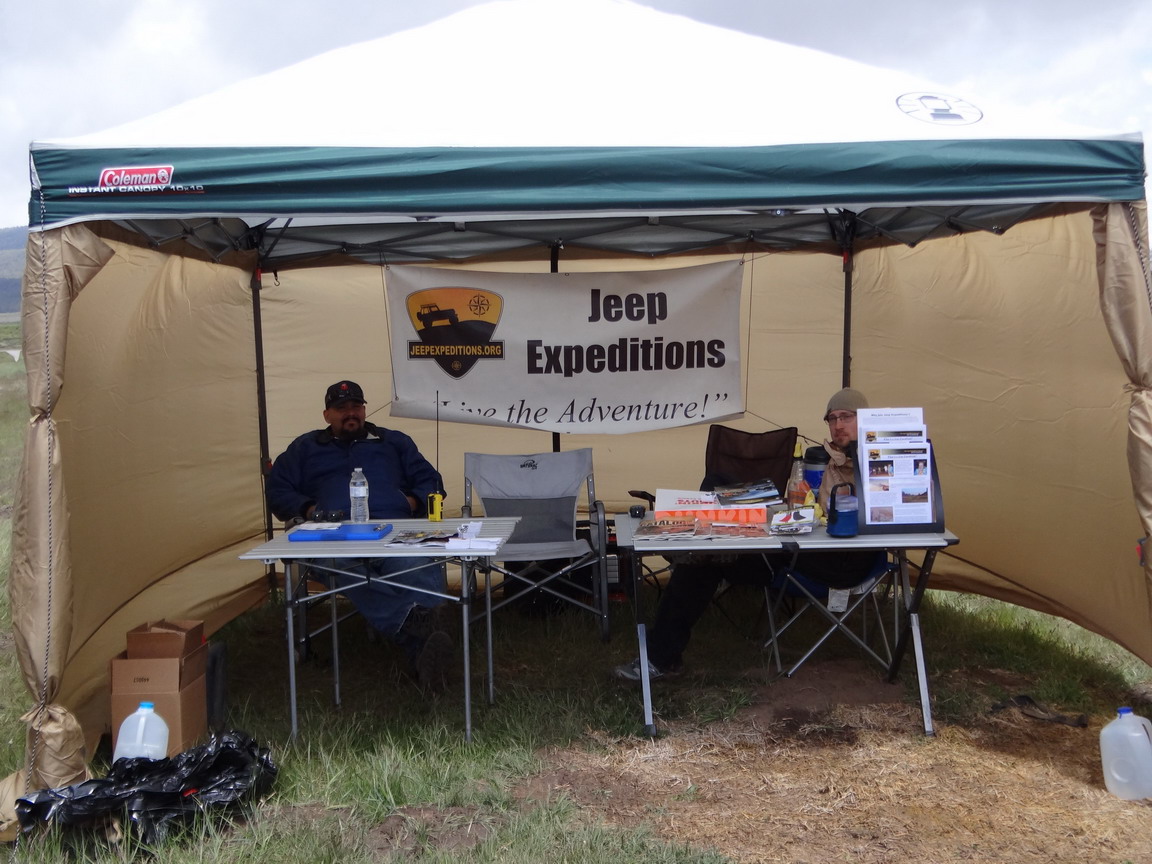
We took the trailer out to display at the Jeep Expeditions booth at the 8th annual Overland Expo held in Flagstaff, AZ - May 15-17, 2015. Despite the bad weather and the
what appeared to be lower than normal attendance due to the weather, our trailer was a big hit. Lots of people looking at it and lots asking questions and taking pictures.
After all, entry level trailers were on display and being sold starting around $5000 before options and not nearly as nice as ours.
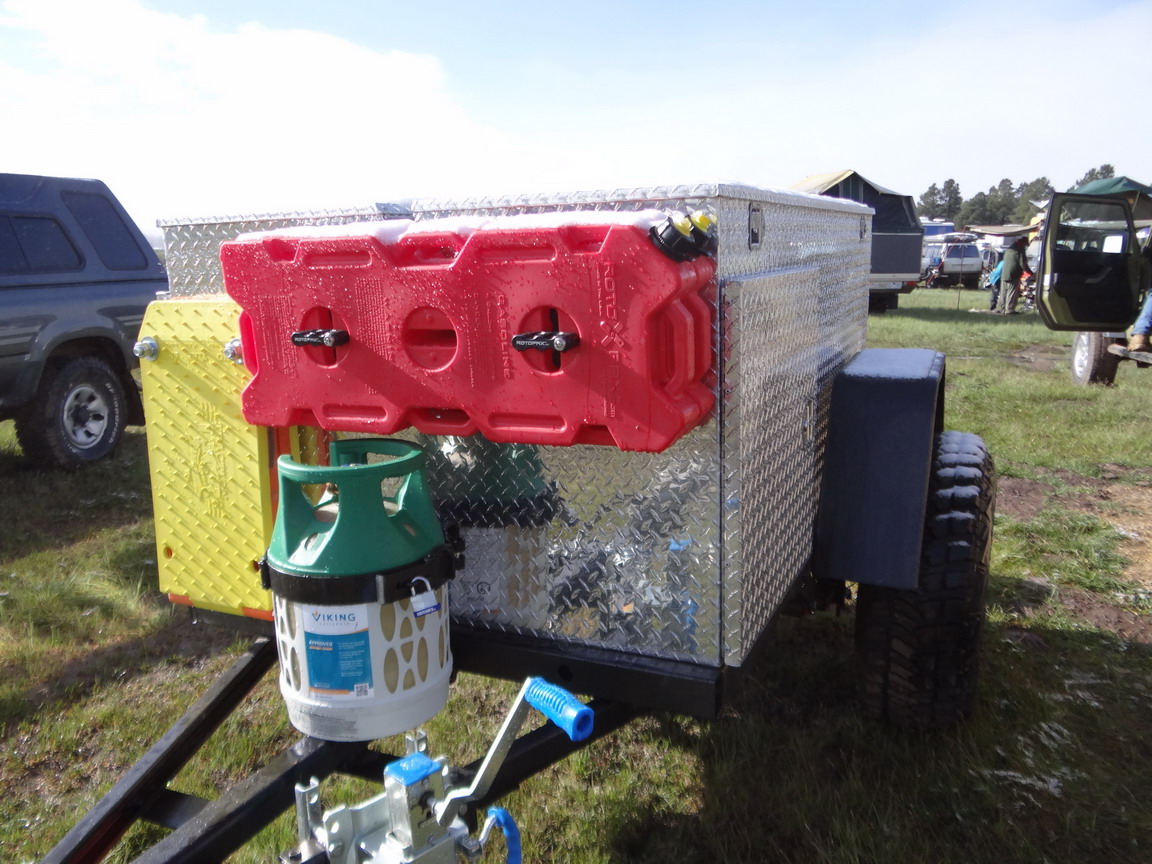
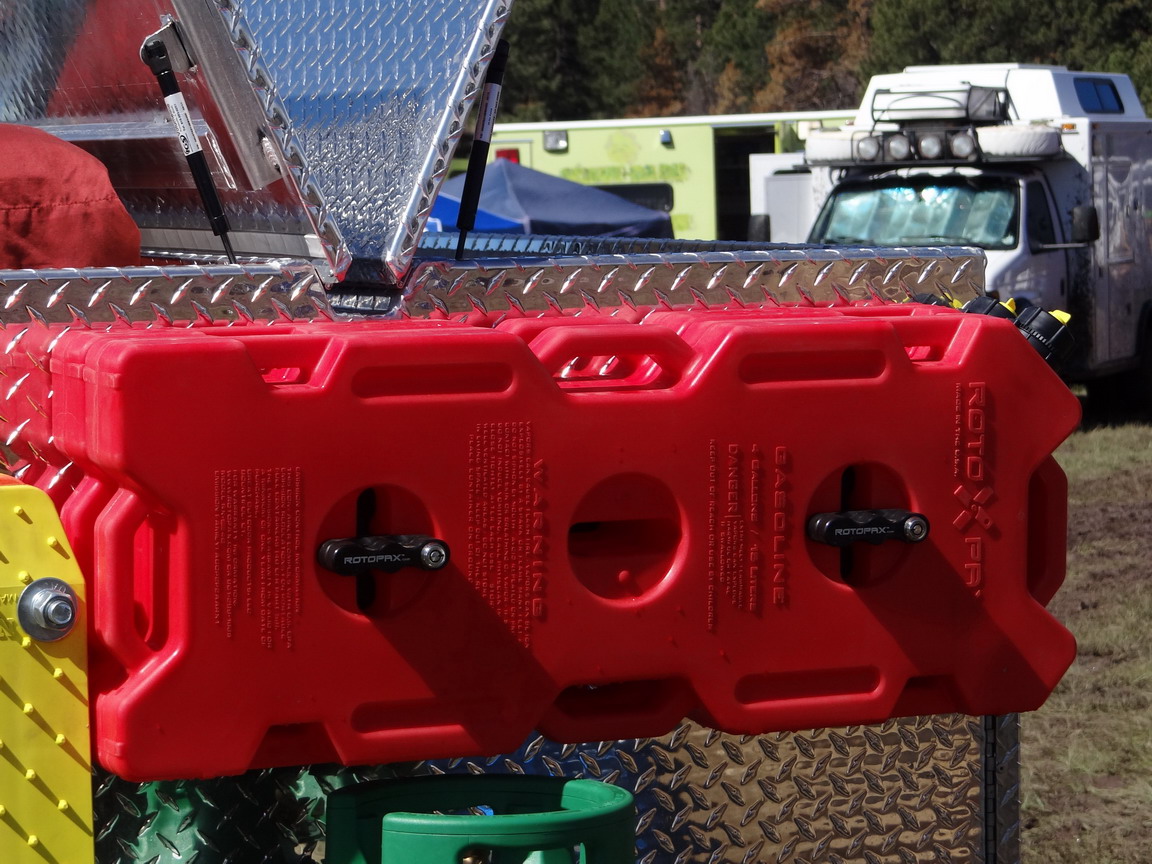
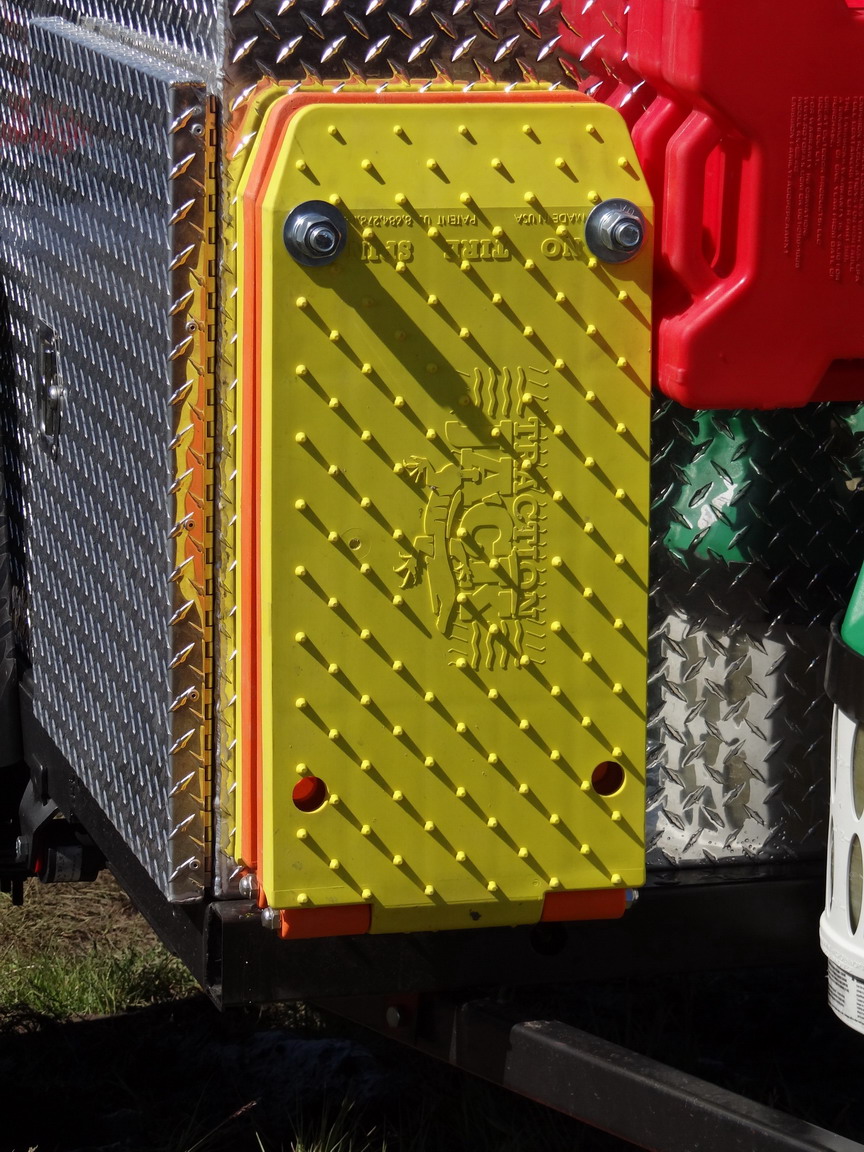
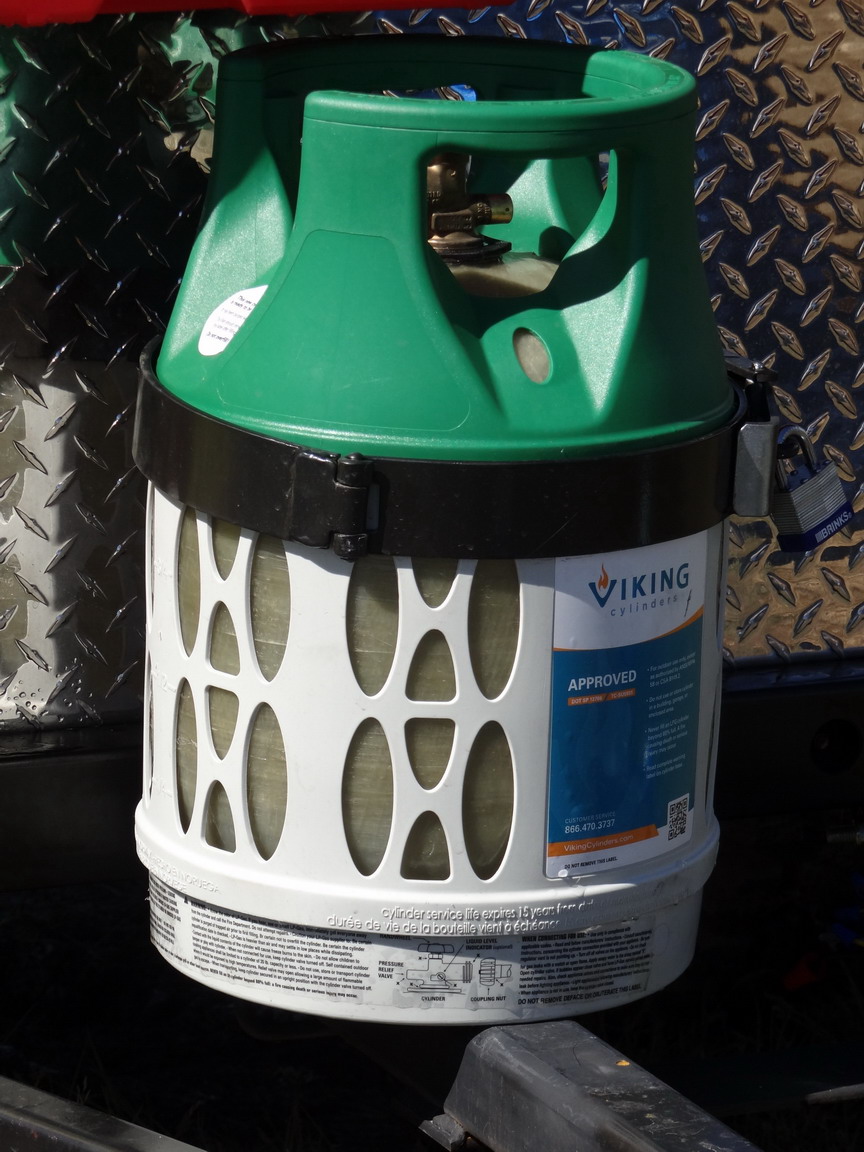
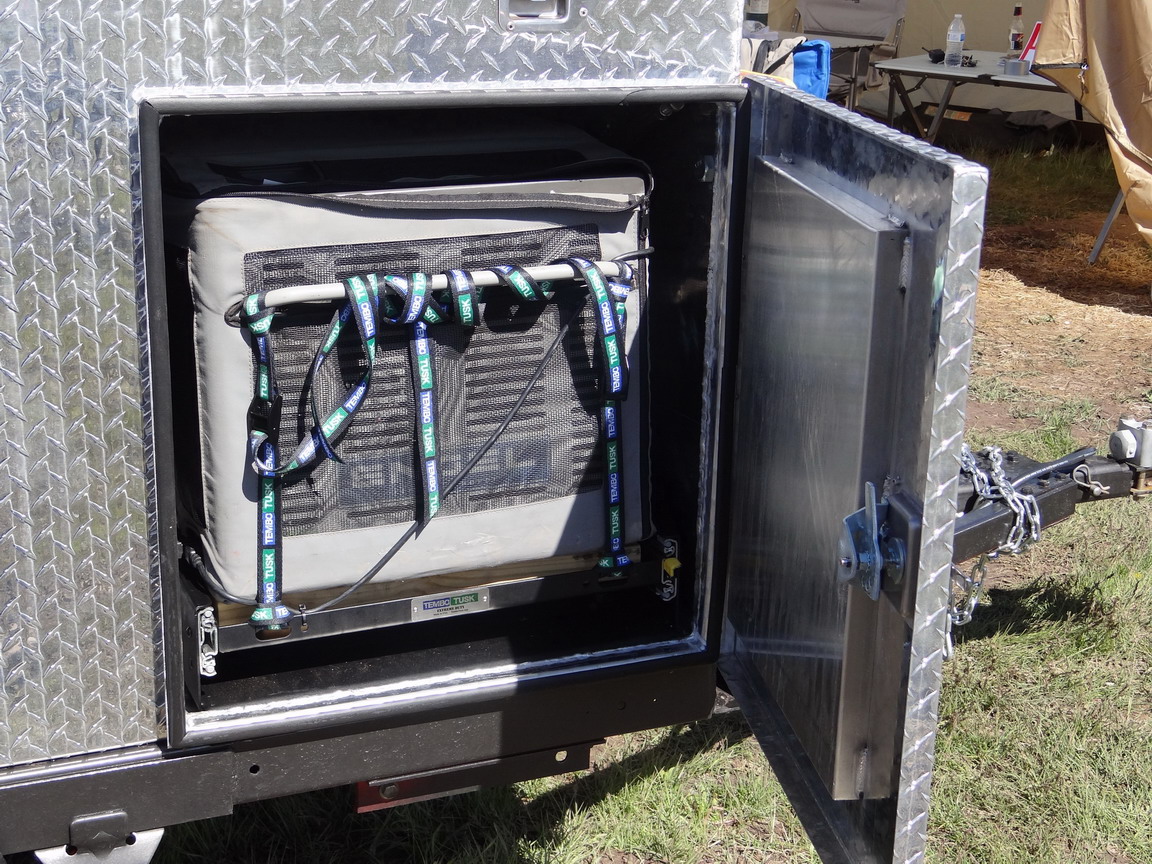
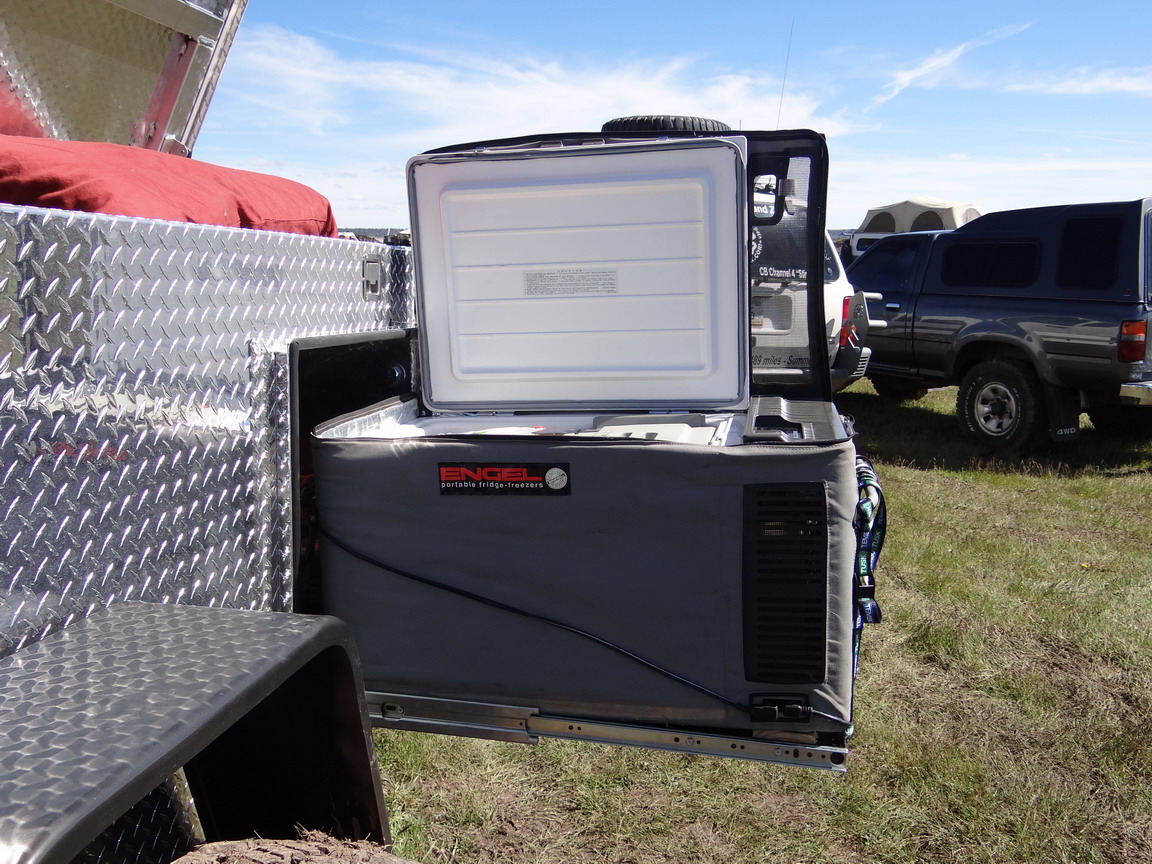
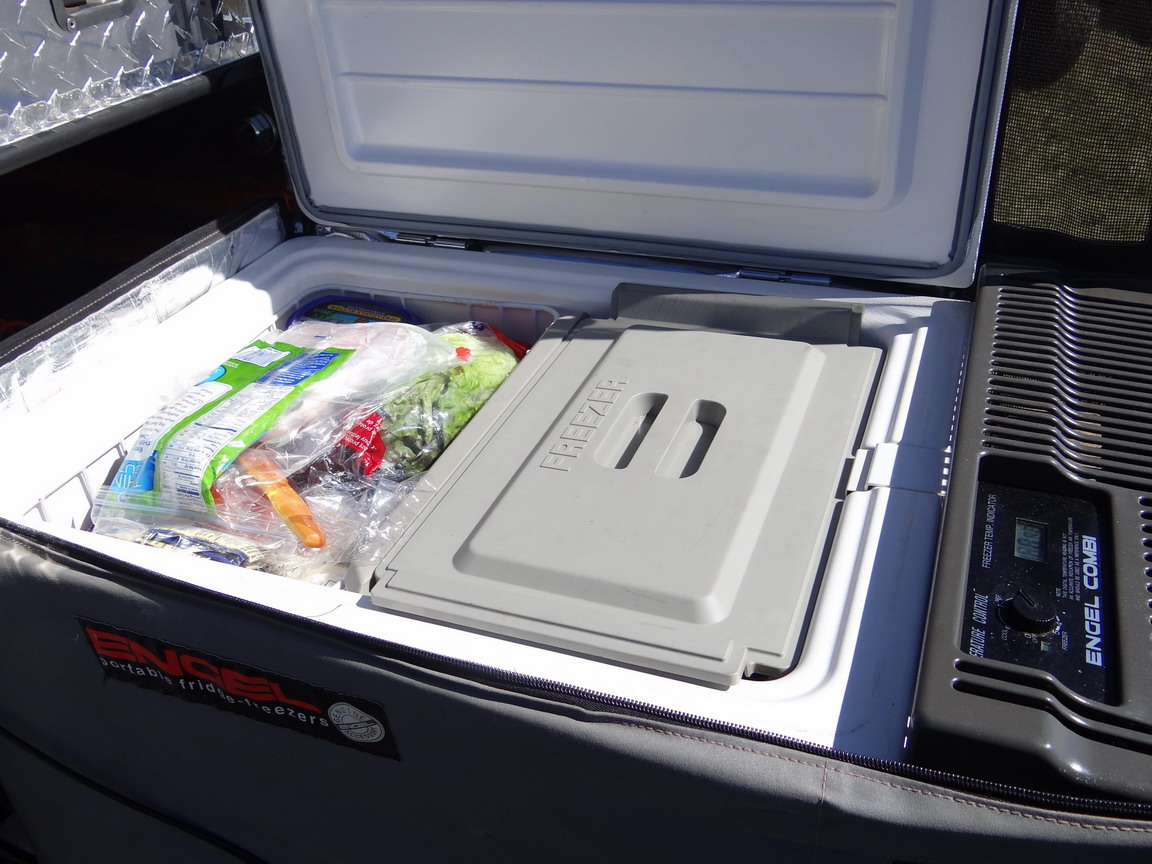
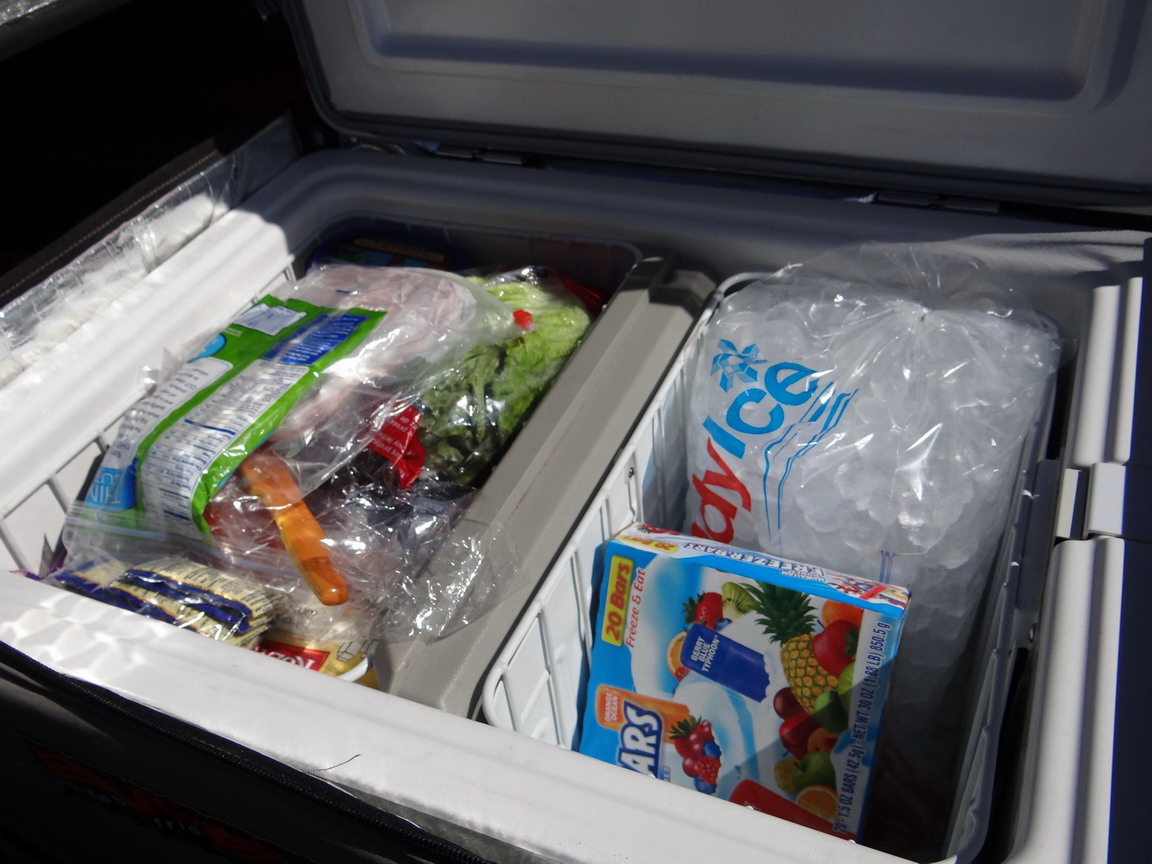
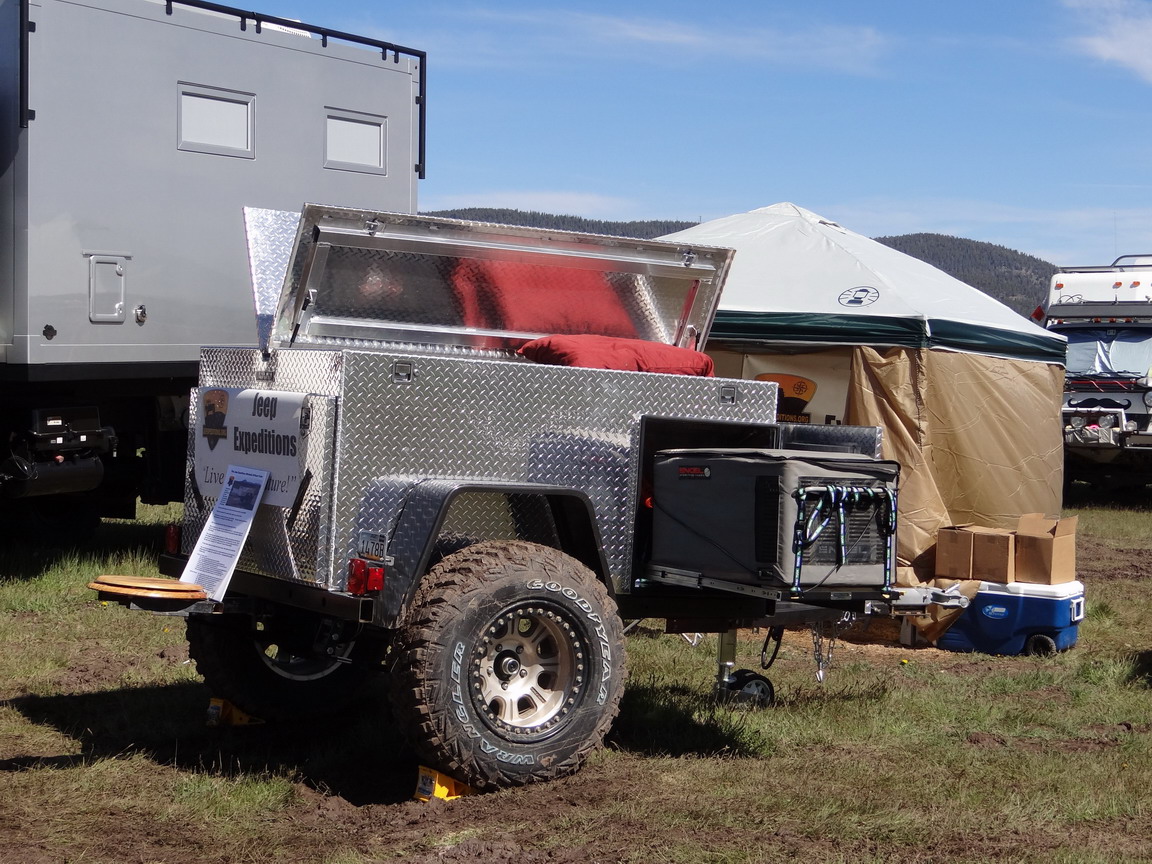
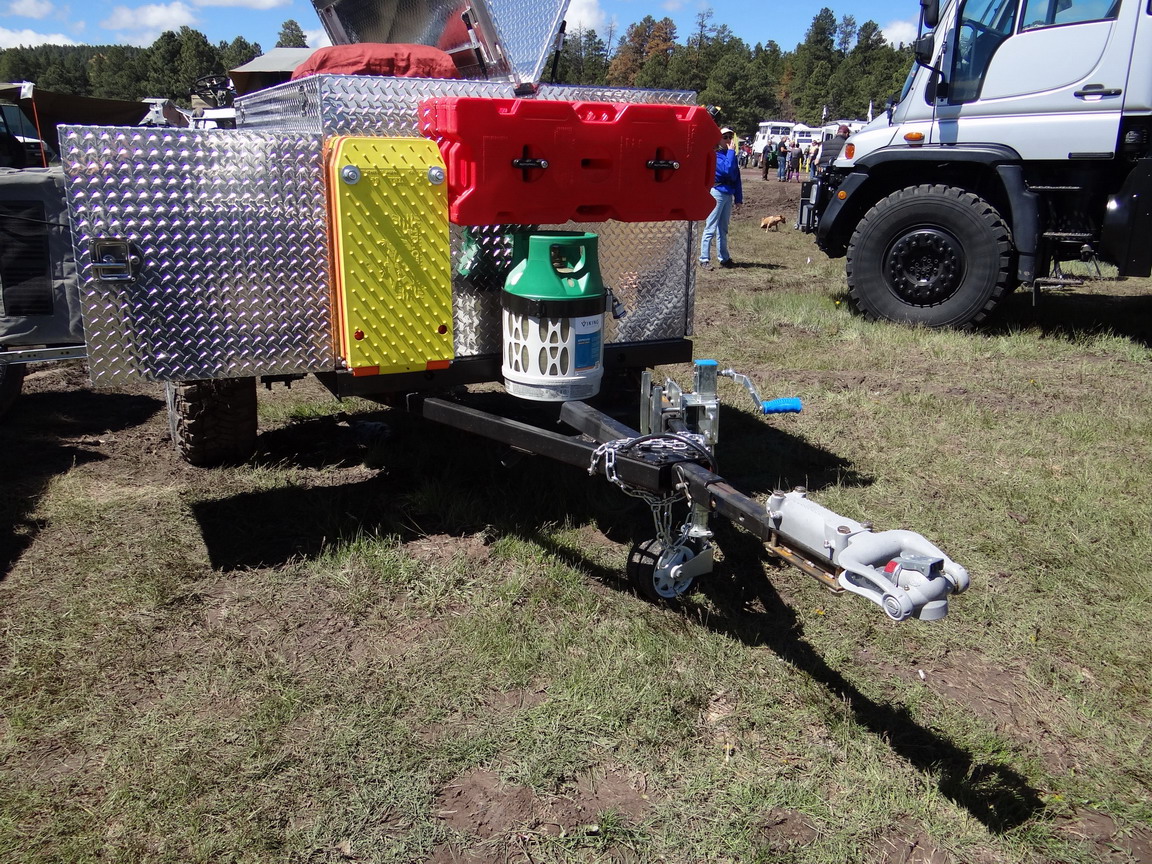
As you can see we've added some options since the last pictures we posted. A pair of RotoPax fuel containers, a pair of Traction Jacks, a Viking composite propane tank,
a Tembo Tusk jumbo fridge slide, a Bumper Dumper and an Engel MT60 Combi dual voltage refrigerator/freezer.
Here are some pictures we took this past weekend at the Overland Expo.


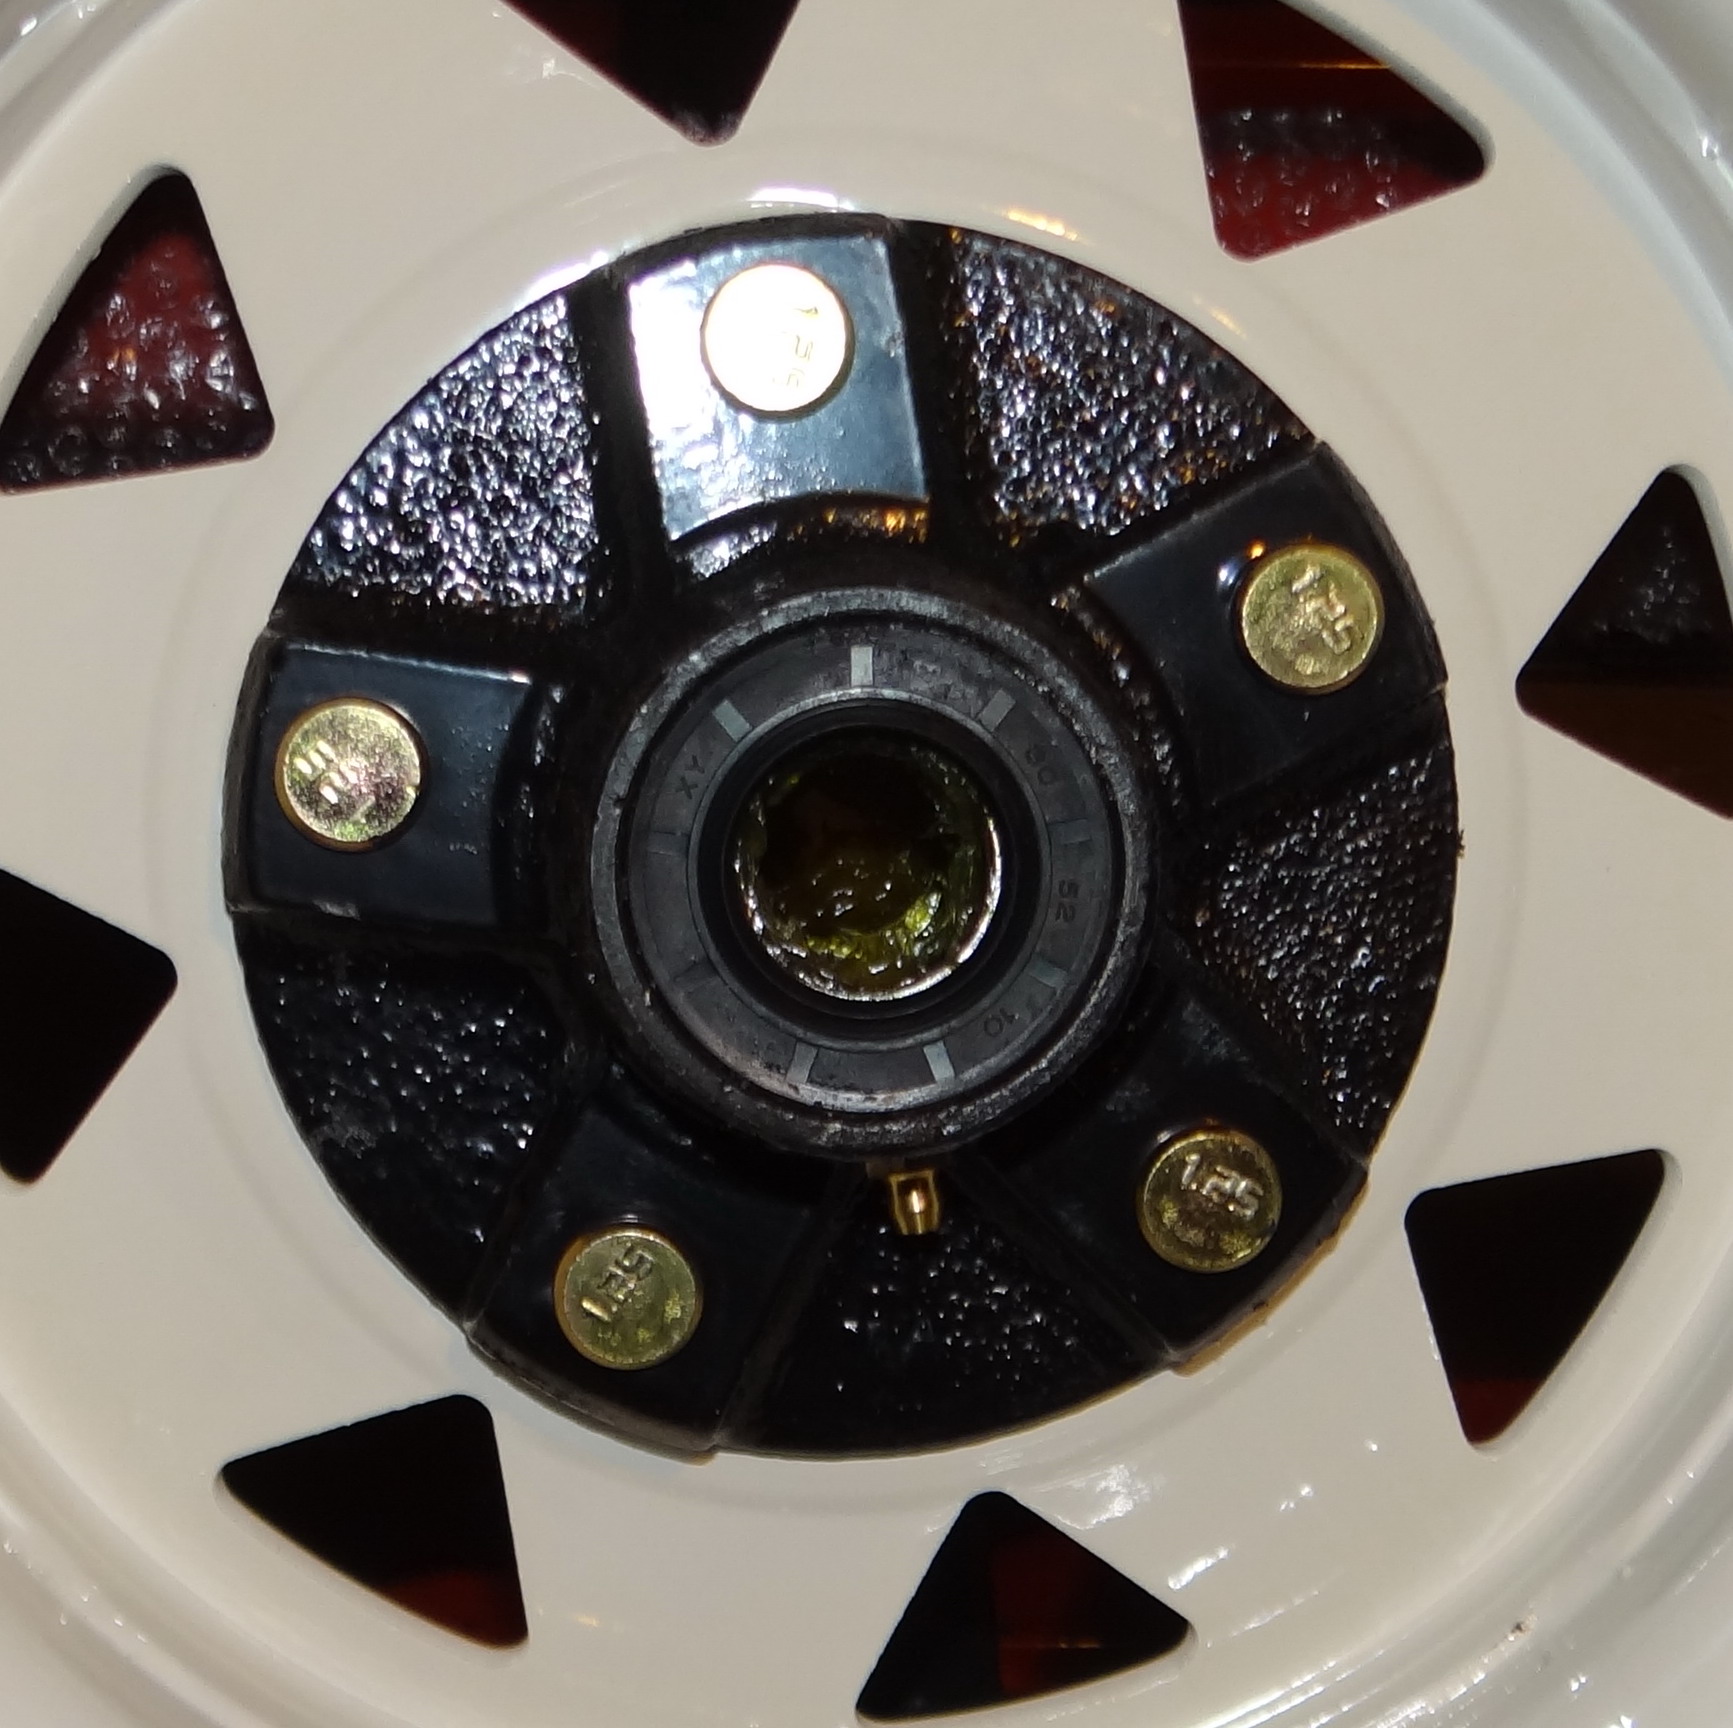
After we got back from the Overland Expo, we had our GoodYear MTRs mounted on factory Jeep rims to match those on the Jeep. Ran into a bit of a problem, the small
hub openings on the factory rims were too small to fit over the trailer hub. The hard way to fix that (and the most expensive) would be to have three rims (two for the trailer
and one for the spare) milled
a bit to fit. The easy way and least expensive is to get a pair of 1 1/2" wheel spacers from Rugged Ridge. This gives a bit more width to the trailer making it more stable
when we put our roof top tent on and will still be able to fit in our 13" wide fenders when we install them soon. Using the spacers also allows us to use the "Jeep" hub
cover that came with the rims.

 CHECK BACK AGAIN LATER THIS SUMMER FOR MORE UPDATES AND PICTURE UPLOADS OF PHASE 2 OF THE BUILD PROCESS !
Parts List
OPTION #1: Basic Trailer Using Trailer Kit
CHECK BACK AGAIN LATER THIS SUMMER FOR MORE UPDATES AND PICTURE UPLOADS OF PHASE 2 OF THE BUILD PROCESS !
Parts List
OPTION #1: Basic Trailer Using Trailer Kit
- 1ea. Heavy Duty 4x4 Trailer Kit rated at 1980 lbs GVWR: - Various sources -
- 1ea. Custom 4x6 Aluminum Box - Source: Jackson Creek Manufacturing - www.customaluminumworks.com
- 2ea. 6 leaf rear 76-86 CJ7 Springs - Part#18202.11 : Omix-ADA - www.omix-ada.com
- 1ea. 76-86 Rear Spring Mount Kit - Part#18271.11 : Omix-ADA - www.omix-ada.com
- 1ea. 76-86 Rear Leaf Spring Bushing Kit - Part#18365.01 : Omix-ADA - www.omix-ada.com
- 2ea. Shock Absorbers: - TBA -
- 1ea. ten foot section of 2"x3" .125 rectangular tubing: - Industrial Metal Supply - http://www.industrialmetalsupply.com/
- 1ea. eight foot section of 2"x3" x 3/16" 90 degree angle steel: - Industrial Metal Supply - http://www.industrialmetalsupply.com/
- 1ea. ten foot section of 2 1/2" X 2 1/2" .250 square tubing/hitch stock: - Industrial Metal Supply
- 2ea. 15" wheels or greater with 5x4.5 bolt pattern or bolt pattern to match your tow vehicle with adaptors.
- 2ea. 31" or taller tires. - Our trailer is using 32x10.50 17 tires
- 2ea. wheel adaptors/spacers (depending width & bolt pattern): Rugged Ridge - www.RuggedRidge.com
- Misc. Hardare - U-bolts, Grade 8 bolts
Optional Additions
- 1ea. Extreme Off-Road 3.5 ton trailer coupler - Ark Corporation - www.arkcorporation.com
- 1ea. Extreme Off-Road Jockey Wheel (Trailer Jack) - Ark Corporation - www.arkcorporation.com
- 1ea. 3500lb axle : - Auto Safety House - www.autosafetyhouse.com
- 2ea. Axle Hubs with desired bolt pattern : - Auto Safety House - www.autosafetyhouse.com
- 2ea. bearing kits and spring perches : - Auto Safety House - www.autosafetyhouse.com
- 2ea. 36" Jeep Style Trailer Fenders : - Auto Safety House - www.autosafetyhouse.com
- For Electric Brakes:1ea. left and right 10" electric brake assemblies: - Auto Safety House - www.autosafetyhouse.com
- For Electric Brakes:1ea. Electric Brake Controller : - Auto Safety House - www.autosafetyhouse.com
- For Electric Brakes: - 4 to 6 feet of 7 wire RV cable w/7 blade connector : - Auto Safety House - www.autosafetyhouse.com
- 1ea. Engel MT60-Combi 60 Quart dual voltage fridge/freezer - Engel Corporation - www-engel-usa.com
- 1ea. Jumbo Fridge Slide - - from Tembo Tusk - www.Tembotusk.com
- 1ea. Ark Portable Power Pack - Ark Corporation - www.arkportablepower.com
- 1ea. Interstate 31-AGM7 Marine Deep Cycle AGM Battery - Interstate Batteries - www.interstatebatteries.com
- 2ea. RotoPax 4 gallon gas carriers with mounts - RotoPax - www.rotopax.com
- 4ea. 5 gallon RV or Marine Water Tanks & 12v Water Pump - - TBA -
- 1ea. Propane Bottle Mount - Amazon - www.amazon.com
- 1ea. 17# Composite Propane Cylinder - Viking Cylinder - www.vikingcylinder.com
- 2ea. Locking Jerry Can Holders - SmittyBilt - www.smittybilt.com
- 1ea. Fold down/fold up Aluminum work table - TBA -
- 1ea. Swing out spare tire carrier - TBA -
- Aux LED lighting - Type, Size and Source - TBA -
- 1ea. The Bumper Dumper trail toilet - www.bumperdumper.com
Optional Materials for Roof Top Tent
- Roof Top Tent - TBA -
- 15ft - 2" telescoping square tube w/ holes: - Industrial Metal Supply - http://www.industrialmetalsupply.com/
- 15ft - 1 3/4" telescoping square tubew/ holes: - Industrial Metal Supply - http://www.industrialmetalsupply.com/
- 5ft - 4" x .250 flat steel: - Industrial Metal Supply - http://www.industrialmetalsupply.com/
- 35ft - 2" x .125 square tube: - Industrial Metal Supply - http://www.industrialmetalsupply.com/
- 4ea. - 50lb gas shocks - Part #4138T63 - McMaster-Carr - www.mcmaster.com
- 8ea. - YJ Boomerang Shackle Plates - J&M Custom Metal Fab - www.jmmetalfab.com
- 4ea. - 4130 Chromoly 1/2 Inch XMR8 Rod Ends/Heim Joints - www.amazon.com
- Misc. Hardare - U-bolts, Grade 8 bolts -
OPTION #2: Scratch Built Frame Basic Trailer
-OR- You can build your own frame? This will be the preferred method for those who have the skills or resources to weld up their own trailer. It certainly will be a much stronger trailer than a kit trailer and will stand up to more abuse off-road. If you have welding skills or know someone that does this could be your best bet using 2x3 C-channel steel for the frame and cross members with 2x3 boxed steel for the tongue. You can then choose your spring and axle set up but again, our suggestion would be to use a 3500 lb axle with electric brakes if you go this route since you will have to buy an axle anyway. We'll even make it easier for you by posting up what we feel is the shopping list for the steel you will need to do it this way. The cost of the kit and the cost for steel are about the same so what you do is up to you.
You'll still need an axle, tires, wheels and suspension. The same that you would use on the kit trailer. We'll recommend certain parts, give you accurate parts lists and provide you with sources where you can get these materials.
- Ready to build your own frame? Here is what you need in lieu of the trailer kit
- 30ft - 2"x3" -or- 2"x4" .125 c-channel steel: - Industrial Metal Supply - http://www.industrialmetalsupply.com/
- 10ft - 2"x3" -or- 2"x4" .125 rectangular tube: - Industrial Metal Supply - http://www.industrialmetalsupply.com/
- 1ea. ten foot section of 2 1/2" X 2 1/2" .250 square tubing: - Industrial Metal Supply - http://www.industrialmetalsupply.com/
- 1ea. ten foot section of 2"x3" .125 rectangular tubing: - Industrial Metal Supply - http://www.industrialmetalsupply.com/
- 1ea. Custom 4x6 Aluminum Box - Source: Jackson Creek Manufacturing - www.customaluminumworks.com
- 2ea. 6 leaf rear 76-86 CJ7 Springs - Part#18202.11 : Omix-ADA - www.omix-ada.com
- 1ea. 76-86 Rear Spring Mount Kit - Part#18271.11 : Omix-ADA - www.omix-ada.com
- 1ea. 76-86 Rear Leaf Spring Bushing Kit - Part#18365.01 : Omix-ADA - www.omix-ada.com
- 2ea. Shock Absorbers: - TBA -
- 1ea. 3500lb axle : - Auto Safety House - www.autosafetyhouse.com
- 2ea. Axle Hubs with desired bolt pattern : - Auto Safety House - www.autosafetyhouse.com
- 2ea. bearing kits and spring perches : - Auto Safety House - www.autosafetyhouse.com
- 2ea. 36" Jeep Style Trailer Fenders : - Auto Safety House - www.autosafetyhouse.com
- For Electric Brakes: 1ea. left and right 10" electric brake assemblies: - Auto Safety House - www.autosafetyhouse.com
- For Electric Brakes: 1ea. Electric Brake Controller : - Auto Safety House - www.autosafetyhouse.com
- For Electric Brakes: - 4 to 6 feet of 7 wire RV cable w/7 blade connector : - Auto Safety House - www.autosafetyhouse.com
- 2ea. 15" wheels or greater with 5x4.5 bolt pattern or bolt pattern to match your tow vehicle with adaptors.
- 2ea. 31" or taller tires. - Our trailer is using 32x10.50 17 tires
- Misc. Hardare - U-bolts, Grade 8 bolts -
----------------------------------------------------------------------------------------------------------------------------------------